Why Miso Blondies Hit Different: Sweet, Salted, and Deeply Umami
Miso blondies keep the comfort of a classic blondie—brown sugar, butter, vanilla—then add a fermented flavor layer that tastes savory and warm. The result feels familiar on the first bite, but richer on the second. That lingering “one more square” effect comes from how miso interacts with fats and sugars during baking.
- Why Miso Blondies Hit Different: Sweet, Salted, and Deeply Umami
- Flavor Chemistry You Can Taste: What Miso Does in Blondie Batter
- Ingredients That Matter: A High-Precision Shopping List
- Chewy Texture Blueprint: How to Bake Blondies Without Drying Them Out
- Make It Yours: Flavor Variations That Stay Dessert-Balanced
- Vanilla + Matcha Cream (Cafe-Style)
- Black Sesame or Toasted Sesame Topping
- Optional Chocolate Swirl (If You Want Fudgier Bars)
- Sweet Garnish Strategy: Don’t Add More Salt
- Recipe: Umami Boosted Miso Blondies (1 Pan, Beginner-Friendly)
- Storage and Make-Ahead: Keep the Chew for Days
- Common Mistakes (and Fixes) for Miso Blondies
- Serving Ideas That Maximize Flavor Contrast
- FAQ
Fermentation creates flavor compounds that read as umami and mild sweetness at the same time. When you bake miso into a blondie, the savory note doesn’t shout—it rounds out the sweetness and boosts perceived caramel flavor. For context on the ingredient itself, see miso.
At a Glance: Key Takeaways
- Start with white (shiro) miso for a dessert-friendly, gentle umami profile.
- Brown the butter to deepen aroma and improve chew.
- Pull early for fudgy centers—carryover heat finishes the bake.
- Taste your miso strength before you commit to 2 tablespoons.
Flavor Chemistry You Can Taste: What Miso Does in Blondie Batter
Blondies rely on sugar and fat to build a soft, chewy crumb. Add miso and you change the “flavor system.” Miso brings glutamates and other savory-active compounds that boost overall flavor depth, a concept closely tied to umami.
You also change how salt reads. Many miso brands vary in salt level due to aging and formulation. That’s why two people can both “use 1 tablespoon” and end up with different results. If you want a broader fermentation background, review fermentation.
White (Shiro) vs Brown (Aged) Miso: Which One Belongs in Dessert?
White miso (often shiro) typically tastes mild, slightly sweet, and easy to blend into sweet batters. That makes it the best choice for beginner-friendly miso blondies. You’ll get savory depth without pushing the bars toward “savory bread” territory.
Brown or aged miso can work, but it brings stronger, more complex flavors that may dominate the dessert. If you choose a darker miso, reduce the amount and expect the blondies to taste more mature and less candy-like. Understanding different miso types starts with the general miso overview.
Ingredients That Matter: A High-Precision Shopping List
This recipe is built for repeatable texture: browned butter for chew, balanced sweetness, and controlled miso intensity. Use unsalted butter so you can manage salt through the miso (and a small amount of finishing salt if you like).
You’ll also use room-temperature eggs. Cold eggs make batter seize faster, which can trap flour and create uneven bake. If you prefer dependable structure, sift flour and check baking powder freshness.
Core Ingredients
Unsalted butter (browned): boosts flavor and helps create a tender, chewy crumb. Browning also drives off water, so you don’t dilute batter.
Light brown sugar: provides caramel notes and moisture. Brown sugar also helps the blondies stay soft longer than plain white sugar would.
Miso Amounts: How to Control Salt vs Umami
Most recipes fail because “miso” gets treated like a fixed seasoning. It isn’t. Brands differ in fermentation time, salt percentage, and even texture. Start with 1 tablespoon for a gentle effect, then adjust in the next batch.
If you plan to add flaky sea salt on top, be extra careful with salted miso. Too much salt can erase the caramel sweetness you came for. For general salt science, the broad topic salt explains why salt affects flavor perception and sweetness balance.
Chewy Texture Blueprint: How to Bake Blondies Without Drying Them Out
Texture comes from three decisions: browning butter, mixing gently, and baking to soft set. Each one prevents the crumb from turning cakey or dry.
Unlike cake, blondies want minimal flour development. Gluten forms when flour hydrates and gets mixed; more mixing equals more structure. That’s why gentle folding beats aggressive whisking once flour enters.
Step-by-Step Method (Built for a 9×13 Pan)
1) Preheat and prep: Heat oven to 350°F / 175°C. Line a 9×13-inch pan with parchment so bars lift cleanly.
2) Brown the butter: Melt butter in a saucepan over medium heat. Keep swirling until you see golden flecks and smell toasted nuts. Remove from heat and cool slightly (you want warm, not hot).
3) Build the sugar base: Whisk browned butter with brown sugar until glossy and smooth. This step helps dissolve sugar and improves bake evenness.
4) Add eggs and vanilla: Add eggs one at a time, whisking until the batter looks cohesive. Stir in vanilla. Scrambling happens if butter is too hot, so cool briefly if needed.
5) Whisk in miso: Add miso and whisk until fully dissolved. Break up lumps with a small spatula if needed—lumps can create “salt islands” in the finished bars.
6) Combine dry ingredients: Whisk flour, baking powder, and fine sea salt in a bowl. Sifting helps prevent clumps.
7) Fold, don’t beat: Add dry to wet and fold just until no flour streaks remain. Stop immediately. Overmixing makes blondies tougher.
8) Bake to soft set: Bake 23–27 minutes. Look for set edges and a center that still jiggles slightly. Pull early for fudgy bars.
9) Cool fully: Cool in pan until firm, then lift out and cut. Warm centers smear. Fully cooled bars slice clean.
Doneness Guide: When to Pull the Pan
If you wait for a toothpick to come out “clean,” you usually overbake blondies. Instead, aim for soft set: edges set, center gently wobbly. As the pan cools, residual heat finishes cooking the middle.
This is also why the pan material matters. Dark pans brown faster. If you use a dark pan, start checking around 20–22 minutes and pull sooner.
Also watch how you measure miso. A loosely filled spoon can mean less paste than a packed spoon. If you want consistency, scoop and level the paste every time.
Make It Yours: Flavor Variations That Stay Dessert-Balanced
Miso blondies act like a base flavor platform. You can nudge them in a few directions while keeping the sweet-salty harmony intact.
Choose add-ins that match umami depth: toasted nuts, roasted sesame, dark chocolate, or fruit with acidity. Acid helps “lift” richness and keeps the flavor bright.
Vanilla + Matcha Cream (Cafe-Style)
For a clean, grown-up dessert vibe, serve miso blondies with a light matcha cream. Matcha adds bitterness and earthiness that echoes fermented flavors without turning the bars savory.
Use a simple whipped mixture (cream or cream cheese + a little sugar) and add matcha powder to taste. Keep it thin so it doesn’t overwhelm the blondie crumb.
Black Sesame or Toasted Sesame Topping
Black sesame adds roasted depth that harmonizes with browned butter and miso’s savory layer. A drizzle or sprinkle gives contrast in aroma and texture.
Toasted sesame seeds also work as a finishing garnish. They add crunch at the moment you bite, which makes chewy blondies feel more “alive.”
Optional Chocolate Swirl (If You Want Fudgier Bars)
If you love brownie-like intensity, fold in chopped dark chocolate or swirl in melted chocolate after mixing miso. Keep the amount moderate so chocolate doesn’t overpower the umami.
You can also reduce flour slightly for a richer center, but don’t skip the baking powder. Blondies still need enough lift to avoid gummy collapse.
Sweet Garnish Strategy: Don’t Add More Salt
If you want extra “wow,” lean on sweetness and aroma rather than salt. Examples include a thin honey ribbon, vanilla glaze, or a dusting of cinnamon.
Salt already exists in miso. Your job is balance, not stacking seasonings.
Expert Insight: Taste your miso by mixing 1 teaspoon of paste into warm water, then taste. This quick dilution test helps you estimate whether 1 tablespoon will read mild or aggressive once baked.[/TIP]
That small step improves repeat results fast. You’ll stop guessing and start dialing.
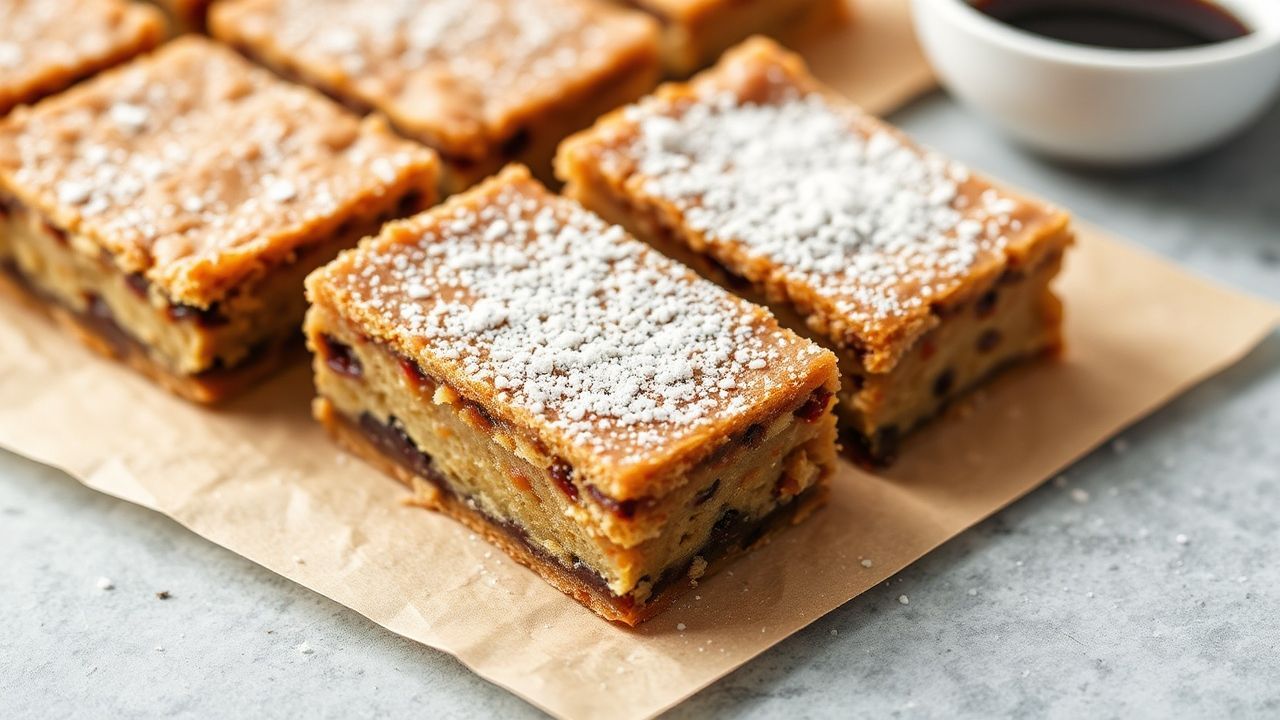
Recipe: Umami Boosted Miso Blondies (1 Pan, Beginner-Friendly)
These bars bake in one pan, cut into 16 squares, and deliver chewy centers when you pull early. If you’re new to blondies, this is a dependable method because it uses gentle mixing and a clear doneness target.
Prep time: 10–12 minutes. Bake time: 23–27 minutes. Cooling: fully cool before cutting.
Ingredients
Wet
- 1 cup unsalted butter, browned and cooled slightly
- 2 cups light brown sugar, packed
- 3 large eggs, room temperature
- 2 teaspoons pure vanilla extract
- 1 tablespoon white (shiro) miso paste
Dry
- 2 cups all-purpose flour, sifted
- 1 teaspoon baking powder
- 1/2 teaspoon fine sea salt (reduce or omit if your miso is very salty)
Optional garnish
- flaky sea salt
- toasted sesame seeds
- chopped nuts
Instructions
1) Preheat to 350°F (175°C). Line a 9×13-inch pan with parchment.
2) Brown butter: melt in a saucepan over medium heat. Swirl until golden flecks appear and aroma turns nutty. Cool slightly.
3) Whisk browned butter + brown sugar until glossy and smooth.
4) Whisk in eggs one at a time, then stir in vanilla.
5) Whisk in miso until fully blended and lump-free.
6) In a separate bowl, whisk flour, baking powder, and sea salt.
7) Fold dry into wet gently until no flour streaks remain. Stop early to avoid toughness.
8) Spread evenly in pan. Add optional garnish.
9) Bake 23–27 minutes. Pull when edges set and the center jiggles slightly.
10) Cool completely in the pan, then lift out and cut into 16 squares.
Storage and Make-Ahead: Keep the Chew for Days
Miso blondies store well because brown sugar and butter create a moist crumb. If you wrap them correctly, they stay soft and flavorful for several days.
To keep texture, cool fully first. Then store airtight. If you refrigerate, the bars firm up slightly, but they return to a tender bite at room temperature.
Suggested Storage
Room temperature: up to 3 days in an airtight container.
Refrigerator: up to 1 week airtight.
Freezer: up to 1 month. Thaw at room temperature before eating.
Common Mistakes (and Fixes) for Miso Blondies
You can fix most problems with one small adjustment. The key is to identify whether the issue comes from salt, bake time, or mixing.
Use these quick checks the next time you bake.
Problem: Tastes too salty
Start by lowering miso next time. Reduce from 1 tablespoon to 3/4 tablespoon if your miso tastes very salty. Also consider skipping added sea salt on top.
Alternatively, keep miso steady but add a touch more sugar in the next batch (small changes only, like 1–2 tablespoons) to restore the sweetness line.
Problem: Dry or crumbly center
You probably baked too long. Pull earlier and rely on carryover heat. For fudgier bars, aim for a center that jiggles more than you think.
Also check pan size. A smaller pan increases thickness and changes baking time.
Problem: Uneven flavor pockets
Miso lumps can create salty streaks. Whisk miso into wet ingredients until smooth, and scrape the bowl so paste disappears completely.
Folding dry ingredients gently also helps distribute moisture evenly.
Serving Ideas That Maximize Flavor Contrast
Salty-sweet blondies shine when you pair them with something that adds aroma, crunch, or cool acidity. The goal is contrast, not extra sweetness.
Think about temperature and texture. Warm bars taste deeper; cold toppings keep the flavor bright.
Quick Pairings
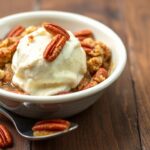
Matcha cream for earthiness and slight bitterness.
Vanilla bean ice cream for classic contrast.
Yuzu or lemon sorbet for acidity that cuts richness.
Toasted sesame or black sesame drizzle for roasted depth.
Coffee and Tea Pairing
Medium roast coffee often works because it balances caramel notes without overpowering miso. If you prefer tea, jasmine green tea offers floral aroma that doesn’t clash with savory sweetness.
Pairing doesn’t change the recipe, but it changes how your brain reads the flavors. That’s why guests taste complexity even when the ingredient list stays simple.
FAQ
What miso tastes best in blondies?
Start with white (shiro) miso. It usually tastes milder and more dessert-friendly, so the bars stay sweet-salty instead of savory-first. If you use darker miso, use less and expect stronger flavor.
How much miso should I use?
Use 1 tablespoon for a balanced starting point. If your miso tastes mild and not very salty, you can increase in a future batch. If it tastes salty straight from the tub, keep at 1 tablespoon or even reduce.
Can I make these less salty?
Yes. Start by reducing added sea salt in the recipe if your miso is salty. You can also lower miso by 1–2 teaspoons to keep the umami but soften the salt impact.
Why do I need to pull the blondies early?
Overbaking dries the bars. Blondies keep cooking after you pull them, so the center firms as it cools. Aim for set edges and a gently jiggly middle for chewy results.
How long do miso blondies keep?
Store airtight at room temperature for up to 3 days. Refrigerate up to 1 week, and freeze up to 1 month. Thaw at room temperature for the best chew.
See also: miso blondies