
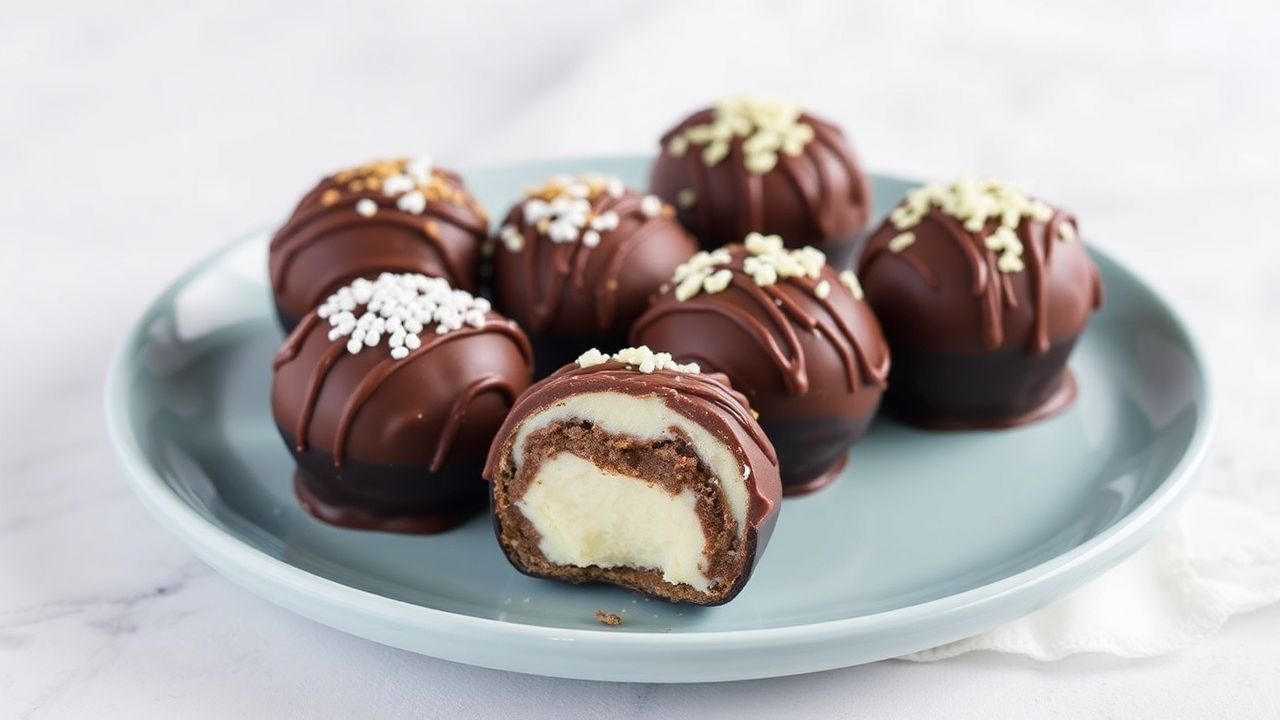
Picture a dessert where ice cream meets rich chocolate in one bite. These ice cream truffles dipped in rich chocolate bliss blend a cold, creamy center with a crisp, glossy shell that snaps when you bite. The result feels indulgent, yet it stays practical to make at home.
- Crafting the Perfect Ice Cream Truffle Base for Ultimate Creaminess
- Choosing the Right Ice Cream Texture
- 💡 Expert Insight Expert Insight: Freeze Twice for Cleaner Centers
- Choosing Rich Chocolate for an Irresistible Dipping Experience
- Techniques for a Flawless Chocolate Coating Every Time
- Tempering Basics You Can Measure
- How to Dip Without Smearing the Center
- ⚠️ Pro-Caution Pro-Caution: Don’t Dip Warm Centers
- Creative Flavor Pairings and Presentation Tips
- Prep and Cook Time
- Yield
- Difficulty Level
- Ingredients
- Instructions
- Tips for Success
- Serving Suggestions
- Nutrition (Per Truffle)
- Q&A: Ice Cream Truffles Dipped in Rich Chocolate Bliss
- What exactly are ice cream truffles, and how do they differ from traditional truffles?
- How do I keep the ice cream center perfectly frozen during dipping?
- Which ice cream flavors work best for this recipe?
- Can I add mix-ins inside the ice cream truffles?
- How long do these truffles last in the freezer?
- Wrapping Up
At a Glance: Ice Cream Truffles Dipped in Rich Chocolate Bliss
- Freeze centers fully so the chocolate stays smooth.
- Temper couverture for shine and a clean snap.
- Work fast, dip in batches, and chill immediately.
- Use bold mix-ins (cookies, nuts, fruit) for texture contrast.
This guide covers the full process, from shaping the base to finishing with garnish and storage. You’ll also learn why tempering matters, how to prevent coating defects, and which chocolate style pairs best with creamy fillings.
Crafting the Perfect Ice Cream Truffle Base for Ultimate Creaminess
Start with a smooth, high-fat ice cream. Fat helps the center taste rich and melt slowly, instead of turning icy. Choose a premium vanilla or a flavor you love, then soften it just enough to mix.
To shape truffles cleanly, fold in a small amount of finely crushed cookie crumbs or nuts. This adds structure and reduces crumbliness when you scoop. For deeper flavor, add vanilla extract and keep the mixture cold while you work.
Choosing the Right Ice Cream Texture
Use full-fat ice cream for the best mouthfeel. Lower-fat styles often freeze harder and can create a grainy center during dipping. If your ice cream feels too soft, chill it briefly before mixing.
Keep mix-ins small and even. Large chunks can break the shell or create weak spots. If you want a contrast, use fine crumbs so every bite stays smooth and balanced.
💡 Expert Insight
Expert Insight: Freeze Twice for Cleaner Centers
This two-step freeze reduces slumping and helps the chocolate set fast. As a result, you get a cleaner snap and fewer smears on your parchment.
Choosing Rich Chocolate for an Irresistible Dipping Experience
The chocolate you choose determines the final bite. For ice cream truffles dipped in rich chocolate bliss, use couverture chocolate with cocoa content around 60–70%. It melts evenly, coats smoothly, and keeps a crisp finish after chilling.
Cocoa butter content matters because it affects viscosity and bloom behavior. If you want stable shine, couverture usually performs better than standard baking bars. For background on how chocolate fats work, see cacao butter.
Dark vs. Milk vs. White Chocolate
Dark chocolate delivers a bittersweet edge that cuts through sweet ice cream. Milk chocolate tastes rounder and more dessert-like, especially with caramel or cookie centers. White chocolate offers a sweet, creamy coat that pairs well with fruit or nut flavors.
If you switch types, keep the tempering process consistent with the chocolate’s fat profile. Chocolate tempering uses specific crystal forms to improve texture and stability, which you can read about at tempering.
Improving Flow Without Losing Flavor
In some kitchens, couverture thickens quickly during dipping. A small amount of coconut oil can improve fluidity, but use it sparingly so flavor and snap stay intact.
When you add any fat, add it gradually and stir until fully smooth. Then keep the bowl at working temperature so the chocolate doesn’t cool too much between batches.
Techniques for a Flawless Chocolate Coating Every Time
Tempering drives the final texture. Tempered chocolate sets with a glossy surface and a firm snap. If you skip tempering, the shell may feel dull or soften faster in your mouth.
Use gentle heat and frequent stirring. Melt chocolate slowly over a double boiler, or use short microwave bursts and stir between each round. Then cool to the working range and rewarm slightly for dipping.
Tempering Basics You Can Measure
Work with a kitchen thermometer if possible. Different couverture brands vary, so rely on your chocolate’s behavior and target ranges. Proper crystal formation helps the chocolate release cleanly and stay stable.
If you want a deeper science foundation, read about chocolate and fat crystal behavior. That knowledge helps you troubleshoot bloom or grainy coatings.
How to Dip Without Smearing the Center
Dip frozen truffles quickly and return them to a cold surface immediately. Use a fork, spoon, or dipping tool to submerge each truffle and lift it in one smooth motion. Let excess chocolate drip off for a clean coat.
After dipping, place each truffle on parchment and chill right away. Rapid setting reduces softening at the edges and keeps the shell crisp.
⚠️ Pro-Caution
Pro-Caution: Don’t Dip Warm Centers
Warm centers also increase the risk of a thin, uneven shell. When that happens, the truffle feels messy instead of crisp and polished.
Creative Flavor Pairings and Presentation Tips
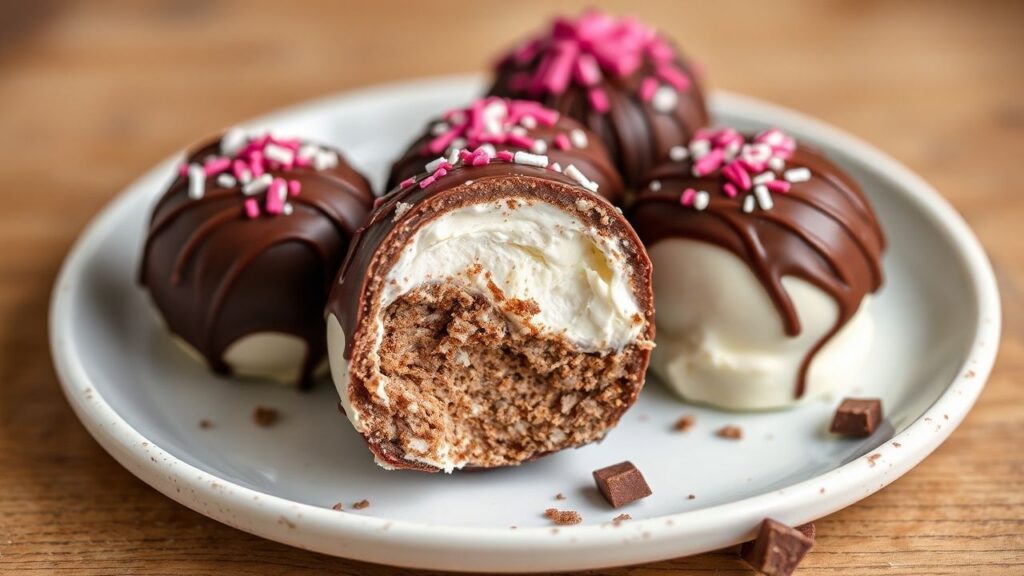
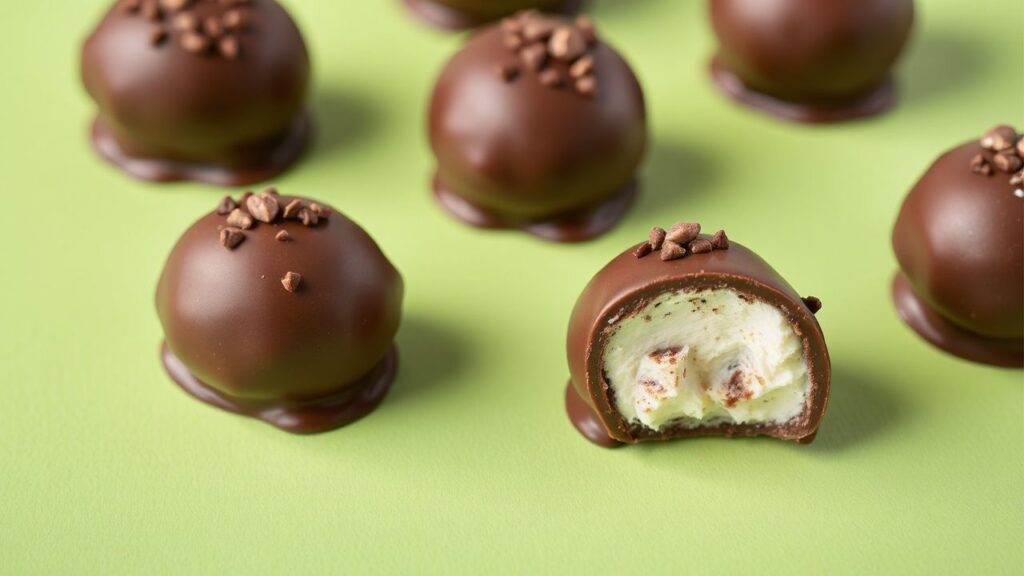
Mix-ins and garnishes turn a simple truffle into a memorable dessert. Salted caramel, crushed biscotti, and toasted nuts create strong texture contrast. For a bright note, add orange zest or freeze-dried raspberries.
In the coating, a pinch of sea salt adds a sweet-salty bounce. For a luxury finish, consider edible gold leaf or finely chopped pistachios. These details raise visual appeal without changing the core method.
On-Top Garnishes That Stick
Sprinkle garnishes immediately after dipping, while chocolate is still wet. If you wait too long, the toppings won’t adhere and you’ll lose that clean, intentional look.
Use freeze-dried fruit for intense flavor with low moisture. Fresh fruit releases water and can weaken the chocolate surface during chilling.
Serving Style for Maximum Dwell Time
Serve on a chilled platter or in mini paper cups. Cold presentation slows melting and keeps the shell intact for guests. Small portions also encourage sharing and repeat bites.
If you want a restaurant feel, drizzle a thin line of melted dark chocolate around the plate, then place truffles at the center. Finish with a light dusting of cocoa powder or powdered sugar.
Prep and Cook Time
- Preparation: 25 minutes
- Freezing (centers): 2 hours (minimum)
- Chocolate dipping & setting: 30 minutes
Yield
Approximately 18 truffles (1-inch diameter each).
Difficulty Level
Medium—the method requires patience with freezing and tempering chocolate. You’ll get better results each batch because your workflow improves.
Ingredients
- 1 pint premium full-fat vanilla ice cream, slightly softened
- 1/2 cup finely crushed almond biscotti (or gluten-free cookie crumbs)
- 1 teaspoon pure vanilla extract
- 8 oz high-quality dark couverture chocolate (60–70% cocoa)
- 1 teaspoon coconut oil (optional, for smoother dipping)
- Coarse sea salt flakes or freeze-dried raspberries for garnish
Instructions
- Mix the base: In a chilled bowl, fold softened ice cream with crushed biscotti and vanilla until evenly combined. Keep mixing gentle to avoid warming the ice cream.
- Shape the truffles: Scoop and roll into bite-size balls. Place on a parchment-lined tray, then freeze until firm, about 2 hours.
- Melt and start tempering: Melt the couverture gently using a double boiler or microwave bursts. Stir between bursts until smooth. If using coconut oil, stir it in now.
- Temper the chocolate: Cool the chocolate with controlled stirring until it reaches a workable temper range, then rewarm slightly for dipping. Maintain the chocolate temperature during your session.
- Dip quickly: Remove centers from the freezer one batch at a time. Submerge each truffle fully and lift, letting excess drip back into the bowl.
- Garnish and set: Add sea salt flakes or crushed raspberries immediately. Return truffles to parchment and chill until the shell sets, about 30 minutes.
- Store properly: Keep in an airtight container in the freezer for up to 3 days. For best texture, thaw for 3–5 minutes before serving.
Tips for Success
- Use ultra-premium ice cream: Higher fat helps the center stay smooth and rich. It also improves how the truffle feels as it melts.
- Freeze solid: Hard centers let chocolate coat evenly without slumping.
- Work in batches: Batch dipping protects your temper and keeps truffles from warming.
- Try coating swaps: White chocolate works well with berry or citrus flavors. Dark chocolate pairs best with salted caramel and nuts.
- Make ahead: Freeze the truffle centers up to several days, then temper and dip when ready to serve.
Serving Suggestions
Place truffles on a cool platter lined with fresh mint leaves or edible flowers. This creates contrast with the glossy shell and keeps the dessert visually elegant.
Pair with espresso, strong black coffee, or a light fruit compote. For a dramatic finish, drizzle a thin layer of warm dark chocolate around the plate and top with the truffles.

Nutrition (Per Truffle)
| Nutrient | Per Truffle |
|---|---|
| Calories | 125 kcal |
| Protein | 2g |
| Carbohydrates | 12g |
| Fat | 8g |
If you want to understand why fat content changes texture, see fat. For general culinary context about mixtures and emulsions, also review emulsion. These topics help explain how chocolate and dairy behave when chilled.
Q&A: Ice Cream Truffles Dipped in Rich Chocolate Bliss
What exactly are ice cream truffles, and how do they differ from traditional truffles?
Ice cream truffles are bite-size balls made from frozen or semi-frozen ice cream, often mixed with crumbs for structure. They differ from classic chocolate truffles that usually rely on ganache (a chocolate-and-cream mixture). Here, you get an ice-cream center plus a tempered chocolate shell.
How do I keep the ice cream center perfectly frozen during dipping?
Flash-freeze the shaped centers until firm. Then dip in small batches and return each tray to the freezer immediately after coating. Tempered chocolate stays fluid long enough for quick dipping, but it should not overheat your kitchen or warm the truffles.
Which ice cream flavors work best for this recipe?
Vanilla bean, salted caramel, and espresso work especially well because their flavors stay clear under a dark coating. Berry flavors also shine when you add freeze-dried fruit to the garnish. Aim for flavors that taste strong even when cold.
Can I add mix-ins inside the ice cream truffles?
Yes. Use finely crushed cookies, chopped nuts, or small swirls of thick caramel. Keep mix-ins evenly distributed and avoid large chunks that could crack the chocolate shell during biting.
How long do these truffles last in the freezer?
Store them in an airtight container for up to 3 days for the best flavor and shell texture. For serving, thaw for a few minutes at room temperature so the center softens slightly while the chocolate remains crisp.
Wrapping Up
These ice cream truffles dipped in rich chocolate bliss deliver contrast in the best way: cold cream meets a glossy snap. When you freeze the centers well and temper the chocolate properly, the texture stays clean and the flavor feels luxurious.
Make a batch, chill, and plate them fast for the crispest result. Then enjoy that first bite—the one where the shell gives way and the creamy core comes through.
See also: Ice cream truffles