
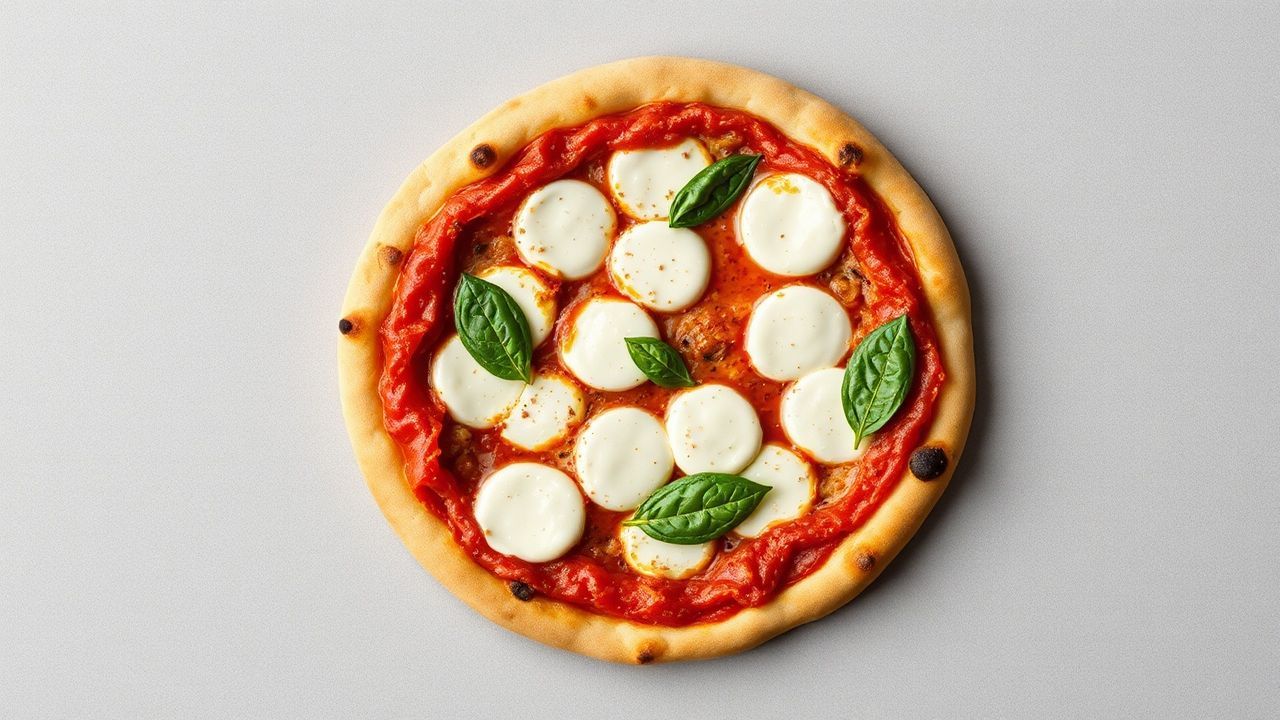
Classic thin crust pizza with fresh mozzarella delivers the best of both worlds: a crisp, golden base and a creamy, milky melt. The goal is simple—keep the dough light, keep the cheese moist-but-controlled, and bake fast enough to set the structure before the toppings drown it. When you follow the steps below, you get a pie that tastes like a neighborhood pizzeria but still feels fresh from your oven.
- Why Thin Crust Works with Fresh Mozzarella
- Prep and Cook Time
- Yield and Difficulty
- Ingredients for Classic Thin Crust Pizza
- Instructions: Step-by-Step Thin Crust Method
- 1) Activate the yeast
- 2) Mix the dough
- 3) Knead to build structure
- 4) Proof the dough
- 5) Preheat for crispness
- 6) Shape the dough
- 7) Build with a classic sauce-to-cheese ratio
- 8) Bake to golden crisp
- 9) Finish and rest
- Tips for Success with Fresh Mozzarella
- Dry mozzarella before it hits the oven
- Choose flour that supports chew
- Let fermentation do the flavor work
- Use the right baking surface
- Keep variations classic, not watery
- Serving Suggestions for the Best First Slice
- At a Glance: Your Repeatable Pizza Checklist
- FAQ: Classic Thin Crust Pizza with Fresh Mozzarella
- Thin crust needs high heat so the rim crisps before cheese leaks.
- Fresh mozzarella must be patted dry to prevent soggy spots.
- Fermentation builds flavor without making the dough tough.
- Less sauce wins when you chase a classic thin base.
Why Thin Crust Works with Fresh Mozzarella
Thin crust depends on two things: fast water evaporation and a well-developed gluten network. When you bake at high temperature, the surface dries quickly and the rim blisters, creating that classic snap. If the dough stays wet or the oven runs cool, the crust loses its crunch.
Fresh mozzarella adds the “flair” because it melts with a soft, elastic texture instead of turning rubbery. It also releases whey, which is exactly why moisture control matters. For mozzarella background, you can review mozzarella and how fresh varieties differ from aged forms.
Traditional thin crust pizza also relies on light layering. A thin spread of sauce and evenly spaced cheese help the crust breathe. That balance mirrors what you see in pizza fundamentals, including dough hydration and toppings distribution—concepts closely tied to gluten structure and dough handling.
Prep and Cook Time
Readiness: 20 minutes | Rising: 1 hour 30 minutes | Cooking: 12–15 minutes
These times assume a hot oven and a preheated baking surface. If you extend fermentation in the fridge, plan extra time for cold rise, but baking time usually stays similar because heat drives the crust set.
Yield and Difficulty
Yield: Serves 4 hungry pizza lovers.
Difficulty Level: Medium. You’ll manage one main dough workflow—mix, knead, proof, then stretch and bake. For dough science, it helps to understand why dough behaves differently when you work and rest it, which ties back to yeast fermentation.
Ingredients for Classic Thin Crust Pizza
Measure ingredients accurately. Thin crust punishes sloppy dough math because you need a controlled texture in a small thickness. Use a kitchen scale if you have one; it improves repeat results.
For mozzarella, choose fresh blocks that you can slice and dry. The list below balances dough structure with enough cheese for a creamy melt.
Dough
- 3 ½ cups all-purpose flour, sifted
- 1 cup lukewarm water (about 105°F/40°C)
- 2 tsp active dry yeast
- 1 tsp sugar
- 1 ½ tsp fine sea salt
- 2 tbsp extra virgin olive oil, plus extra for drizzling
Toppings
- 1 cup crushed San Marzano tomatoes (or high-quality canned plum tomatoes)
- 8 oz fresh mozzarella, sliced and patted dry
- Fresh basil leaves for garnish
- Flaky sea salt for finishing
- Optional toppings: thinly sliced prosciutto, mushrooms, or roasted peppers
Instructions: Step-by-Step Thin Crust Method
Work in order, and keep dough handling calm. If you rush, the dough can tear instead of stretching thin. If you forget to preheat, the crust won’t crisp even with perfect technique.
1) Activate the yeast
In a small bowl, combine lukewarm water, sugar, and active dry yeast. Stir gently and rest 5–10 minutes until frothy. Froth signals active fermentation, which follows the basic yeast behavior described in yeast.
2) Mix the dough
In a large bowl, whisk all-purpose flour and sea salt. Create a well in the center, then pour in the yeast mixture and olive oil. Stir with a wooden spoon until the dough forms a shaggy mass.
At this stage the dough looks uneven, and that’s normal. Next you’ll knead so the gluten develops and the dough traps gas during proofing.
3) Knead to build structure
Transfer dough to a lightly floured surface. Knead about 10 minutes—firm, but still supple—until smooth and elastic. If dough feels sticky, add flour a little at a time so you keep a tender crust.
Gluten development supports thin stretching and helps the rim hold bubbles in the oven. For a quick primer, see gluten.
4) Proof the dough
Lightly oil a clean bowl, place dough inside, and cover with a damp cloth or plastic wrap. Let it rise 1 hour 30 minutes in a warm spot until doubled.
If you want extra flavor, cold fermentation gives the dough more time to develop acids and aroma. You can extend the rise with a fridge rest, then bring dough to room temperature before stretching. (This is grounded in fermentation time effects described in general bread and yeast behavior.)
5) Preheat for crispness
Place a pizza stone or heavy-duty baking sheet on the middle rack. Heat the oven to 500°F (260°C) for at least 45 minutes. A stable, high surface temperature drives quick crust setting.
If you use a stone, let it fully heat before the pizza goes in. For more context on how surface heat transfers, review oven.
6) Shape the dough
Punch down the dough, then divide into two equal portions. Roll or stretch each into a 12-inch thin circle, starting at the center and working outward to protect an airy rim.
Transfer each round to a parchment-lined peel or baking sheet. If the dough resists, rest it 5 minutes—elastic dough relaxes faster than you think.
7) Build with a classic sauce-to-cheese ratio
Spread a thin layer of crushed San Marzano tomatoes across the dough, leaving a small border. Use the back of a spoon to spread evenly without piling sauce.
Scatter slices of fresh mozzarella evenly, with slight overlap for melt. Keep cheese thickness low so it melts quickly while the crust stays dry.
8) Bake to golden crisp
Slide the pizza onto the preheated stone or baking sheet. Bake 12–15 minutes, rotating halfway for even browning. Look for leopard spotting on the rim and bubbling mozzarella.
Rotating matters because oven hot spots vary. Thin crust also cooks fast, so start checking around the 12-minute mark if your oven runs hot.
9) Finish and rest
Remove pizza from the oven and drizzle with extra virgin olive oil. Sprinkle flaky sea salt, then scatter basil leaves over the hot cheese.
Rest 2–3 minutes before slicing. The rest lets cheese set slightly, which improves slice structure and reduces slide-off.
Tips for Success with Fresh Mozzarella
Thin crust becomes “classic” when you repeat the same texture each time. That means consistent dough, controlled moisture, and even heat. Use the tips below like a checklist before every bake.
Dry mozzarella before it hits the oven
Pat mozzarella dry with paper towels. Fresh cheese holds whey; less whey means fewer soggy patches. This follows basic mozzarella moisture behavior you can learn about at milk and dairy water content.
Choose flour that supports chew
Use unbleached, higher-protein flour when possible. Stronger flour helps gluten form and hold bubbles in a thin crust. That structure gives you crunch on the outside and chew near the bite.
Let fermentation do the flavor work
For deeper flavor, try a cold ferment for 24–48 hours. After the fridge rest, bring dough to room temperature before shaping so it stretches cleanly. Yeast and time influence flavor compounds, which tie back to yeast fermentation.
Use the right baking surface
A pizza stone or steel holds and releases intense heat. This helps you mimic wood-fired style crisping at home. For a general primer on baking materials and heat, see ceramic (stones) and thermal behavior.
Keep variations classic, not watery
If you add prosciutto or roasted peppers, use smaller amounts. Add wet ingredients after baking when you can. For “just baked” texture, avoid thick veggie layers that trap water.
Serving Suggestions for the Best First Slice
Serve thin crust pizza on a wooden board or a hot plate so the bottom stays crisp. Pair it with a fresh arugula salad dressed lightly in lemon vinaigrette. The acidity cuts through the mozzarella richness and makes each bite taste clean.
Finish with red pepper flakes or extra basil. If you want sweetness, a tiny drizzle of honey works well with salty cheese, but keep it minimal to preserve a classic Italian profile.
At a Glance: Your Repeatable Pizza Checklist
Before you bake, run through these points quickly. They help you fix the most common thin crust issues—bland flavor, floppy center, or watery cheese—without changing the whole recipe.
- Oven at 500°F with a preheated stone or steel.
- Pat mozzarella dry to control whey release.
- Thin sauce layer to protect the crust.
- Rest 2–3 minutes for cleaner slices.
FAQ: Classic Thin Crust Pizza with Fresh Mozzarella
What makes a thin crust pizza feel truly “classic”?
A classic thin crust has a crackly rim, a tender center, and a sauce-to-dough ratio that stays light. You also need a short bake at high heat so the crust dries fast and the cheese melts without flooding.
Why do I get soggy spots with fresh mozzarella?
Most soggy spots come from excess whey, too much sauce, or an oven that isn’t hot enough. Pat mozzarella dry, spread sauce thin, and preheat the stone/steel fully.
Should I roll or stretch the dough?
Both work, but stretching often helps you keep a more airy rim. If the dough shrinks back, rest it for 5 minutes, then try again so the gluten relaxes.
How do I get the best cheese melt without oiliness?
Use fresh mozzarella and keep slices even and thin. Bake at high temperature and don’t overload toppings so the cheese melts and sets quickly instead of pooling.
Can I prepare dough in advance?
Yes. A cold ferment for 24–48 hours improves flavor and makes the dough easier to shape. After chilling, let the dough warm slightly before stretching so it doesn’t tear.
See also: thin crust pizza