Classic Beef Enchiladas: The Comfort Food That Never Fades
Few meals feel as instantly comforting as classic beef enchiladas. Warm corn tortillas, shredded seasoned beef, and a generous pour of red sauce create a meal that tastes like home—whether it’s a weeknight or a celebration.
- Classic Beef Enchiladas: The Comfort Food That Never Fades
- What “Classic” Really Means in Beef Enchiladas
- Ingredients You’ll Want (and Why Each One Matters)
- Equipment Checklist for Reliable Rolling and Baking
- 10-Step Recipe: Ultimate Classic Beef Enchiladas
- Prep + Cook Timeline
- Ingredients
- Step-by-Step Instructions
- 1) Braise the chuck roast (or use pre-shredded beef)
- 2) Toast the spices for deeper flavor
- 3) Build the sauce base
- 4) Enrich with red enchilada sauce
- 5) Season and moisten the shredded beef
- 6) Warm tortillas so they roll cleanly
- 7) Assemble with the right “center line”
- 8) Pour sauce evenly for moisture
- 9) Bake covered, then uncovered
- 10) Rest before serving
- Expert Technique Notes for “Restaurant-Style” Results
- Troubleshooting Common Enchilada Problems
- Why are my tortillas cracking?
- Why are my enchiladas dry?
- Why does the sauce taste flat?
- Why is the filling greasy?
- Make-Ahead, Freezing, and Reheating Like a Pro
- Serving Ideas That Match the Flavor Profile
- Why This Recipe Works (The Science in Plain Terms)
- FAQ
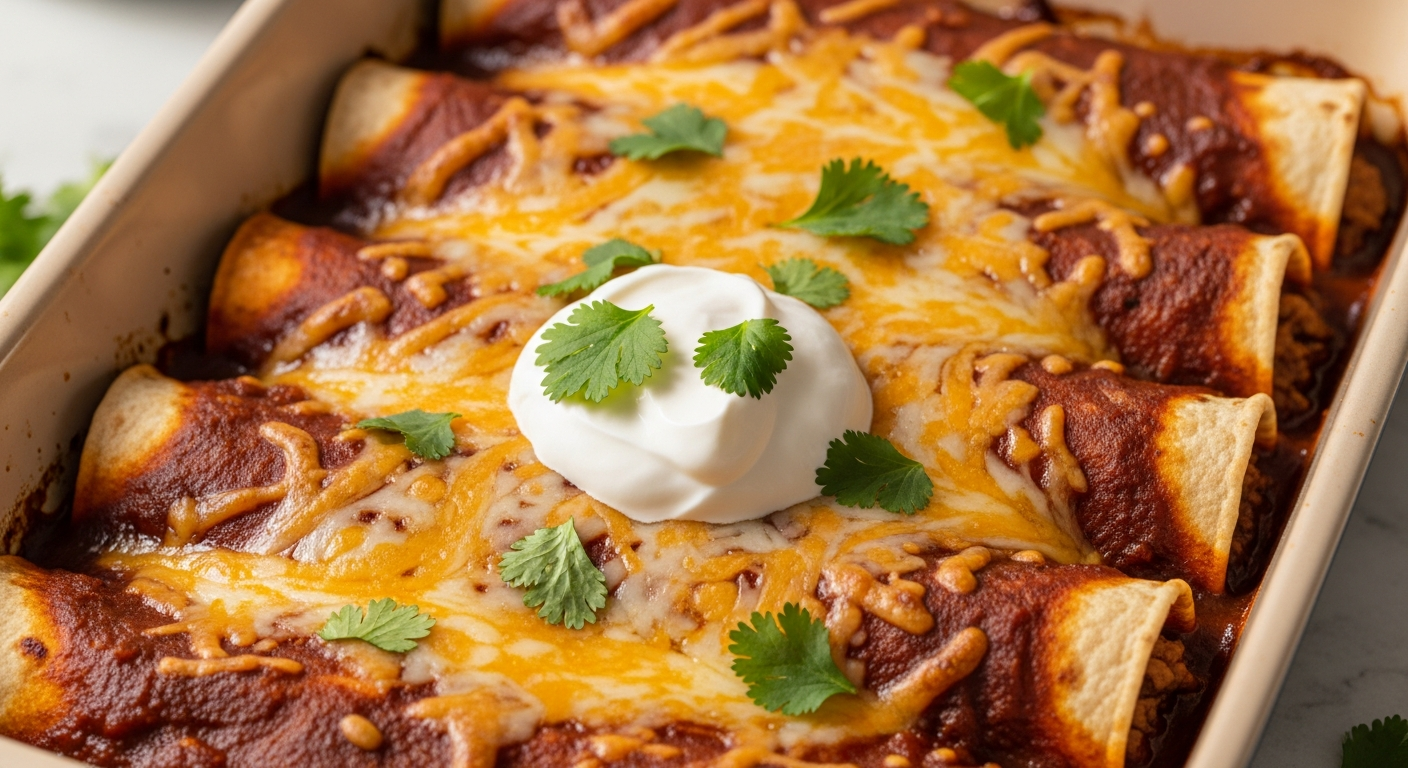
What makes this dish last for generations is simple: every layer earns its place. The tortillas soften in sauce, the filling stays juicy, and the cheese turns glossy in the oven. If you follow the right technique, you get enchiladas with bold flavor and clean structure.
At a Glance: Key Takeaways
- Chuck roast builds tender shredded beef with rich flavor.
- Toasting spices in oil sharpens chili, cumin, and garlic notes.
- Warm tortillas prevent cracking and help you roll tight.
- Bake covered first, then uncover to melt and brown.
What “Classic” Really Means in Beef Enchiladas
Classic beef enchiladas usually center on three building blocks: seasoned shredded beef, corn tortillas, and red chile sauce. Traditional versions lean toward corn because it holds sauce well and delivers that lightly earthy corn flavor.
Red enchilada sauce often features chile, aromatics, and a thickener such as tomato paste or toasted masa. For the “classic” taste, aim for sauce that coats a spoon and clings to the tortillas rather than pooling.
To deepen your understanding of the role of chile in Mexican cooking, you can explore the history and varieties behind chili peppers. That context helps you choose chili power (mild vs. smoky) and balance heat with flavor.
Ingredients You’ll Want (and Why Each One Matters)
Every ingredient in these enchiladas supports a specific job. The beef supplies texture and depth. The sauce supplies aroma and moisture. The tortillas and cheese complete the comfort loop.
Below is a classic, oven-baked enchilada setup designed for 6 hearty servings. You can scale up easily by multiplying the filling and sauce, but keep the tortilla-to-filling ratio consistent.
Beef and Filling
2 lb chuck roast, trimmed and finely shredded after cooking. Chuck’s fat and connective tissue break down during slow braising, which yields tender strands that hold sauce.
If you prefer to understand why certain cuts behave this way, review the fundamentals of chuck steak. It explains why this region of the cow stays forgiving under moist heat.
Tortillas
12 corn tortillas, warmed. Warm tortillas flex without cracking, so your rolls stay tight and seam-side down.
Corn tortillas also play well with red sauce because they absorb moisture. That absorption is why you must warm them, then bake with enough sauce.
Classic Red Enchilada Sauce
Enchilada sauce: 10 oz red enchilada sauce (store-bought) or your own homemade version. Either option works; the key is simmer time and seasoning.
For a broader understanding of how sauces work across cuisines, skim sauce. It reinforces the idea that thickness and cling matter as much as flavor.
Cheese and Garnish
1 1/2 cups shredded Mexican blend cheese. A blend often includes melt-friendly cheeses that turn silky instead of greasy.
Fresh cilantro adds brightness. Optional garnishes like diced avocado, sour cream, and lime give you a cool, tangy finish that balances chili richness.
Equipment Checklist for Reliable Rolling and Baking
You don’t need fancy tools, but you do need a few reliable basics. A heavy skillet helps toast spices evenly. A Dutch oven or covered pot helps braise the roast.
For baking, use a 9×13 dish and foil. Foil creates steam early on, then you remove it to brown the top.
10-Step Recipe: Ultimate Classic Beef Enchiladas
These steps build flavor in the right order. You braise beef first. Then you craft sauce. Finally, you roll, bake, and finish for texture and shine.
Plan for about 1 hour 10 minutes total active-to-including braise time shown below if your beef is already cooked; otherwise, braising takes longer but can happen ahead.
Prep + Cook Timeline
Preparation: ~25 minutes (active)
Cooking: ~45 minutes (active)
Total: ~1 hour 10 minutes (not counting optional longer braise advance)
If you braise the beef until it shreds easily, you can do it the day before. Then the enchiladas bake fast, and flavors meld overnight.
Ingredients
Beef
2 lb chuck roast, finely shredded
Filling base
3 tbsp vegetable oil, divided
1 large onion, finely chopped
4 cloves garlic, minced
3 tbsp chili powder
2 tsp ground cumin
1 tsp smoked paprika
1/2 tsp dried oregano
2 cups low-sodium beef broth
1/4 cup tomato paste
1 can (10 oz) red enchilada sauce
Assembly
12 corn tortillas, warmed
1 1/2 cups shredded Mexican blend cheese
1/2 cup chopped fresh cilantro
Salt and freshly ground black pepper, to taste
Optional
Diced avocado, sour cream, lime wedges
Step-by-Step Instructions
1) Braise the chuck roast (or use pre-shredded beef)
Cook the chuck roast until it shreds easily. Simmering in beef broth with aromatics works well because moist heat softens connective tissue.
Once tender, shred with two forks. Keep the beef warm while you build sauce, or chill it and reheat later.
2) Toast the spices for deeper flavor
Heat 2 tbsp oil in a skillet over medium heat. Add onion and cook until translucent, about 5 minutes.
Stir in garlic, chili powder, cumin, smoked paprika, and oregano. Cook for about 1 minute, stirring constantly, so the spices bloom instead of turning dull.
3) Build the sauce base
Stir in tomato paste and cook 1 minute to reduce raw “tomato” taste. Then whisk in beef broth slowly to prevent lumps.
Simmer until slightly thickened, around 8 minutes. Season with salt and black pepper.
4) Enrich with red enchilada sauce
Pour in the canned red enchilada sauce. Simmer on low for 5 minutes so flavors merge.
Set aside. You’ll reserve some for assembly, and you’ll pour the rest over the rolled tortillas.
5) Season and moisten the shredded beef
Toss the shredded beef with about 1/2 cup of your enchilada sauce. This step keeps filling flavorful and prevents dry bites.
Reserve the remaining sauce for the bottom layer and the top pour.
6) Warm tortillas so they roll cleanly
Heat 1 tbsp oil in a skillet and briefly warm each tortilla, about 10 seconds per side. You want pliable tortillas, not crisp ones.
Work in batches and keep them covered so they stay soft.
7) Assemble with the right “center line”
Preheat oven to 375°F (190°C). Spread a thin layer of sauce on the bottom of your 9×13 dish.
For each enchilada, spoon filling into the center, sprinkle cheese and cilantro, then roll tightly and place seam-side down.
8) Pour sauce evenly for moisture
Once all enchiladas sit in the dish, pour remaining sauce over the top. Aim for even coverage so each tortilla steams as it bakes.
Finish with the rest of your cheese for a bubbly, browned surface.
9) Bake covered, then uncovered
Cover loosely with foil and bake for 20 minutes. The foil traps steam and keeps tortillas from drying.
Uncover and bake another 10 minutes until the sauce bubbles and cheese browns slightly.
10) Rest before serving
Rest for 5 minutes. During resting, sauce thickens slightly and filling firms up so enchiladas hold their shape.
Top with cilantro, avocado, sour cream, and a squeeze of lime right before serving.
Expert Technique Notes for “Restaurant-Style” Results
Small technical choices make classic enchiladas taste more complex. Focus on sauce thickness, tortilla flexibility, and bake timing.
If you want to improve quickly, treat this recipe like a system: you control moisture, structure, and seasoning at each stage.
Troubleshooting Common Enchilada Problems
Enchiladas often fail for a few repeat reasons. You can fix most issues by adjusting sauce and bake method.
Use this section as a quick diagnostic guide when your enchiladas come out less than expected.
Why are my tortillas cracking?
Cracking usually means tortillas cooled down or you didn’t warm them enough. Warm them right before rolling and keep them covered.
Also avoid crisping them in the skillet. You want flexibility, not crunch.
Why are my enchiladas dry?
Dry enchiladas come from not enough sauce or overbaking. Sauce steams the tortillas, and the cheese locks in heat.
Cover for the first half of baking. If needed, tent with foil for a few extra minutes rather than baking longer uncovered.
Why does the sauce taste flat?
Flat sauce often needs more time or a deeper spice profile. Toasting spices in oil boosts aroma, and simmering merges flavors.
Also taste at the end. Add salt gradually until it tastes “alive” rather than bland.
Why is the filling greasy?
Grease usually comes from very fatty meat without reduction. If your sauce runs thin, it can separate and look oily.
Simmer longer next time or skim off some fat after braising. Fat can be delicious, but it should emulsify into sauce, not pool.
Make-Ahead, Freezing, and Reheating Like a Pro
Enchiladas are ideal for planning. You can assemble them ahead and bake when you’re ready to serve. That saves time and keeps the experience stress-free.
Proper storage also helps flavors blend, especially in the beef and sauce.
Refrigerate assembled enchiladas
Assemble, cover tightly, and refrigerate up to 24 hours. Bake straight from the fridge, adding 5–10 minutes to ensure the center heats through.
This method works well for weeknight dinners and party prep.
Freeze for later
Freeze after assembly but before baking. Wrap the dish tightly and label it with the date.
Thaw in the refrigerator overnight, then bake at 375°F (190°C) until bubbly and hot.
Reheat leftovers
Reheat individual portions in the microwave or oven. For best texture, warm in the oven covered with foil.
Avoid overheating repeatedly; cheese can dry out when reheated too many times.
Serving Ideas That Match the Flavor Profile
Classic beef enchiladas shine with sides that balance heat and richness. Choose sides that offer crunch, freshness, or starchy comfort.
You also want at least one acidic or bright component—lime or salsa does that job well.
Pair with Mexican rice or beans
Mexican rice complements the sauce and rounds out the meal. Refried beans add a creamy, earthy base under the enchiladas.
If you enjoy learning about traditional grains and staples, browse corn. It ties back to why corn tortillas matter in classic enchiladas.
Add a fresh crunch
Try a crisp jicama slaw or a simple shredded lettuce salad with lime. The crunch cuts through cheese and chili.
Finish with cilantro and a light dressing so you don’t overpower the main flavors.
Offer toppings for guests
Set up a topping bar with avocado, sour cream, cilantro, and lime wedges. People can adjust heat and richness to their own taste.
This small step boosts enjoyment and keeps everyone coming back for “just one more bite.”
Why This Recipe Works (The Science in Plain Terms)
Enchiladas succeed because they manage three key factors: moisture, flavor extraction, and texture. Your braised beef provides moisture and tenderness, while sauce supplies liquid and aroma.
The bake method matters too. Covered baking traps steam, which keeps tortillas soft. Uncovered baking then evaporates extra moisture so cheese browns and sauce bubbles.
Even the spice process plays a role. Toasting spices in oil increases volatility of aromatic compounds, which is why the scent pops as soon as you stir.
FAQ
What type of beef is best for classic beef enchiladas?
Chuck roast works best because it becomes tender when braised and shreds easily. The result gives you juicy filling that absorbs sauce without drying out.
Can I make enchiladas with ground beef instead of shredded chuck?
Yes, but adjust cooking time. Brown ground beef, simmer with sauce until juicy, then assemble. Shredded chuck gives a more traditional, pulled texture.
Should I use corn or flour tortillas?
Corn tortillas deliver the most classic flavor and hold red sauce well. Flour tortillas taste milder and roll more softly, but corn remains the traditional choice for classic beef enchiladas.
How do I keep enchiladas from becoming soggy?
Use sauce with a medium thickness and avoid extra watery additions. Also warm tortillas briefly, then bake covered first so steam softens evenly instead of flooding the dish.
Can I use homemade red enchilada sauce?
Absolutely. Homemade sauce often gives richer chile aroma and more control over heat. If you use homemade sauce, simmer until it thickens slightly before assembling.
See also: classic beef enchiladas