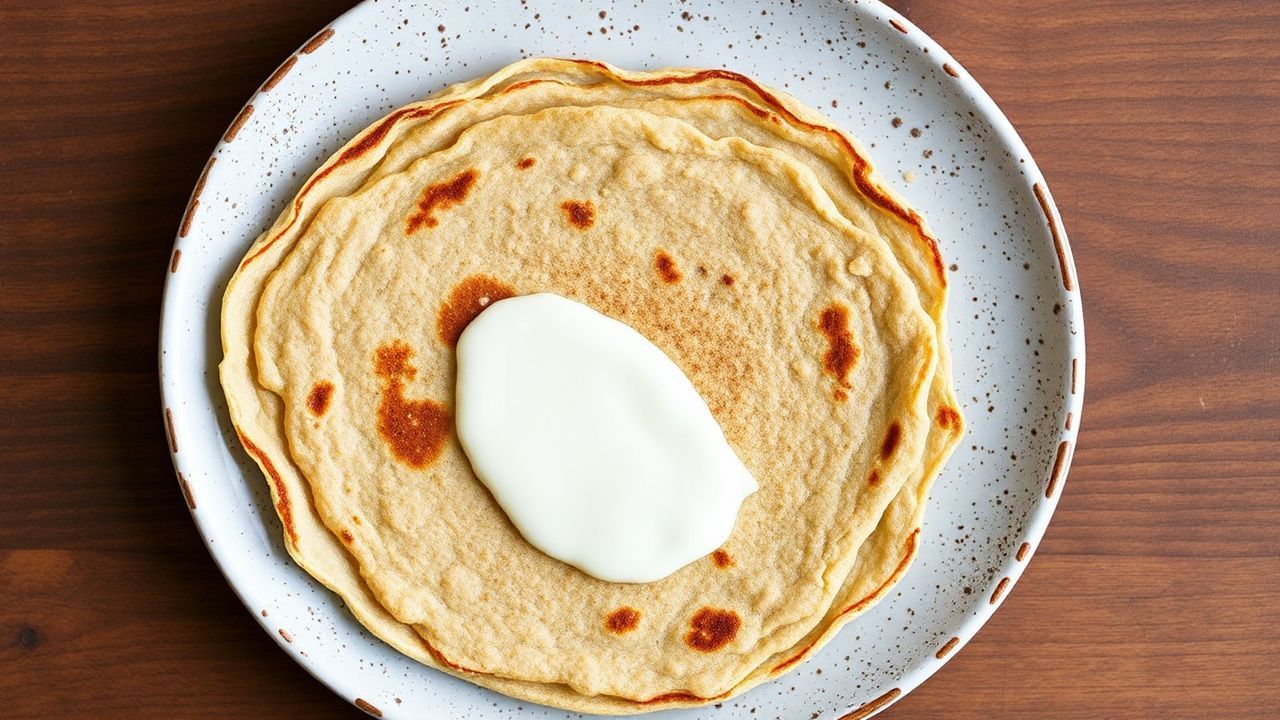
Buckwheat galettes are savory, rustic crepes built for crisp edges and lean, filling-friendly bites. With the right batter thickness and heat control, they stay sturdy under toppings instead of turning soggy. This recipe turns the whole process into repeatable steps you can run all week.
- Rustic Buckwheat Galettes: Why They Feel Like a Real Meal
- What Makes Buckwheat Galettes Different from Wheat Crepes?
- The 7-Step Method for Healthy Buckwheat Galettes
- Step 1: Mix Buckwheat Flour and Salt for Even Flavor
- Step 2: Whisk Eggs Until the Batter Looks Uniform
- Step 3: Add Cold Water Gradually (Control the Pour)
- Step 4: Stir in Butter for Flavor and Crisp Edges
- Step 5: Rest the Batter 60 Minutes in the Fridge
- Step 6: Heat the Skillet Until It’s Ready to Sizzle
- Step 7: Pour Thin, Cook Until Set, Then Flip
- How to Build Healthy Fillings That Don’t Weep or Collapse
- Moisture Control: Cook Vegetables Until Water Evaporates
- Flavor Architecture: Savory Depth with Fresh Lift
- 5 Filling Concepts That Work Every Time
- Cooking Techniques That Guarantee Crisp Edges
- Thickness: Use the Test-Strip Rule
- Flip Timing: Look for Edge Lifting and a Set Surface
- Tool Choices: Pan Material Changes Browning Speed
- Serving Timing: Fill and Fold Immediately
- Make-Ahead, Freezing, and Reheating for Best Texture
- Nutrition Snapshot: Keep Buckwheat Galettes “Healthy” in Practice
- Common Problems and Fixes (Fast Troubleshooting)
- Galettes Tear When You Flip
- Galettes Stay Pale and Don’t Crisp
- Centers Turn Tough or Dry
- Filling Makes the Edge Soggy
- FAQ: Healthy Buckwheat Galettes
At a Glance: Key Takeaways
- Rest 60 minutes so buckwheat hydrates and spreads thin.
- Medium-high heat sets the surface fast for crisp edges.
- Fill smart: use lean protein plus a small binder for structure.
- Reheat in a skillet to restore edge crispness.
Rustic Buckwheat Galettes: Why They Feel Like a Real Meal
Buckwheat galettes work like a real meal because the crepe shell holds its shape under savory fillings. Buckwheat flour has a naturally nutty flavor, and it cooks without relying on wheat gluten for stretch.
Your goal stays simple: tender inside, crisp at the edges, and fold without tearing. You get that result by pouring thin batter, resting long enough, and cooking at the right skillet temperature.
What Makes Buckwheat Galettes Different from Wheat Crepes?
Buckwheat does not build the same gluten network that wheat does. Instead, your batter relies on eggs for structure, plus hydration time for even setting. If you treat buckwheat like a wheat crepe, the texture often turns rubbery or brittle.
Buckwheat is naturally gluten-free by ingredient, but finished recipes can still include gluten through added wheat products or cross-contact. For background on how gluten works in baking, see gluten.
Hydration and Rest: The Texture Engine
Buckwheat absorbs water differently than wheat flour. During the rest, the flour fully hydrates and the batter thickens slightly, which helps it cook evenly. That reduces dense centers and supports clean folding.
Rest time also makes the batter relax, so it spreads more consistently across the pan. When the perimeter sets thin and fast, you get crisp edges with a tender middle—exactly the galette bite you want.
Gluten-Free Reality and Cross-Contamination
Buckwheat itself is gluten-free, yet cross-contact can happen in shared facilities. If you need a strict gluten-free outcome, source ingredients with clear labeling and avoid wheat-based additives.
For a simple definition of buckwheat’s place in food systems, see buckwheat. Understanding the ingredient helps explain why rest and heat matter so much for texture.
The 7-Step Method for Healthy Buckwheat Galettes
You do not need fancy tools. You need a clear workflow and small adjustments you can repeat without guesswork. Mix, rest, preheat, pour thin, cook fast, flip confidently, then fill and fold.
Cook one tester galette first. Use it to calibrate pour amount and skillet heat. Once you nail those two variables, every batch becomes easier.
Step 1: Mix Buckwheat Flour and Salt for Even Flavor
Combine buckwheat flour with salt before you add liquids. This distributes salt through the dry mix so every bite tastes balanced.
Too, lumps often form when dry and wet mix unevenly. If you add any extra dry binder, sift it in so the batter stays smooth and fold-ready.
Step 2: Whisk Eggs Until the Batter Looks Uniform
Whisk eggs into the batter until the mixture looks smooth. Eggs act as an emulsifier and help the gluten-free batter set into a cohesive crepe.
A uniform batter also cooks evenly. When the center cooks at the same rate as the edges, you avoid wet middle zones that tear during folding.
Step 3: Add Cold Water Gradually (Control the Pour)
Pour in cold water slowly while whisking. Cold liquid reduces clumping and helps you reach a truly pourable consistency.
If your batter feels thick, add water a tablespoon at a time. You want it like thin pancake batter so the galette spreads quickly in the pan.
Step 4: Stir in Butter for Flavor and Crisp Edges
Melted butter adds flavor and supports browning. It also helps the edge dry slightly faster, which improves crispness after cooking.
Use a light hand. Too much fat can soften the surface quickly or brown unevenly, especially if your skillet runs hot.
Step 5: Rest the Batter 60 Minutes in the Fridge
Cover the bowl and refrigerate for at least 60 minutes. The rest hydrates the flour and improves spread control across the whole round.
If you rest only 10–15 minutes, you often get patchy setting. The crepe may taste fine, but it folds worse and crisping often suffers.
Step 6: Heat the Skillet Until It’s Ready to Sizzle
Heat your skillet over medium-high until it sizzles lightly when batter hits. If the pan runs cool, the surface steams instead of setting, and the edges never crisp properly.
Use a nonstick skillet or well-seasoned cast iron for reliable results. Brush with a thin film of butter or neutral oil each time to prevent sticking.
For cookware background, see cast iron. Heat retention changes how quickly you brown, so adjust with your own test galette.
Step 7: Pour Thin, Cook Until Set, Then Flip
Pour about 1/3 cup batter, then tilt and swirl to spread thin. Cook until the edges lift naturally and the center looks set—not glossy.
Flip with a wide spatula, then cook the second side until lightly browned. Keep browning moderate so the galette stays flexible for folding.
If you reheat, use a skillet over medium heat or a toaster oven. Short reheating restores dryness at the surface while keeping the inside tender.
How to Build Healthy Fillings That Don’t Weep or Collapse
Healthy buckwheat galettes come from filling choices that control moisture. You want flavor plus low free water so the crepe edge stays crisp after folding.
Start with a balance: fiber-rich vegetables, lean protein, and a small binder like yogurt, egg, or a modest amount of cheese. The binder helps the filling stay cohesive when you cut and eat.
Moisture Control: Cook Vegetables Until Water Evaporates
Sauté vegetables until their liquid cooks off. Mushrooms and onions release water quickly, so give them time in the pan before you assemble.
When vegetables stay wet, the galette edge steams and softens. When vegetables dry slightly, crispness lasts longer and the fold stays stable.
Flavor Architecture: Savory Depth with Fresh Lift
Build flavor in layers. Start with browned aromatics, then add a savory core, then finish with herbs and a touch of acid like lemon.
Acid lifts taste and prevents the meal from feeling heavy. If you want to understand how herbs affect flavor profiles, see herbs.
5 Filling Concepts That Work Every Time
Pick one filling concept and scale it to your pan size. Treat your galette like a thin platform, not a thick pie, so moisture stays controlled.
Warm fillings spread and bind more reliably. If the filling is hot, the cheese melts or the egg sets faster, which helps hold the slice.
1) Mushrooms + Gruyère + Thyme
Sauté mushrooms until browned, then add thyme and a pinch of salt. If you include garlic, cook it briefly so it tastes sweet, not raw.
Sprinkle gruyère and fold while warm. The cheese acts like a binder and keeps the filling together when you cut a triangle.
2) Smoked Salmon + Crème Fraîche + Dill
Keep this filling fresh. Warm salmon gently if needed, then mix with crème fraîche and dill. Add lemon zest right before serving.
Because smoked salmon tastes strong, you need less extra salt. Lemon balances richness without adding cooking moisture.
3) Roasted Vegetables + Goat Cheese + Herbs
Roasted vegetables lose much of their free water, so they work well in crisp galettes. Crumble in goat cheese and add parsley or chives.
Taste and adjust salt after mixing. This filling feels like a full meal and supports a fiber-forward plate.
4) Spinach + Nutmeg + Swiss Cheese
Wilt spinach quickly in a hot pan, then squeeze out extra liquid if it looks wet. Season with nutmeg and salt, then add Swiss cheese.
Fold the mixture into a compact layer so it does not spill when you cut. The cheese binds and keeps the center together.
5) Herbed Ricotta + Pine Nuts + Lemon
Mix ricotta with herbs and lemon zest. Toast pine nuts for crunch, then fold them in at the end.
Keep the filling lightly bound and not overly wet. The herbs and acid sharpen the creaminess so you enjoy more flavor with less sauce.
Cooking Techniques That Guarantee Crisp Edges
Crisp edges come from three factors: thin batter, correct heat, and timely flipping. If you rush a step, the edge turns soggy because steam builds before the crepe sets.
Also avoid overfilling. A thick mound pushes moisture toward the crepe surface and softens the perimeter. Keep the filling layer thin and even.
Thickness: Use the Test-Strip Rule
After your first tester galette, adjust pour amount and pan tilt speed. Buckwheat batter thickens as it rests, so you must spread quickly once you pour.
If the galette tears, loosen the batter with a tablespoon of water and spread wider. If it stays pale, spread thinner and raise heat a notch.
Flip Timing: Look for Edge Lifting and a Set Surface
Flip when edges lift naturally and the center no longer looks glossy. If you flip too early, the crepe folds onto itself and can tear.
If you wait too long, the crepe dries and turns brittle. Aim for golden edges with a tender middle so folding stays effortless.
Tool Choices: Pan Material Changes Browning Speed
Cast iron holds heat and browns quickly. Nonstick releases easily and often cooks more evenly at steady temperatures. Either option works if you adjust heat based on your pan’s behavior.
For a broader explanation of moisture behavior in cooking, see moisture. Less surface steam means better crispness, and heat control directly influences that.
Serving Timing: Fill and Fold Immediately
Galettes steam as soon as hot filling touches the surface. For best crispness, fill right after the second side cooks, then fold, plate, and finish quickly.
Serve while the edges still crackle slightly. That peak texture window depends on moisture balance and fast serving.
Make-Ahead, Freezing, and Reheating for Best Texture
You can prep ahead and still get crisp results. The key is how you cool, store, and reheat. You want to remove excess moisture during reheat, not trap it.
Cool galettes fully before stacking. If you stack while hot, condensation forms between layers and softens the edges.
Reheat Like a Pro
Reheat on a skillet over medium heat. Cook 30–60 seconds per side until the edge crisps again and the center warms through.
Keep reheating short so the interior does not dry out. If you use a toaster oven, warm briefly and watch the edges for browning.
Freeze in a Crisp-Friendly Way
Freeze cooled galettes with parchment between layers. This prevents sticking and makes separation easy.
Thaw in the refrigerator, then reheat in a skillet. That method restores the edge without making the galette leathery or dry.
Nutrition Snapshot: Keep Buckwheat Galettes “Healthy” in Practice
Healthy buckwheat galettes depend on portion size and filling ingredients. Buckwheat contributes fiber and can support satiety, especially when you add vegetables and lean protein.
For general nutrition context on fiber, see dietary fiber. Build meals with vegetables first, then add protein and modest binder.
Plain Galette Baseline (Practical Estimates)
A plain buckwheat galette portion often lands around 120–160 calories, depending on thickness and how much fat you use. The range changes quickly when eggs, cheese, or other proteins join the filling.
If you want fewer calories without losing satisfaction, keep cheese moderate and increase vegetables. More plant volume also helps texture by reducing extra added fats.
Common Problems and Fixes (Fast Troubleshooting)
If your buckwheat galettes fail, fix the variable you can control. Most issues come from batter thickness, skillet heat, or flip timing. Small changes usually solve the problem in one batch.
Start with the simplest adjustment. Then change one factor at a time so you can learn what worked.
Galettes Tear When You Flip
Batter often runs too thick, or you flipped before the surface set. Resting longer can help because hydrated buckwheat spreads more evenly and sets with a thinner perimeter.
Loosen the batter with a tablespoon of water. Then wait until edges lift before you flip again.
Galettes Stay Pale and Don’t Crisp
Your skillet may run cool, or your galette may be too thick. Raise heat slightly and spread thinner next time.
Crisping needs fast surface setting so water evaporates instead of steaming. Also use less butter in the pan if the surface looks greasy.
Centers Turn Tough or Dry
Overcooking often makes centers tough. Flip sooner and pull the galette when it looks set with light browning.
If you plan to fill it, remove it from the pan at a tender stage. The hot filling warms the center without over-drying the crepe.
Filling Makes the Edge Soggy
Your filling may be too wet or layered too thickly. Sauté vegetables until moisture reduces, then season before assembling.
Let hot fillings touch the surface right after the second side cooks. Fill immediately, plate right away, and eat while crispness peaks.
FAQ: Healthy Buckwheat Galettes
Are buckwheat galettes actually gluten-free?
Buckwheat itself is naturally gluten-free. However, your final recipe can include gluten if you add wheat flour or if ingredients have cross-contact during manufacturing.
Use certified gluten-free ingredients if you need strict results. For background, see gluten.
How thin should the batter be?
Buckwheat galette batter should pour easily, like thin pancake batter. It must spread quickly when you tilt the pan.
If batter looks thick in the first minute, add a small splash of water. Thin batter cooks fast and supports crisp edges.
Can I make the batter the night before?
Yes. Refrigerate batter for up to 24 hours for even hydration and flavor development.
Before cooking, whisk gently to loosen it. Buckwheat batter thickens as it rests, so you may need a spoonful of water.
What fillings work best for crisp edges?
Use fillings that you sauté until dry and cohesive. Mushrooms, greens, and browned onions work well because prep cooks off extra liquid.
Finish with herbs and a small amount of acid so flavors pop without adding more moisture. For herb basics, see herbs.
What’s the best way to reheat leftover galettes?
Reheat in a skillet over medium heat or in a toaster oven. Keep time short so the center warms while the edge regains crispness.
Avoid microwaving. Steam from microwaves softens crisp edges quickly, especially if leftovers sit for a while.
See also: cooking, moisture, browning.
See also: buckwheat galettes