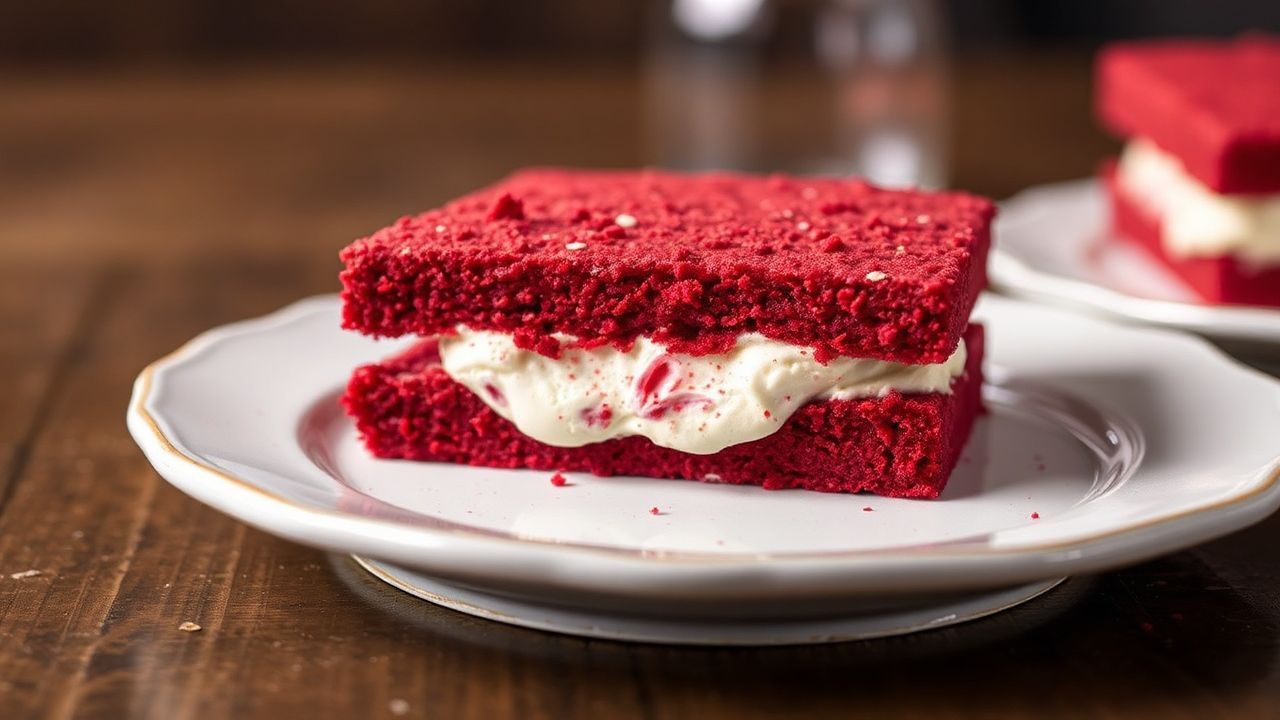
There’s something irresistibly enchanting about the marriage of classic flavor and creative technique, and a red velvet ice cream sandwich delivers that magic in every bite. You get the soft, cocoa-kissed bite of red velvet cookies paired with cool, creamy ice cream between two cake-like layers.
- Why Red Velvet Works So Well in an Ice Cream Sandwich
- Ingredients for Red Velvet Ice Cream Sandwiches (8 to 10)
- Prep and Cook Time
- Instructions: How to Make Red Velvet Ice Cream Sandwiches
- Step 1: Make the Red Velvet Cookies
- Step 2: Churn the Cream Cheese Ice Cream Filling
- Step 3: Assemble the Sandwiches
- Chef’s Notes & Tips for Success
- Serving Suggestions for Red Velvet Ice Cream Sandwiches
- Nutrition Information per Serving
- Q&A
- Signature look: bold red velvet color with cocoa depth.
- Best texture: cookie bake time controls chew vs. crisp.
- Flavor pairing: cream cheese or vanilla ice cream stays balanced.
- Make-ahead: freeze for clean slicing and less melting.
In this guide, you’ll learn how red velvet’s flavor profile works, how to prep and churn the filling, and how to assemble sandwiches that hold their shape. You’ll also find practical tips for storage, variation, and the most reliable assembly method.
Why Red Velvet Works So Well in an Ice Cream Sandwich
Red velvet cake gets its character from cocoa, a mild tang, and a tender crumb. Those traits pair naturally with cold dairy fat in ice cream because they balance sweetness and soften the finish. If you want a quick science anchor, see Red velvet cake for the background on this style.
When you compress cookies around ice cream, texture becomes the main story. A short bake keeps cookies pliable, while a slightly longer bake helps them resist freezer moisture. For the role of cocoa and baking reactions, review Cocoa and leavening basics.
Ingredients for Red Velvet Ice Cream Sandwiches (8 to 10)
Start with ingredients that support both color and structure. For the cookies, you’ll use flour, cocoa, baking soda, butter, sugar, egg, and vinegar, plus red food coloring to create the classic look. For the filling, you’ll build a smooth cream cheese ice cream base with dairy and sugar.
Before you measure, confirm your units and prep your tools. Chill bowls for faster emulsifying, and set up your ice cream maker so you don’t rush the churn. If you want a foundation on how dairy emulsions behave in frozen desserts, read Ice cream to understand common base principles.
For the Red Velvet Cookies
- 1 ½ cups all-purpose flour, sifted
- 2 tbsp unsweetened cocoa powder, sifted
- ½ tsp baking soda
- ¼ tsp salt
- ½ cup unsalted butter, softened
- ¾ cup granulated sugar
- 1 large egg
- 1 tbsp red food coloring
- 1 tsp pure vanilla extract
- 1 tsp white vinegar
For the Cream Cheese Ice Cream Filling
- 1 cup heavy cream
- 1 cup whole milk
- ¾ cup granulated sugar
- 8 oz cream cheese, softened
- 1 tsp pure vanilla extract
- Pinch of salt
Prep and Cook Time
Plan your timing so cookies cool before assembly. That cooling step matters because warm cookies can melt ice cream and weaken the sandwich structure. It also helps the filling set cleanly during freezing.
Use the timeline below to pace your day. If you want faster progress, chill the cookie dough and ice cream base while you preheat the oven. This keeps your process smooth and reduces waiting time.
Time Breakdown
- Preparation: 25 minutes
- Chilling time: 1 hour
- Assembly: 15 minutes
- Total time: 1 hour 40 minutes
Yield
- 8 to 10 ice cream sandwiches
Difficulty Level
- Medium

Instructions: How to Make Red Velvet Ice Cream Sandwiches
Follow these steps in order for consistent cookies and a stable filling. Keep mixing times reasonable, and avoid rushing the freeze step. That approach protects both texture and shape in the final sandwich.
As you work, check for doneness by sight. Red velvet cookies should look set at the edges with a soft center, which helps the cookie act like a tender “bread” layer for ice cream. For more background on how freezing affects dessert texture, see Frozen dessert.
Step 1: Make the Red Velvet Cookies
- Preheat oven to 350°F (175°C). In a medium bowl, whisk flour, cocoa powder, baking soda, and salt. Set aside.
- In a large bowl, beat butter and sugar until light and fluffy, about 3–4 minutes. Add egg, red food coloring, vanilla extract, and vinegar. Mix until combined.
- Gradually add the dry ingredients into the wet mixture. Mix on low until just combined. Stop early to keep cookies tender.
- Line two baking sheets with parchment paper. Scoop dough into 2-inch portions and lightly flatten for even thickness.
- Bake for 10–12 minutes. Let cookies cool on the tray for 5 minutes, then move to a wire rack to cool fully.
Step 2: Churn the Cream Cheese Ice Cream Filling
- Whisk cream cheese in a chilled bowl until smooth. Add sugar and beat until creamy and lump-free.
- Slowly whisk in heavy cream, milk, vanilla extract, and a pinch of salt. Mix until smooth.
- Churn in an ice cream maker per manufacturer instructions, often 20–25 minutes, until soft-serve consistency forms.
- Transfer to a freezer-safe container and freeze at least 1 hour for easier scooping.
Step 3: Assemble the Sandwiches
- Place about ¼ cup of ice cream on the flat side of one cooled red velvet cookie.
- Top with another cookie and press gently to spread filling to the edges without squeezing out too much.
- Wrap each sandwich tightly and freeze for 30 minutes to set before serving.
Chef’s Notes & Tips for Success
Small adjustments create big texture changes. Bake closer to 10 minutes for a softer sandwich, or extend to 12 minutes if you prefer more structure. Either way, cool completely before you add ice cream.
Ice cream flavor can shift the whole experience. Cream cheese ice cream adds tang and richness, while vanilla bean keeps the cocoa flavor in front. If you try another base, keep the sweetness level in mind so red velvet stays balanced.
- Cookie texture: 10 minutes = softer, 12 minutes = firmer.
- Ice cream variations: swap cream cheese with vanilla or chocolate-style bases that complement cocoa.
- Make-ahead: bake cookies up to 3 days ahead; churn filling up to 1 week ahead.
- Color boost: adjust food coloring for deeper red if you prefer a stronger classic look.
Without an Ice Cream Maker
You can still make a strong filling. Pour the chilled base into a shallow container, freeze, and stir every 30 minutes. This breaks up ice crystals and keeps the filling scoopable.
After 1–2 hours, check the texture. You want a soft, spreadable consistency, not a hard block. Then assemble and freeze until firm.
Serving Suggestions for Red Velvet Ice Cream Sandwiches
Serve straight from the freezer for the best “snap” and cold creaminess. If the ice cream feels too hard, wait 3–5 minutes at room temperature before the first bite. That brief rest softens the center without turning the cookies soggy.
For a simple pairing, add a drizzle of chocolate sauce or a dusting of powdered sugar. Fresh berries add a bright contrast that works especially well with cocoa. If you want a pairing idea for the cake side, consider vanilla or fruit notes to keep flavors cohesive.
Nutrition Information per Serving
Nutrition values depend on portion size and exact ingredient brands. The estimate below assumes your cookies and ice cream are portioned to yield 8–10 sandwiches with even layer thickness.
Use this as a planning guide, not a strict medical figure. If you need exact counts for dietary goals, calculate using your specific package labels.
| Calories | Protein | Carbohydrates | Fat |
|---|---|---|---|
| 320 kcal | 5 g | 40 g | 15 g |
Q&A
What makes red velvet ice cream sandwiches different from other frozen treats?
A red velvet ice cream sandwich uses cookies with cocoa depth and a tender cake-like crumb. The ice cream filling adds cold richness, so each bite blends chew, creaminess, and a mild tang.
That combo stands out because it pairs “cake texture” with frozen dairy. It feels dessert-like without needing a bowl or spoon.
Can I use any type of ice cream for the filling?
Yes. Cream cheese or vanilla generally fit best because they support the cocoa notes. If you choose another flavor, keep it complementary so it doesn’t overpower red velvet.
For flavor pairing ideas in frozen desserts, you can reference general guidance in flavor and then test your preference.
How do I make the red velvet cookies at home?
Use flour, cocoa, baking soda, and salt for structure and flavor. Then beat butter and sugar, add egg plus red coloring, and use vinegar to support leavening reactions for a classic tender crumb.
If you want background on the cake style, consult Red velvet cake for common ingredient and method context.
What’s the best way to assemble without melting?
Chill cookies fully, and scoop ice cream straight from a firmer freeze so it holds shape. Work quickly, press gently, and wrap immediately before refreezing.
Then freeze long enough for the filling to set and bond with the cookie layers.
How should I store red velvet ice cream sandwiches?
Wrap each sandwich tightly to reduce freezer burn. Store them in an airtight container and keep a steady freezer temperature.
For best quality, eat within about a week, since texture and flavor can drift over time in home freezers.
Once you make a batch, you’ll notice how quickly the texture comes together. The cookies stay tender, the filling stays creamy, and the whole dessert feels balanced in sweetness and cocoa depth. For many people, that’s why red velvet ice cream sandwiches become a repeat treat.
Try a few small experiments next time—slightly longer cookie bake time, a tangier filling, or a fruit garnish. Then freeze, thaw briefly, and enjoy the satisfying first bite.
See also: red velvet ice cream sandwiches