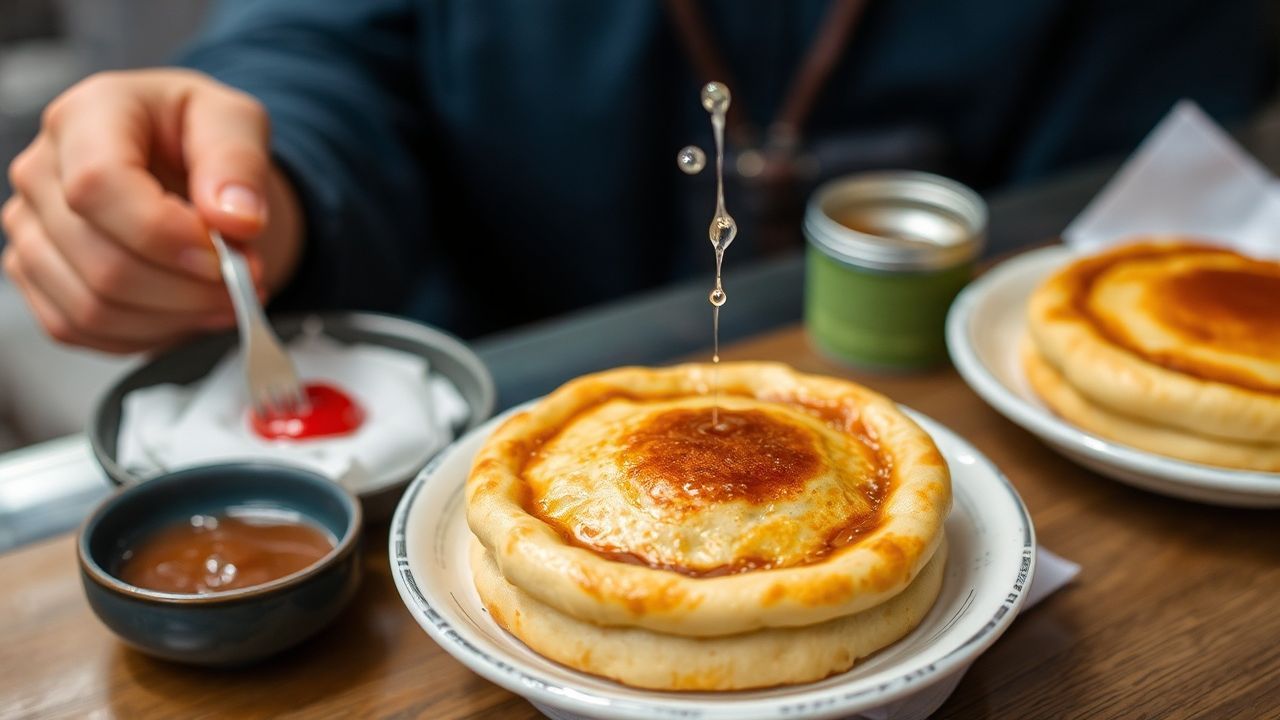
Hotteok (Korean: 호떡) earns its hype for one simple reason: the dough stays chewy, while the filling turns molten instead of just melting away. That combo—elastic texture plus a caramel-like center—makes it one of Korea’s most loved winter street snacks.
- What Hotteok Really Is (And Why It’s Not Like Regular Pancakes)
- Ingredients That Matter (And Substitutions That Still Work)
- Dough Base (Reliable, Street-Style Texture)
- Sweet Filling (How to Keep It Gooey, Not Leaky)
- Savory Options (Same Technique, Different Filling)
- At-Home Hotteok Recipe (45 Minutes, Crispy Edges + Gooey Center)
- Step-by-Step: Make Hotteok Like a Street Vendor
- 1) Activate the Yeast (Confirm Your Dough Will Rise)
- 2) Mix and Knead the Dough (Aim for Stretch, Not Dryness)
- 3) Proof Until Puffy (This Is Where Chew Is Born)
- 4) Make the Filling (Thick = Gooey)
- 5) Divide, Fill, and Seal (Your Leak-Proof Secret)
- 6) Pan-Fry on Medium Heat (Color First, Then Flip)
- 7) Drain and Serve Immediately (The Molten Window)
- How to Get the Perfect Texture (Troubleshooting Guide)
- Problem: Filling Leaks Out
- Problem: Outside Burns Before Inside Cooks
- Problem: Dough Turns Tough or Dry
- Problem: Filling Doesn’t Melt Smoothly
- Make-Ahead and Storage (What Works, What Doesn’t)
- Serving Ideas That Make Hotteok Even Better
- Nutritional Reality (Estimate, Not a Promise)
- FAQ
You can absolutely make hotteok at home. The difference between “good” and “restaurant-style” comes down to four things: fermented dough, filling thickness, heat control, and sealing technique. Nail those, and you’ll get crisp edges with a syrupy middle that pulls like warm caramel.
- Chew comes from yeast: proof the dough until puffy and springy.
- Prevent leaks: seal seams fully and don’t over-flatten.
- Cook on medium heat: brown the outside without scorching sugar.
- Serve immediately: filling thickens fast as it cools.
What Hotteok Really Is (And Why It’s Not Like Regular Pancakes)
Hotteok isn’t a flat pancake with toppings. It’s a stuffed griddle bread: you wrap a sweet (or savory) filling inside elastic dough, then pan-fry it until the outside crisps and the inside bubbles. That stuffed method forces you to think like a dough maker first, and like a pancake cook second.
The key texture comes from yeast fermentation. Gas bubbles form inside the dough while it proofs, creating that tender chew when heat hits. If you rush proofing or use dough that’s too dry, your hotteok turns bready and tough instead of chewy.
Fermentation also supports flavor. Yeast breaks down sugars and helps develop the browned, nutty aromas you associate with street food. If you want context on the science behind dough fermentation, review fermentation and how it changes texture.
Sweet Hotteok Flavor: Brown Sugar, Cinnamon, and Crunch
Classic sweet hotteok uses brown sugar plus cinnamon. During frying, the sugar mixture boils and thickens, creating that “molten” center. Nuts or seeds add crunch and slow the melt so the filling doesn’t instantly run.
You can adjust the flavor easily. More cinnamon gives a warm, bakery-like perfume. Adding chopped walnuts or sunflower seeds gives bite and helps absorb some moisture, which improves filling stability.
If you want background on common sweeteners and how they behave with heat, skim brown sugar. It explains why brown sugar melts differently than plain white sugar.
Ingredients That Matter (And Substitutions That Still Work)
Hotteok dough looks simple on paper, but each ingredient plays a role. Flour gives structure, yeast gives chew, oil adds flexibility, and sugar feeds fermentation. Warm water helps yeast bloom quickly.
For accurate results, measure flour by volume but adjust based on dough feel. Hotteok dough should feel slightly sticky and stretchy, not stiff. If you add too much flour, you’ll struggle to seal seams and the pancake will bake instead of puffing.
Dough Base (Reliable, Street-Style Texture)
Use active dry yeast or instant yeast. Active dry yeast needs proofing in warm water first; instant yeast can mix directly, though proofing is still helpful for timing. Warm water matters—too hot can weaken yeast.
Flour type matters too. All-purpose flour works best for a balanced chew. Whole wheat can work, but it can make dough heavier, which may reduce the “street snack” softness.
For general dough science, yeast offers a useful baseline on what yeast does and why proof timing changes texture.
Sweet Filling (How to Keep It Gooey, Not Leaky)
Your filling must stay thick enough to sit in the dough pocket. Brown sugar and cinnamon mix well, but liquid ingredients can break the texture and make leaks more likely.
That’s why nuts or seeds are more than “extras.” They add mass, reduce free liquid, and help the filling bubble slowly rather than flooding the pancake.
For an alternate profile, you can use a more nut-forward mixture or add a small pinch of salt to balance sweetness. Even slight salt improves caramel depth.
Savory Options (Same Technique, Different Filling)
Hotteok can go savory while keeping the same cooking method. Scallion + cheese creates a rich, melty center. Kimchi-inspired fillings bring acidity that cuts through the dough’s sweetness.
Keep savory fillings thick as well. If you use very wet ingredients, steam forms inside the pocket and pushes filling out.
If you want reading on Korean fermented ingredients often used in savory versions, see kimchi. It helps explain why acidity changes flavor perception.
At-Home Hotteok Recipe (45 Minutes, Crispy Edges + Gooey Center)
This recipe targets the signature texture: crisp outside, chewy dough, and syrupy filling that bubbles without burning. You’ll spend most of your time on proofing, then the griddle part moves fast.
Because hotteok is cooked in batches, work with steady heat. If your griddle runs too hot, the filling can scorch before the dough cooks through.
Yield, Time, Difficulty
Yield: 8 medium hotteok
Total time: ~45 minutes (includes proofing)
Difficulty: Medium (sealing and heat control)
Plan to eat them right away. As they cool, the filling thickens and the center stops flowing. That “molten” moment lasts only a short window.
Ingredients
Dough
2 cups all-purpose flour (sifted if you can)
1 cup warm water (~110°F / 45°C)
2 1/2 tsp active dry yeast
2 tbsp granulated sugar
1/4 tsp salt
3 tbsp neutral oil (plus extra for the bowl and griddle)
Sweet Filling
1/2 cup packed brown sugar
1 tsp ground cinnamon
1/4 cup chopped walnuts or sunflower seeds (optional but recommended)
Savory Filling (Optional)
1/4 cup finely chopped scallions
1/2 cup grated mozzarella or cheddar (optional)
1 tsp soy sauce
1 tsp toasted sesame oil
Equipment
Use a nonstick skillet or a heavy griddle. A lid helps trap steam at the start if your dough seems slow to cook through, but avoid prolonged lid cooking because the outside can soften.
Have a small bowl of flour for dusting. Dusting keeps sealing easy and prevents tearing seams.
Step-by-Step: Make Hotteok Like a Street Vendor
Follow the sequence carefully: activate yeast → mix dough → proof → mix filling → divide, seal, and cook. Each step supports the next one, and timing affects texture.
While the dough proofs, set up your station. When it’s time to assemble, work quickly so the dough stays elastic.
1) Activate the Yeast (Confirm Your Dough Will Rise)
Combine warm water, 1 tbsp of the sugar, and yeast in a small bowl. Wait 5–7 minutes until the mixture turns foamy.
If it doesn’t foam, your yeast may be old or the water too hot/cold. Replace it so you don’t end up with dense dough later.
2) Mix and Knead the Dough (Aim for Stretch, Not Dryness)
Stir flour and salt in a mixing bowl. Add the yeast mixture and oil, then mix until you get a sticky dough.
Knead 6–8 minutes on a lightly floured surface. The dough should feel elastic. If it’s tearing, sprinkle a little flour. If it’s too stiff, don’t force extra flour—add a teaspoon of water instead.
For more background on dough structure, see gluten. Kneading develops elasticity, which helps you seal the filling.
3) Proof Until Puffy (This Is Where Chew Is Born)
Oil a bowl, place dough inside, cover, and proof in a warm spot for about 30 minutes. Look for a noticeable rise—about doubling in volume.
Proper proofing should make the dough feel airy. If you press it gently, it should spring back instead of staying tight and heavy.
After proofing, keep the dough covered. Air-drying at this stage makes it harder to seal pockets.
4) Make the Filling (Thick = Gooey)
Mix brown sugar and cinnamon. Stir in nuts or seeds for body. The filling should look thick and hold shape when pressed between your fingers.
If your mixture looks too loose, add a bit more chopped nuts/seeds. If it feels too dry, warm it slightly (10–15 seconds in a microwave) so sugar softens, then stir again.
For readers who want a quick flavor science reference, cinnamon explains why cinnamon stays aromatic even during cooking.
5) Divide, Fill, and Seal (Your Leak-Proof Secret)
Punch down the dough gently. Divide into 8 equal portions and roll into balls. Flatten each ball into a disk with thicker edges.
Add about 1 tablespoon filling to the center. Fold dough edges over and pinch seams closed. Then place seam-side down on a floured surface.
Don’t worry if seams look rough at first. What matters is that the seam pinches together without gaps.
Expert Insight: Seal like you’re making a dumpling—pinch firmly, then press the seam to “glue” it to the dough. If you feel any filling pushing through, pause and re-seal before cooking.
6) Pan-Fry on Medium Heat (Color First, Then Flip)
Heat 1–2 tablespoons neutral oil in a nonstick skillet over medium heat. Place filled dough balls seam-side down. Press gently and flatten to about 1/2 inch thick.
Cook 3–4 minutes until the bottom turns deep golden. Flip carefully, then cook another 3–4 minutes. If needed, flip again briefly to brown evenly.
The filling should bubble and soften. If it smokes or smells burnt, your heat is too high—reduce slightly and continue.
7) Drain and Serve Immediately (The Molten Window)
Move hotteok to paper towels for 30–60 seconds to remove excess oil. Eat while the center still flows.
As it cools, sugar thickens fast. Warm hotteok tastes sweet, nutty, and caramel-like; cooled hotteok tastes more like baked pastry with less melt.
How to Get the Perfect Texture (Troubleshooting Guide)
Hotteok quality hinges on small details. You can fix most issues by adjusting one variable at a time: dough hydration, sealing strength, flatten thickness, or heat level.
Use this checklist during your first batch so you can dial it in quickly.
Problem: Filling Leaks Out
Leaking usually comes from weak sealing or over-pressing. If you flatten too thin, seams stretch and burst.
Solution: pinch seams longer, keep thickness closer to 1/2 inch, and cook on medium heat so the dough sets before sugar over-boils.
Problem: Outside Burns Before Inside Cooks
This happens when heat runs too high or when hotteok batches are too crowded. Crowding cools the pan between flips, which also causes uneven cooking.
Solution: reduce heat, leave space between pieces, and flip based on color rather than strict timing.
Problem: Dough Turns Tough or Dry
Under-proofed dough or over-floured surfaces can create dryness. If dough dries while you assemble, it can tear and cook too quickly.
Solution: proof until puffy, dust lightly, cover dough balls while you work, and avoid adding too much flour during kneading.
Problem: Filling Doesn’t Melt Smoothly
If filling stays grainy or doesn’t bubble, your mixture may be too dry or your heat may be too low. Sugar needs enough heat to liquefy and thicken.
Solution: ensure filling includes nuts/seeds for body, and keep medium heat so sugar bubbles rather than burns.
Make-Ahead and Storage (What Works, What Doesn’t)
Hotteok tastes best fresh, but smart prep helps you reduce stress. You can prepare dough and fillings in advance, then shape and fry right before serving.
Because the filling can set as it cools, avoid long storage after cooking. Reheating works, but you won’t get the exact same molten center.
Best Make-Ahead Plan
Make dough and proof it. Mix filling and cool it slightly. Divide dough and fill, then refrigerate covered for up to a day.
When ready, fry from cold (slightly longer cook time) or let shaped hotteok sit at room temperature 10–15 minutes for more even frying.
Freezing (Use With Care)
You can freeze shaped, uncooked hotteok. Freeze on a tray first so they don’t stick together, then bag them.
To cook, thaw briefly or fry directly at medium heat, watching for even browning. Expect longer cook time.
Serving Ideas That Make Hotteok Even Better
Sweet hotteok shines with a drink that cuts sugar. Warm tea balances the caramel notes and keeps the flavor clean.
For savory hotteok, add toppings that amplify aromatics. Chili oil adds heat, while soy-based dips add umami depth.
Sweet Pairings
Try a plain green tea or a light cinnamon-spiced beverage. The slight bitterness in tea keeps the dessert from feeling heavy.
Some people also dust hotteok with powdered sugar for extra aroma, but the best texture still comes from eating right after frying.
If you want general tea background, see tea.
Savory Toppings
Top with sliced scallions for fresh bite. For a Korean-style vibe, add a small drizzle of chili oil and a soy-based dipping sauce.
Skip watery toppings. They can soften the crisp shell and reduce the chewy contrast.
Nutritional Reality (Estimate, Not a Promise)
Nutrition varies based on dough size, oil absorption, and how much filling you pack. Hotteok can feel lighter because it’s warm and snack-sized, but frying adds calories through oil and sugar.
Use nutrition as guidance for portion planning, not as a strict measurement.
FAQ
What is hotteok?
Hotteok is a Korean stuffed pancake made with fermented yeast dough and filled with sweet (or savory) filling. Vendors fry it on a griddle until the outside turns crisp and the center turns syrupy.
Why does my hotteok filling leak out?
Most leaks come from weak seam sealing or flattening too thin. Pinch the seam fully, then keep the pancake around 1/2 inch thick so the dough sets before sugar boils aggressively.
How do I stop the outside from burning while the inside stays raw?
Use medium heat and flip based on golden color. If your pan runs hot, reduce heat and cook slightly longer so the dough cooks through before the filling scorches.
Can I make hotteok dairy-free or nut-free?
Yes. Skip cheese for savory and replace nuts with sunflower seeds, pumpkin seeds, or extra cinnamon-brown sugar for sweet. Keep the filling thick so it doesn’t push out.
My dough is too sticky to work with. What should I do?
Knead until elastic, then dust lightly with flour. Add flour in tiny pinches only. Over-flouring makes dough stiff and harder to seal, which can cause more leaks.
See also: Hotteok