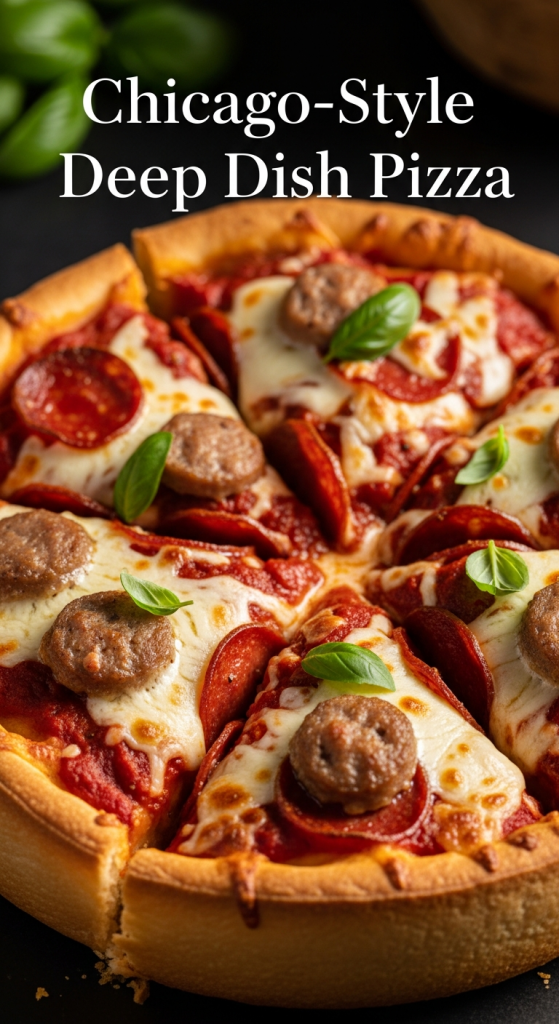
There’s somthing irresistibly magical about sinking your teeth into a slice of Chicago-style deep dish pizza. With its golden, buttery crust rising tall enough to cradle a mountain of molten cheese, tangy tomato sauce, and hearty layers of toppings, this iconic pie is a culinary experience unlike any other.
But mastering the art of deep dish pizza at home can feel like an ambitious quest-one that requires patience, precision, and a passion for bold flavors.In this step-by-step guide, we’ll take you on a journey through the secrets and techniques that turn ordinary ingredients into a showstopping masterpiece. Ready to roll up your sleeves and bring a slice of Chicago’s finest to your kitchen? Let’s dive in.
Mastering Chicago-Style deep Dish pizza is a culinary journey that dives deep into layers of history, texture, and bold flavors. This iconic pie, originating from the bustling streets of Chicago in the 1940s, redefined what pizza could be – a hearty, rich experience packed with a buttery crust and an irresistible layering technique that harmonizes cheese, tomato sauce, and fresh ingredients into a symphony of taste. Whether you’re a longtime fan or new to this iconic dish, understanding its unique characteristics will empower you to recreate an authentic masterpiece in your own kitchen.
Prep and cook time
- Readiness: 30 minutes
- Rising Time: 1 hour
- Cooking: 40-45 minutes
- Total Time: Approximately 2 hours 15 minutes
Yield
1 deep dish pizza (8-10 inches), serves 4 hearty portions
Difficulty Level
Medium – The patience for dough prep and layering technique rewards you with an indulgent, crispy, and tender pie.
Ingredients
- For the dough:
- 2 ¼ teaspoons (1 packet) active dry yeast
- 1 ½ cups warm water (105°F-115°F)
- 3 ¼ cups all-purpose flour, sifted
- ½ cup yellow cornmeal
- 1 ½ teaspoons kosher salt
- ½ cup unsalted butter, melted and slightly cooled
- 1 tablespoon sugar
- For the filling and topping:
- 3 cups shredded whole milk mozzarella cheese
- 3 cups crushed San Marzano tomatoes (canned or fresh)
- 2 tablespoons tomato paste
- 1 teaspoon dried oregano
- 1 teaspoon garlic powder
- 1 tablespoon olive oil
- 1 cup sliced mushrooms
- 1 green bell pepper, thinly sliced
- 1 small red onion, thinly sliced
- fresh basil leaves for garnish
- Salt and freshly ground black pepper, to taste
Instructions
- Activate the yeast: In a small bowl, combine warm water and sugar. Sprinkle yeast on top and let it bloom for 5-7 minutes until frothy and fragrant.
- Make the dough: In a large mixing bowl,whisk together flour,cornmeal,and salt. Slowly add the melted butter and the yeast mixture, stirring until a rough dough forms.
- Knead: Turn the dough onto a floured surface and knead for 8-10 minutes until smooth and elastic. Place in a lightly oiled bowl,cover with a damp cloth,and let rise in a warm space for 1 hour or until doubled in size.
- Prepare the sauce: In a medium bowl, mix crushed tomatoes, tomato paste, oregano, garlic powder, olive oil, salt, and pepper. Set aside to meld.
- Sauté the veggies: Over medium heat, sauté mushrooms, bell pepper, and onion in a tablespoon of olive oil until softened, about 5 minutes. Set aside.
- Shape the dough: Punch down the risen dough and transfer it to a 9-inch deep dish pan.Using your fingers, press dough evenly onto the bottom and up the sides, creating a thick wall for that iconic crust.
- Layer the cheese: spread the shredded mozzarella evenly along the bottom of the crust.This creates a moisture barrier for the crust and ensures melty, gooey goodness.
- Add the sautéed vegetables: Distribute the softened veggies over the cheese layer, ensuring balanced coverage for each slice.
- Pour the sauce: Ladle the tomato sauce mixture gently over the vegetables – this thick, chunky layer seals in flavour and moisture.
- Bake: Bake in a preheated oven at 425°F (220°C) for 40 to 45 minutes, until the crust is golden brown and the sauce is bubbling invitingly.
- Cool and garnish: Remove from oven and allow the pizza to rest for 10 minutes. Garnish with fresh basil leaves before slicing and serving.
Tips for Success
- Cornmeal Magic: Adding yellow cornmeal to the dough is key to achieving that slightly gritty, flaky texture emblematic of Chicago deep dish.
- Use Whole Milk Mozzarella: It melts beautifully and offers the best creaminess. Avoid low-moisture mozzarella for authenticity.
- Layering Order: remember, cheese first, then toppings, and finally sauce-this protects the crust from sogginess and balances flavors perfectly.
- Make-Ahead: Dough can be refrigerated overnight, covered tightly in plastic wrap to develop flavor and improve texture.
- Sauce Variations: Enhance your sauce by adding finely chopped fresh herbs like thyme or rosemary for a fragrant twist.
- Prevent Sticking: Be sure to grease your pan thoroughly with butter or oil before pressing the dough.
Serving Suggestions
Serve your Chicago-style deep dish pizza warm alongside a crisp green salad with a tangy vinaigrette to cut through the richness. Garnish each slice with freshly torn basil and a light drizzle of extra virgin olive oil. For a celebratory touch, offer some freshly grated Parmesan cheese and crushed red pepper flakes at the table. Pair with a sparkling lemonade or a chilled iced tea for a perfect balance.
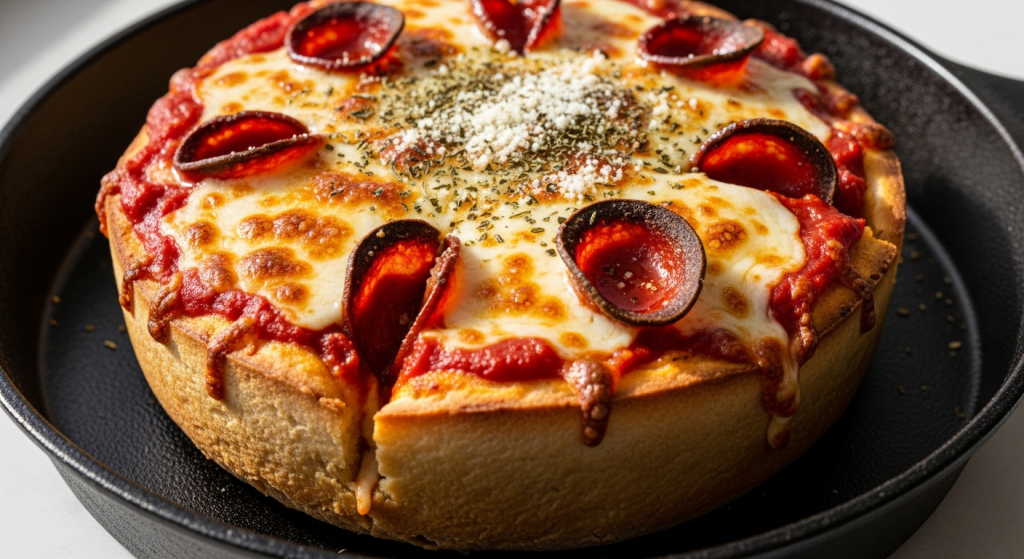
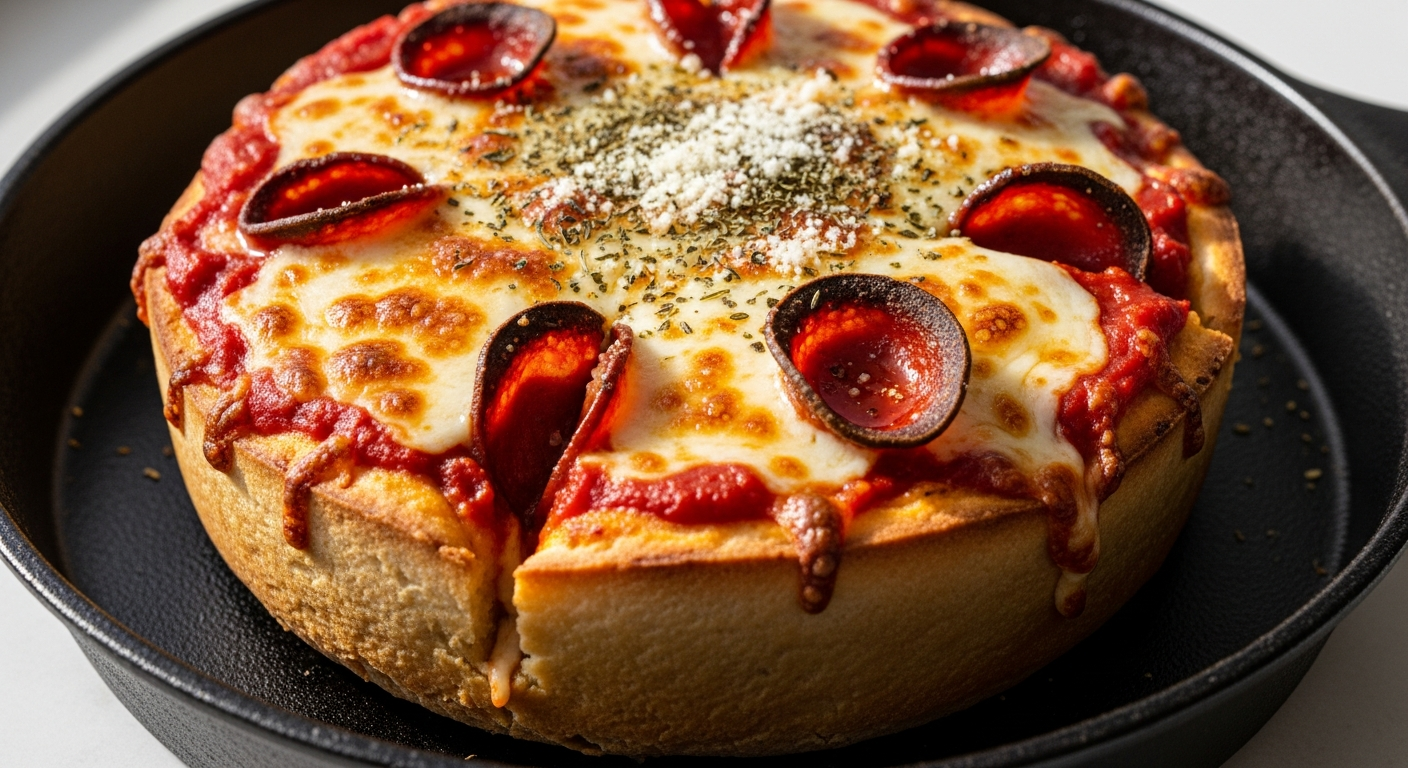
Layered deep dish pizza showcasing its hearty crust and vibrant toppings.
| Nutrient | Per serving (1/4 pizza) |
|---|---|
| Calories | 650 kcal |
| Protein | 28 g |
| Carbohydrates | 72 g |
| Fat | 28 g |
For more tips on perfect pizza dough, check out our Ultimate Pizza Dough Guide. Discover the origin story and the cultural footprint of Chicago pizza via Chicago Tribune’s food section.
Q&A
Q&A: Mastering Chicago-Style Deep Dish Pizza - Your Step-by-Step Guide
Q1: What makes Chicago-style deep dish pizza different from other types of pizza?
A1: Chicago-style deep dish pizza is famous for its hefty, buttery crust that’s baked in a deep pan, allowing for generous layers of cheese, chunky tomato sauce, and a variety of toppings. Unlike conventional thin-crust pizzas, it’s more of a savory pie, ofen eaten with a knife and fork due to its thickness and richness.
Q2: What type of pan should I use to get the authentic deep dish experience?
A2: To perfectly replicate the authentic Chicago deep dish, opt for a seasoned cast-iron skillet or a heavy-duty steel deep dish pan. These materials conduct heat evenly, helping develop a crisp, golden crust that stands up to the dense fillings without getting soggy.
Q3: how do I achieve a crispy yet tender crust?
A3: The secret lies in the dough and technique. Using a combination of all-purpose and cornmeal flour adds texture and flavor, while cold butter incorporated into the dough creates flakiness. Press the dough generously into the pan,ensuring the edges come up high for that signature thickness. A swift pre-bake before adding toppings helps lock in crispness.
Q4: When layering ingredients, what order should I follow?
A4: Unlike other pizzas, deep dish calls for cheese placed directly on the crust first, creating a moisture barrier that prevents sogginess. Layer sliced or shredded cheese evenly, then add your choice of vegetables, mushrooms, or poultry toppings, and finish with a chunky tomato sauce ladled on top. This reversed layering ensures a juicy, balanced slice.
Q5: Can I make a vegetarian deep dish pizza that still captures authentic flavors?
A5: Absolutely! Load it up with hearty vegetables like roasted bell peppers, caramelized onions, sautéed spinach, artichoke hearts, and fresh mushrooms.Use a robust tomato sauce infused with garlic, herbs, and a pinch of chili flakes. A blend of fresh mozzarella and provolone cheeses will give that melty, gooey texture deep dish lovers crave.
Q6: How long does it typically take to bake a deep dish pizza?
A6: Baking time ranges from 30 to 45 minutes, depending on your oven and pan. The goal is a golden crust with bubbling cheese and a thick, rich tomato sauce that’s cooked through. For even cooking, place your pan on the lower rack to allow the crust’s bottom to crisp without burning the toppings.
Q7: What tips can definitely help when cutting and serving this hefty pizza?
A7: Use a sharp, sturdy knife or a spatula for the best results. Let the pizza cool for about 5 to 10 minutes after baking – this resting time allows the cheese and sauce to set slightly, making it easier to slice neat portions. Serve in wedges and expect each piece to be a filling, savory meal!
Q8: Is it possible to prepare the dough and sauce ahead of time?
A8: Yes, making the dough a day in advance allows it to ferment slowly in the fridge, developing deeper flavor and better texture. The tomato sauce can also be prepared a few days ahead,stored in the refrigerator,and gently reheated before assembling. This prep work makes baking your deep dish pizza an efficient and enjoyable experience.
Q9: What are some common mistakes to avoid when making deep dish pizza?
A9: Overloading the pizza with too many wet ingredients can make the crust soggy. Also, skipping the cheese layer directly on the dough can lead to a watery bottom. Another pitfall is baking at too high a temperature; this might burn the crust before toppings cook through. Patience and attention to layering and temperature create a flawless pie every time.
Q10: How can home cooks personalize their deep dish pizzas while staying true to the style?
A10: Feel free to experiment with cheeses-adding smoked gouda or sharp cheddar can add a unique twist. Swap in different veggies or poultry options like grilled chicken or roasted vegetables to suit your taste. Just remember to keep the foundational elements: a rich buttery crust, a thick blanket of cheese, and vibrant tomato sauce on top for that unmistakable Chicago deep dish soul.
Whether you’re a curious beginner or a pizza aficionado, mastering the art of Chicago-style deep dish pizza is a delicious journey - one buttery, cheesy slice at a time!
In Retrospect
Now that you’ve journeyed through the layers of buttery crust, rich tomato sauce, and melting cheese, mastering Chicago-style deep dish pizza is no longer a lofty dream but an achievable delight. With patience, the right ingredients, and this step-by-step guide in hand, you’re ready to bring a slice of windy City warmth right into your kitchen. So preheat that oven, embrace the delicious challenge, and prepare to savor every hearty, golden bite-because this isn’t just pizza; it’s a delicious adventure worth mastering. Happy baking!