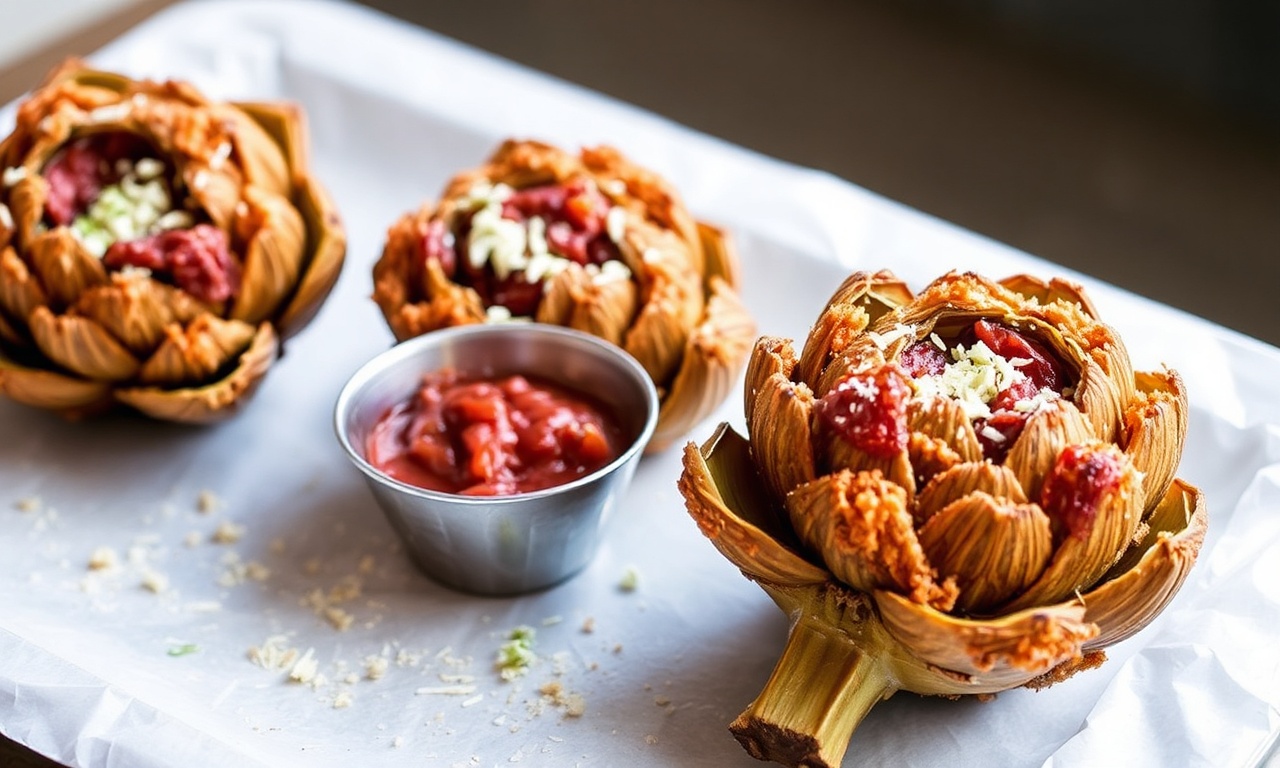
Carciofi alla Giudia are not “just fried artichokes.” They’re a controlled crunch system that turns tough, water-rich leaves into a golden, snap-crisp shell with a soft, earthy center. If you control moisture, heat recovery, and timing, the results stay light instead of greasy.
- What Carciofi alla Giudia Actually Are (and Why They Crisp)
- Choose the Right Artichokes for Even Crunch
- Ingredients: Keep It Minimal, Keep It Clean
- Equipment That Makes Crispness Reliable
- Trim and Open: Create the Crisp “Petals”
- Lemon Soak + Hard Drying: The Non-Negotiable Step
- The 2-Stage Fry: Golden Crunch Without Grease
- First fry (structure fry)
- Rest on a rack (brief, not long)
- Second fry (crunch + color fry)
- Salt immediately—then serve
- Troubleshooting: Why Your Carciofi Go Greasy, Soft, or Burnt
- Serving: How to Keep Them Crisp for Real
- Step-by-Step Recipe: 2-Stage Carciofi alla Giudia
- Batch Strategy: Fry More Calmly, Crisp More Consistently
- Storage and Reheating: Can You Bring Back Crunch?
- FAQ
- Trim + open the artichokes so oil reaches more leaf surface.
- Lemon-acid soak slows browning while you prep—then you dry hard.
- Two fries: first fry sets structure, second fry drives deep crunch.
- Rack drain keeps steam from softening the crust.
What Carciofi alla Giudia Actually Are (and Why They Crisp)
“Carciofi alla Giudia” means Jewish-style fried artichokes, a Roman classic built around a specific frying method rather than unusual ingredients. The artichoke leaves act like many thin, overlapping layers. Each layer holds moisture that must be driven off fast enough for crust to form.
So the goal isn’t only browning. It’s converting wet leaf surface into a dry outer film that fries into a crisp crust. That’s why technique matters more than seasoning, and why small temperature mistakes show up quickly.
If you want a science anchor, it helps to understand what causes surface darkening and texture shifts in plant foods. Enzymatic browning speeds up once you cut plant tissue and expose it to oxygen; heat then takes over and turns the surface deeper brown. For background, see browning.
Also, remember that frying is a heat-transfer process. Hot oil transfers heat by convection and contact while water inside the food turns into steam. When steam can escape, you crisp. When steam gets trapped, you steam-fry and the coating softens. If you want an overview, check frying.
Choose the Right Artichokes for Even Crunch
Your crunch depends on the artichoke itself. Globe artichokes with tightly packed leaves usually fry more evenly because the internal structure holds water differently than loose, older heads. Look for heads that feel heavy for their size and have firm, intact leaves.
Size also changes the timeline. Smaller to medium artichokes cook through faster, so the outer leaves don’t burn before the heart becomes tender. Large artichokes need more time inside the oil. That extra time often pushes tips toward dark bitterness.
Quick selection checklist
Choose artichokes with tight leaf clusters and fresh-looking green surfaces. Skip any heads with split leaves, dried edges, or broad brown patches. Damaged areas burn first because oil penetrates and dries them faster.
Trim time is also a quality signal. If the outer leaves look already dried or brittle, you’ll spend longer removing them. Longer prep usually means more exposure to browning and more surface moisture risk later.
Why “globe” matters
Carciofi alla Giudia rely on the globe shape. Globe heads have a compact bud structure that behaves like a layered “bloom.” When you open the leaves outward, you create many crispable contact points. That shape turns the frying oil into a uniform drying and browning environment.
To understand the vegetable category in general terms, you can review artichoke. The practical takeaway is simple: the fresher and firmer the globe head, the easier it is to reach crisp without harsh bitterness.
Ingredients: Keep It Minimal, Keep It Clean
Classic carciofi alla giudia use almost no “flavor masking.” You rely on nutty, grassy artichoke taste plus a clean fry oil. Salt comes at the end, when the crust is hot and dry enough to hold seasoning.
Use a neutral oil with a high smoke point. That choice matters because the oil temperature must stay stable under load. When the oil drops and reheats repeatedly, you get more oil absorption and less crisp texture.
What to use
You need artichokes, lemon, neutral frying oil, and salt (plus black pepper if you like). That’s it. If you add herbs or strong spices, they can burn during fast frying and pull focus away from the artichoke.
High heat stability connects to smoke point. You still need a thermometer, but the smoke point concept explains why some oils behave better in deep-frying.
Salt timing: why “later” wins
If you salt too early, salt draws out surface moisture. That moisture then steams in the oil or softens the crust as the artichoke drains. Salting at the end keeps the surface dry and the crust crisp.
Also, hot crisp shells accept salt better. When the crust cools, salt dissolves slower and the flavor stays as seasoning instead of drifting into oily pockets.
Equipment That Makes Crispness Reliable
Good equipment removes guesswork. Use a heavy pot or Dutch oven for heat stability and a thermometer to track oil temperature. Deep frying fails most often due to temperature drift, not lack of effort.
You also need a wire rack and a tray to catch drips. A rack gives airflow under the artichokes. That airflow helps steam escape and keeps the crust from turning soggy as it rests.
Oil temperature control
Target 350°F / 175°C. This range gives you fast crust formation while still cooking the interior. If your oil runs cooler, moisture evaporates slower and the artichoke absorbs more oil. If it runs hotter, the leaf tips darken too quickly.
Keep space between artichokes so the oil temperature recovers quickly. Overcrowding drops the oil temperature and creates steaming zones around each piece.
Drain setup that prevents steam trapping
Place a rack over a sheet pan. After each fry, drain briefly on the rack. Don’t wrap in foil or stack in a bowl. Those steps trap humidity and undo your work.
If you need to fry multiple batches, keep the rack ready and maintain your workflow. Crisp frying is timing-heavy, so a calm setup matters more than fancy gadgets.
Trim and Open: Create the Crisp “Petals”
Trimming isn’t cosmetic. It changes how quickly leaf surfaces dry and how evenly oil contacts the artichoke. Start by removing the tough outer leaves until you reach paler, tender inner leaves.
Then trim the stem so the artichoke sits flat and stable in the pot. Cut about 1/2 inch (1–1.5 cm) from the top to even out cooking of the tips. If the tips cook faster, they burn before the thicker interior softens.
Open like a bloom
Gently pull the leaves outward so the artichoke looks like an open flower. That action creates more leaf surface exposed to oil. More exposure means more moisture escapes in the oil and the shell crisps more uniformly.
Move efficiently. Once you cut, oxidation begins. You can slow color change with lemon soak, but you still want to avoid long delays on the cutting board.
Moisture management starts before frying
Every cut releases water and triggers browning enzymes. That’s why the next step—acidulated soak plus hard drying—matters. If water sits on the leaf surface, it turns to steam in the oil and interferes with crust formation.
For general plant-tissue browning background, enzymatic browning explains why cut surfaces darken and how acid can slow that process.
Lemon Soak + Hard Drying: The Non-Negotiable Step
Soak trimmed artichokes in cold water with lemon juice. The acid reduces browning during prep, so the leaves stay visually bright while you work through the batch.
But do not treat the soak like marination. The goal is short protection, not adding extra water. Excess water turns into steam during frying and directly harms crispness.
When you remove each artichoke from the lemon bath, dry it extremely well with clean towels. Press gently between leaves and around the joints. This step reduces surface water—the main cause of splatter and soft crust.
Also, pat dry right before frying. If you wait, moisture creeps back onto the surface from the towel-damp environment. Crisp results prefer short intervals and quick transfers.
The 2-Stage Fry: Golden Crunch Without Grease
The two-fry method solves a common contradiction: artichokes need heat to cook through, but they also need a dry surface to crisp. One fry can’t do both perfectly for most sizes. Two fries create a timing window where the crust forms, then it toughens and deepens.
Set your oil to 350°F / 175°C. Use a heavy pot so temperature recovery stays smooth when you add artichokes. Also, don’t overcrowd—leave enough space for oil circulation around each bloom.
First fry (structure fry)
Lower the artichokes face-down into the oil. Fry for about 3–4 minutes until the leaves begin to look lighter golden and slightly loosening at the edges. This stage starts dehydration and sets the leaf “bloom” so the second fry can finish crisping faster.
Don’t aim for deep golden in the first fry. If you push for full color now, you risk browning leaf tips before the heart cooks tender.
Rest on a rack (brief, not long)
Remove the artichokes and rest on a wire rack for about a few minutes. Airflow drains surface oil and lets trapped steam escape from the leaf gaps. That small pause improves the texture in the second fry.
While they rest, monitor oil temperature. Your thermometer tells you whether you need to let the oil recover before the second fry.
Second fry (crunch + color fry)
Bring the oil back to 350°F / 175°C if it dipped. Return the artichokes and fry for 2–3 minutes until you see deep golden color and hard, crisp edges.
Keep spacing between artichokes during the second fry. Oil temperature recovery controls final crispness more than any other single variable.
Salt immediately—then serve
Drain briefly and salt while the crust is hot and dry. Salt adheres better at this stage. If you wait too long, condensation from cooling softens the surface.
Serve right away with lemon wedges. The lemon adds acidity that makes the fried flavor taste cleaner and sharper.
Troubleshooting: Why Your Carciofi Go Greasy, Soft, or Burnt
If your result isn’t right, don’t change ten things at once. Most failure patterns trace back to either temperature, moisture, or batch size. Identify the symptom and correct the root cause.
Use this guide like a diagnostic chart. It saves time because you won’t “over-fix” and ruin the next batch.
Greasy crust
Greasy artichokes usually mean the oil ran too cool, you overcrowded, or you didn’t dry thoroughly. When the surface doesn’t dry fast, oil penetrates before crust forms.
Fix: dry harder between leaves and keep loads small so the oil returns to temperature quickly.
Soft shell but browned outside
Sometimes you see color, but the shell feels soft. That often means trapped steam stayed in leaf joints during the rest or while draining. Stacking and sealed containers also create this softening effect.
Fix: use a rack, avoid stacking, and keep the resting time brief and airy.
Burnt leaf tips
Burnt or bitter tips point to oversized artichokes, slow prep, or oil that ran too hot. Leaf tips brown faster because they’re thinner and more exposed.
Fix: choose smaller heads and keep the oil near 350°F / 175°C.
Center undercooked
If the outside crisps but the heart tastes hard, the artichoke didn’t cook through. That can happen when artichokes are large or your first fry was too short.
Fix: reduce size next time, and extend the first fry by 30–60 seconds for thicker hearts.
Serving: How to Keep Them Crisp for Real
Crispness fades when humidity returns to the surface. Fried leaves trap steam inside the bloom structure, and when cooled in still air, that moisture redistributes and softens the shell.
Serve immediately for the best crunch. If you must time a meal, keep artichokes on a rack in a warm, airy area. Don’t stack them.
Lemon wedges and simple pairings
Lemon wedges work because acidity lifts fried flavors. They also make the nutty artichoke taste brighter against the golden crust.
For a Mediterranean-style balance, serve with something fresh and green. The contrast helps because the artichoke is rich and dry-crisp, not heavy and saucy.
Step-by-Step Recipe: 2-Stage Carciofi alla Giudia
This recipe focuses on repeatable texture. Follow the order strictly, especially trimming, drying, and the two-fry timing. With the thermometer and a rack, you can get consistent results.
Use small to medium globe artichokes for the easiest balance. Larger heads can work, but they demand closer monitoring.
Ingredients
4 small globe artichokes
1 lemon, juiced
Neutral high-smoke-point frying oil (enough for deep frying)
Kosher salt (to taste) + black pepper (optional)
Prep
Mix cold water with lemon juice in a bowl. Trim each artichoke: remove tough outer leaves, trim the stem, and cut about 1/2 inch (1–1.5 cm) from the top.
Open the leaves outward like a flower. Move each artichoke into the lemon water right away.
First fry
Heat oil to 350°F / 175°C in a heavy pot. Work in small batches so oil temperature stays stable.
Remove one artichoke, dry it extremely well, and fry face-down for 3–4 minutes. Drain on a wire rack for about 5 minutes.
Second fry
Bring the oil back to 350°F / 175°C. Return the artichoke and fry for 2–3 minutes, until deep golden and sharply crisp.
Drain briefly on the rack. Salt immediately and serve at once with lemon wedges.
Batch Strategy: Fry More Calmly, Crisp More Consistently
Crispy frying depends on oil temperature recovery. If you fry too many artichokes at once, the oil drops and stays low long enough to cause oil absorption and soft crust.
Smaller batches also help you manage timing. You’ll be able to handle each bloom’s drying and transfer window without long waits.
Workflow that prevents moisture creep
Set up your lemon bath, towels, rack, and a clear “fry line” before you heat oil. When oil is ready, you should move each artichoke quickly from drying to oil.
Keep the draining rack empty and ready. If you place a hot artichoke into a crowded rack, airflow drops and steam lingers.
Storage and Reheating: Can You Bring Back Crunch?
Carciofi alla giudia taste best immediately. Once they cool, the crust tends to reabsorb moisture from the environment. Still, you can improve leftovers with the right method.
Cool leftovers on a rack, not in a sealed container. Refrigeration in an airtight box traps humidity and softens the shell further.
Reheating method
Reheat in a hot oven with a rack—airflow matters. Aim for a quick re-crisp rather than slow warming. A microwave makes the crust chewy because it heats moisture instead of evaporating it.
If you want a general idea about reheating and moisture control, reheating covers the principle that heat transfer and trapped moisture change texture.
FAQ
What does “carciofi alla giudia” mean?
It means Jewish-style fried artichokes. Roman versions use a two-stage deep-fry technique and careful trimming/opening to create a crisp golden “bloom.”
Why soak artichokes in lemon water?
Lemon juice adds acid that slows browning reactions on cut plant surfaces. The soak protects color during trimming, but you still must dry the artichokes hard before frying.
How do I prevent greasy artichokes?
Keep oil near 350°F / 175°C, avoid overcrowding, and dry the artichokes extremely well after the lemon soak. Grease usually means crust didn’t form fast enough.
Can I use larger artichokes?
Yes, but they cook more slowly inside. Large heads can leave centers undercooked or push leaf tips toward burn. If you use large artichokes, reduce batch size and monitor the first fry closely.
Can I prepare ahead?
You can trim and open ahead, and you can keep artichokes in lemon water briefly. Fry right before serving for peak crunch. For leftovers, cool on a rack and reheat in a hot oven with airflow.
See also: Carciofi alla Giudia