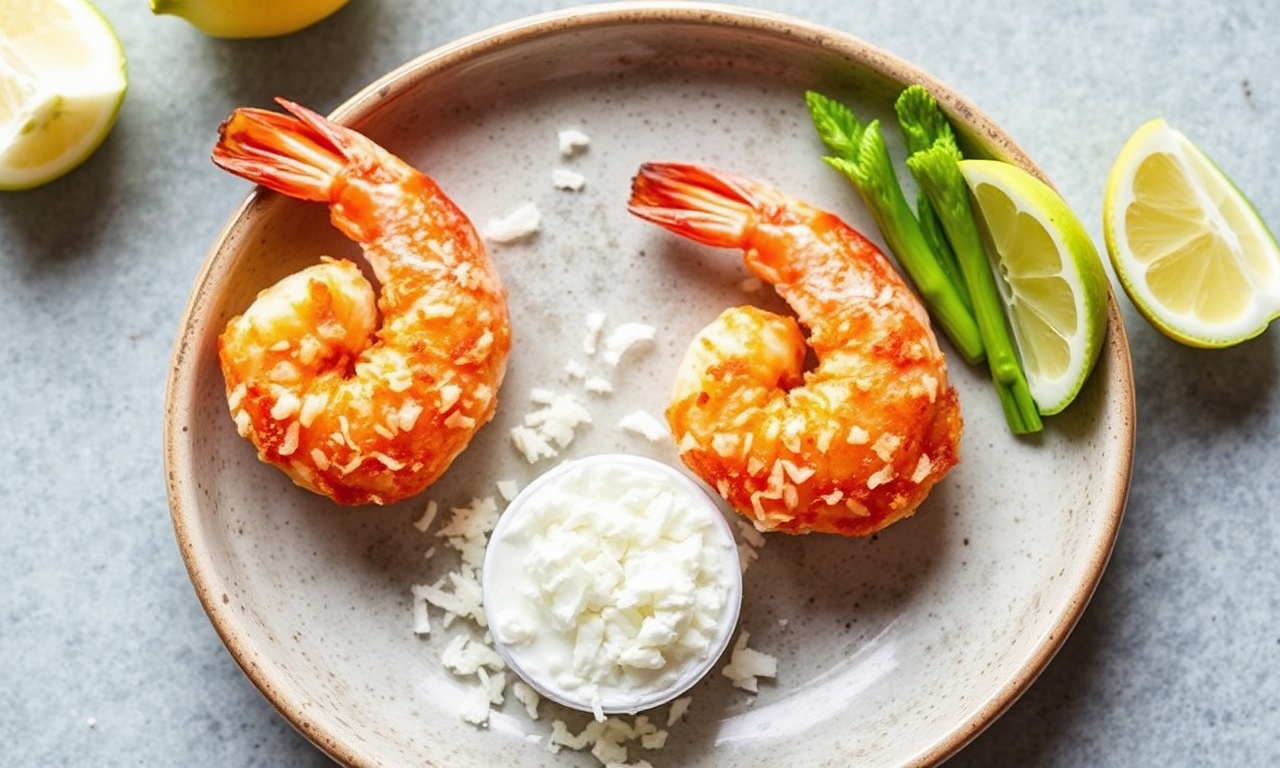
Hot, crunchy, and juicy—air fryer coconut shrimp delivers the beach-food vibe in a weeknight time frame. You get a golden coconut crust that snaps when you bite, while the shrimp stays tender because the cook time stays short.
- Why This 15-Minute Method Works for Crispy Coconut Shrimp
- Ingredients: Build a Tropical Crunch Coating
- Prepping for Crispness: The Moisture Rules
- Step-by-Step: Coat and Air Fry for Maximum Crunch
- Air Fry Instructions: Temperature, Timing, and Flipping
- Serving Like a Pro: Keep the Coating Crisp
- Quick Dipping Sauce Pairings
- Spicy Mango Salsa
- Sweet Chili Sauce
- Garlic Aioli with Lemon
- Pineapple-Mint Chutney
- Troubleshooting: Fix Common Crunch Problems
- Make-Ahead Options (So Weeknights Stay Easy)
- Nutrition Snapshot (Estimate per Serving)
- FAQ
Better yet, you skip the mess of deep-frying. Air circulation browns the breading fast, so the coating sets quickly instead of turning soggy. If you follow the moisture and spacing rules below, you’ll get consistent results even when you cook in batches.
At a Glance
- Total time: about 15 minutes from start to finish
- Texture: crisp coconut-panko shell + juicy, opaque shrimp
- Method: preheated air fryer + single layer (no overcrowding)
- Key move: press coating firmly so it adheres during airflow
Why This 15-Minute Method Works for Crispy Coconut Shrimp
Air frying works because it surrounds food with fast-moving hot air. That airflow dries the surface and accelerates browning of the crumb. When the breading dries early, it can crisp instead of steaming.
The texture depends on three controllable factors: dry shrimp, high-contact coating, and enough space in the basket. If any one of those fails, you’ll feel it in the final crunch.
For the science-minded cook, the browning you want comes from known chemical reactions in hot foods. Sugar and proteins form browned flavors through Maillard reactions, which typically require heat and a drier surface. See Maillard reaction for the underlying process.
Also, toasted coconut adds both flavor and faster color. Coconut contains fats and sugars that brown quickly, so you need just-right toasting and careful monitoring. If you want the broader food chemistry background, read about toasting.
Ingredients: Build a Tropical Crunch Coating
This recipe uses a classic breading flow—flour, egg, then crumb—but swaps the crumb for a coconut-panko blend. Panko matters because its larger flakes trap air and tend to stay crisp longer than fine crumbs.
You can use fresh or thawed frozen shrimp. The coating only performs well when the shrimp surface stays dry, so pat them until they feel almost “paper dry.” Then let them rest briefly before breading.
Core Ingredients
1 lb large shrimp, peeled and deveined (tails optional)
1/2 cup all-purpose flour
2 large eggs, beaten
3/4 cup unsweetened shredded coconut, lightly toasted
3/4 cup panko breadcrumbs
1/2 tsp kosher salt + 1/4 tsp black pepper
1/2 tsp smoked paprika (optional, but highly recommended)
Cooking spray (light oil spray)
Optional Flavor Upgrades
Add a small pinch of cayenne for heat, or a touch of lime zest for brightness. Coconut tastes naturally sweet and mild, so citrus keeps the flavor from feeling flat.
If you like a more “fried shrimp” taste, use a portion of smoked paprika plus garlic powder. For a quick primer on spice origin and flavor compounds, browse Paprika.
When you choose coconut, look for unsweetened shredded coconut. Sweetened coconut can brown too fast and can taste caramel-like under high heat. Toasting also changes aroma quickly, so keep your eyes on the pan.
Prepping for Crispness: The Moisture Rules
Crispy coconut shrimp fails for predictable reasons. Most “soft coating” issues come from moisture—either inside the shrimp or on its surface. Your job is to remove surface moisture before breading.
After you pat the shrimp dry, give them a short rest. During that rest, the surface water redistributes and evaporates slightly, which helps the flour layer grip better.
Toasting Coconut (Don’t Skip This)
Toast coconut in a dry skillet over medium heat for about 3–5 minutes, stirring often. Stop when it turns light golden and smells nutty. If it goes dark brown, it will taste bitter and can burn during air frying.
Toasting also drives off some moisture. That matters because toasted coconut firms up and browns faster under the air fryer’s heat. For broader context on plant oils and fats browning, see frying (it covers heat transfer basics relevant to crispy coatings).
After you toast, cool it completely on a plate. Then mix it with panko and spices so the crumbs season evenly. You want every bite to taste tropical, not just the outer layer.
Then set up your breading station so each shrimp moves fast from bowl to bowl. That reduces time in egg and reduces coating shake-off.
Step-by-Step: Coat and Air Fry for Maximum Crunch
Air fryer success comes from workflow. You need an efficient station, firm contact, and a single layer. Plan to cook in batches if your shrimp won’t fit comfortably.
Preheat your air fryer first. Preheating helps the coating set right away so it crisps instead of absorbing moisture while the appliance warms up.
Build a Simple Breading Station
Use three shallow bowls. Bowl 1 holds flour, Bowl 2 holds beaten eggs, and Bowl 3 holds the coconut-panko mix. Add salt and pepper to the crumb so seasoning reaches every shrimp.
Mix panko, toasted coconut, and smoked paprika (if using). Stir until the spices look evenly distributed. That matters for color and taste consistency across all shrimp.
Coating Technique That Actually Sticks
Pat each shrimp dry again right before breading if you see any sheen. Lightly dust in flour, shake off extra, then dip in egg, then press firmly into the coconut-panko mixture.
Pressing is not optional. The crumb needs direct contact to cling when hot air hits it. If you do not press, the outer layer can lift and turn patchy.
Expert Insight: Press the coating for 2–3 seconds on each side. Then let the breaded shrimp rest on a plate for 1 minute before air frying. That short rest helps the egg “grab” the crumbs and improves adhesion during airflow.
After coating, arrange shrimp in a single layer with space between pieces. Lightly spray the tops with cooking spray. The spray helps with browning and also reduces dry spots in the crumb.
If your basket is small, cook in two batches. Keep the first batch warm on a sheet pan in a low oven (around 200°F / 95°C) while you cook the second batch.
Air Fry Instructions: Temperature, Timing, and Flipping
Set the air fryer to 400°F (200°C). Cook until the coating turns deep golden and the shrimp turn opaque. Shrimp cook fast, so you should start checking at the 6-minute mark.
In most air fryers, the total cook time lands around 6–8 minutes depending on shrimp size and batch thickness. For even browning, flip halfway.
Cook Time Reference
Small/medium shrimp: about 6 minutes total, flipping at 3 minutes
Large shrimp: about 7–8 minutes total, flipping at 3–4 minutes
At doneness, shrimp should look opaque throughout and feel firm. If you cut into the thickest piece, the center should no longer look translucent.
For safe cooking expectations, shrimp are generally fully cooked once they turn opaque and curl into a firm “C” shape. If you want the broader food safety rules for seafood handling, reference food safety.
Serving Like a Pro: Keep the Coating Crisp
Coconut shrimp tastes best right after cooking. Crisp coatings soften as they sit because steam migrates into the crumb. That’s normal—so time your plating.
Use a rack if you have one. A rack lets airflow circulate under the shrimp so the bottom stays crisp. If you only have a tray, try not to pile shrimp on top of each other.
Quick Dipping Sauce Pairings
Sweet coconut works beautifully with bright, tangy dips. Lime juice adds acidity, which balances sweetness and makes the breading taste less heavy.
Choose one sauce and prepare it while the shrimp bread. Here are four crowd-friendly options that pair well with the tropical profile.
Spicy Mango Salsa
Dice mango, red onion, jalapeño, and cilantro. Add lime juice and a pinch of salt. This sauce adds sweetness, heat, and freshness.
If you want a simple flavor pairing reference, browse mango.
Sweet Chili Sauce
Use store-bought for speed, or mix chili sauce with a little honey and lime. Warm, sticky sweetness complements the toasted coconut flavor.
Garlic Aioli with Lemon
Stir mayonnaise with lemon zest and roasted garlic. Garlic adds savory depth and keeps the shrimp tasting “restaurant-style.”
Pineapple-Mint Chutney
Chutney brings fruit acidity and aromatic notes. Pineapple cuts through the richness and improves overall balance.
For fruit flavor science basics, see pineapple.
Troubleshooting: Fix Common Crunch Problems
Most issues come from a few repeat causes: moisture, weak adhesion, or overcrowding. The good news is you can correct each one quickly next time.
Use the guide below while the meal cooks, and adjust for your next batch if needed.
Coating Turns Soft
Overcrowding traps steam and raises the surface humidity. Cook in a single layer and keep space between shrimp.
Also check your shrimp dryness. Even small moisture pockets can steam the crumb during the first minutes.
Coating Falls Off
Pressing matters. Dip and then press firmly into the coconut-panko mix. If you skip the press, the crumb will detach under airflow.
Make sure flour, egg, and crumb layers stay consistent. Too much egg can make the coating slide.
Coconut Burns Before Shrimp Finish
Coconut can brown earlier than shrimp. If this happens, lower the temperature to 390°F (200°C) and extend by 1–2 minutes.
Also toast coconut lightly. Dark-toasted coconut will carry over heat into the air fryer and burn faster.
Texture Tastes Dry
Overcooking shrimp makes them rubbery. Start checking early, especially for medium and small sizes.
If your coating seems dry, use a slightly lighter spray and keep cooking time tight. The goal is crisp, not dehydrated.
Make-Ahead Options (So Weeknights Stay Easy)
You can prep parts of this recipe ahead to reduce stress. The crispness depends on timing, so plan to air fry close to serving.
Still, prep makes a real difference—especially when you’re feeding guests.
What You Can Prep
Toast coconut and mix it with panko up to 24 hours ahead. Store it in an airtight container.
Also pat shrimp dry and season with a pinch of salt right before breading (or just keep them dry in the fridge). If you salt too early, the shrimp can release moisture.
Best Timing for Full Breaded Shrimp
Breaded shrimp can sit briefly before cooking, but avoid long delays. The crumb may absorb egg moisture over time.
If you must hold them, place coated shrimp on a tray in the fridge for up to 20–30 minutes, then cook immediately. Avoid covering them tightly, which can trap humidity.
Nutrition Snapshot (Estimate per Serving)
Nutrition varies by shrimp size, flour amount, and how heavily you spray oil. Coating drives most of the calories, while shrimp contributes protein.
For planning, a typical serving (about 6–8 shrimp depending on size) lands near the numbers below. If you need exact nutrition for your ingredients, calculate based on your specific brands and quantities.
- Calories: ~320 kcal
- Protein: ~28 g
- Carbohydrates: ~18 g
- Fat: ~12 g
For general shrimp nutrition context, you can reference shrimp.
FAQ
Can I use frozen shrimp for air fryer coconut shrimp?
Yes. Thaw shrimp in the refrigerator, then pat them dry thoroughly. Any extra surface moisture can soften the breading and reduce crispness.
What makes the coating crisp instead of soggy?
Use dry shrimp, toast the coconut, press the coating firmly, and cook in a single layer. Overcrowding traps steam and stops the crumb from drying and browning.
How do I keep coconut from burning?
Toast coconut lightly (light golden only). If needed, lower air fryer temperature slightly and check earlier. Flipping halfway also helps both sides brown evenly.
Why does panko matter here?
Panko’s larger flakes create more air pockets in the coating. Those pockets support crisp texture as the breading dries and browns in hot airflow.
For more about breadcrumb types, see breadcrumb.
Can I make this gluten-free?
Yes. Use gluten-free flour and gluten-free panko-style breadcrumbs. Keep the breading steps the same, and make sure your blend still adheres well when pressed.
If you want general guidance on gluten-free baking swaps, review gluten-free diet.
See also: air fryer coconut shrimp