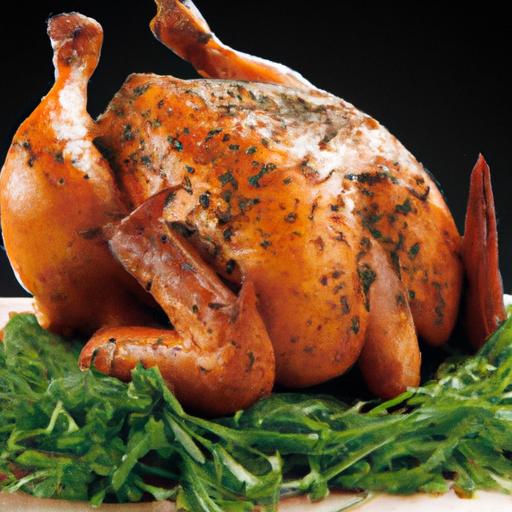
There’s something undeniably magical about biting into a perfectly cooked, juicy piece of chicken infused with smoky, grill-kissed flavors-and when it comes to achieving that culinary bliss, beer can chicken reigns supreme. This iconic grilling method, where a whole chicken is perched atop an open can of beer, transforms an ordinary backyard cookout into a mouthwatering feast that rivals any restaurant specialty.
But mastering the art of beer can chicken isn’t just about balancing a bird on a can; it’s about understanding the secrets that keep the meat tender,the skin crispy,and the flavors bold. In this ultimate guide, we’ll take you step-by-step through everything you need to know to create succulent, crowd-pleasing beer can chicken right on your own grill-complete with tips, tricks, and flavor hacks that will have your friends clamoring for seconds. ready to elevate your grilling game? Let’s dive in.
Ultimate Guide to juicy Beer Can Chicken on the Grill
The secret to an irresistibly flavorful and tender beer can chicken lies not just in the cooking method but in the choice of chicken and beer, the marinade mastery, and precise grilling techniques.Whether you’re a backyard grill enthusiast or a weekend hero, unlocking the perfect balance of juicy meat and crispy skin transforms ordinary chicken into a sensational centerpiece that impresses every time.
Choosing the perfect Chicken and Beer for Maximum Flavor
Start with a high-quality whole chicken, ideally fresh and about 4 to 5 pounds-this size ensures even cooking and retains moisture beautifully. Free-range or organic chickens boast firmer meat and richer flavor, which makes all the difference when grilling.
When selecting your beer, think beyond just any lager. Opt for a beer that complements the bird’s flavor without overpowering it. A smooth, malty amber ale or a subtly hoppy pale ale adds depth, while lighter pilsners infuse gentle aromatics. Avoid overly bitter or craft-heavy IPAs as they can clash with your spice rub. The beer vapor inside the cavity steams the chicken from within, imparting complexity and tenderness.
Mastering the Marinade and Dry Rub for Tender, Juicy Meat
A well-balanced marinade tenderizes and infuses the meat with layers of flavor. use a blend of citrus juice, garlic, and a touch of honey or maple syrup to brighten and caramelize the skin. For the dry rub, combine smoky paprika, brown sugar, garlic powder, onion powder, cayenne, salt, and black pepper. This blend creates a stunning crust that locks in juices during grilling.
Marinate the chicken for at least 4 hours, or ideally overnight, allowing the marinade to penetrate deep into the fibers. Before applying the dry rub, pat the chicken dry to ensure crispness when grilled.
Essential Grill Setup and Temperature Tips for Even Cooking
Set up your grill for indirect cooking by placing coals or burners on one side only. Maintain a steady temperature between 350°F and 375°F. This balance ensures the chicken roasts evenly around the beer can without flare-ups that burn the skin.
Position the beer can chicken upright on the cooler side of the grill. Keep the lid closed as much as possible-this traps heat and smoke, slow-cooking the chicken and allowing the beer vapors to permeate. Use a grill thermometer to monitor internal temperature and avoid overcooking.
Timing and Techniques for crispy Skin and Succulent Inside
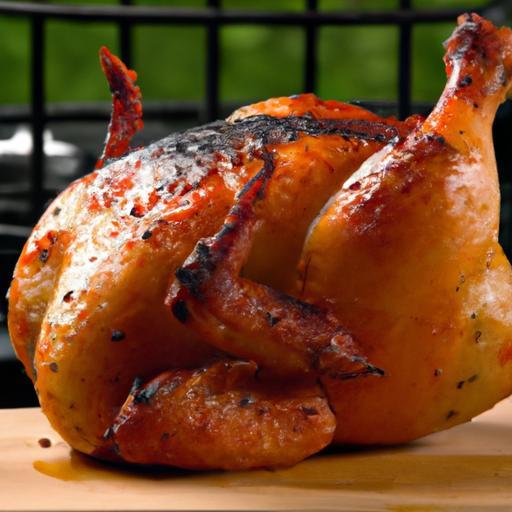
Patience is key. Grill the chicken for about 1 hour to 1 hour 15 minutes, checking internal temperature with a meat thermometer inserted into the thickest part of the thigh-it should read 165°F. For irresistibly crispy skin, finish by moving the bird directly over the heat source for the final 5-10 minutes, rotating carefully to avoid flare-ups.
Rest the chicken for 10 minutes before carving. This allows juices to redistribute, guaranteeing every bite is moist and flavorful with that classic crackling skin.
Prep and Cook Time
- Prep Time: 20 minutes (plus 4-12 hours marinating)
- Cook Time: 1 hour 15 minutes
Yield
Serves 4 to 6 hungry guests
Difficulty level
Medium – Requires grill setup knowledge and careful temperature control
Ingredients
- 1 whole fresh chicken (4-5 pounds), patted dry
- 1 can (12 oz) of amber ale or light pale ale (room temperature)
- 1/4 cup fresh lemon juice
- 2 tbsp olive oil
- 2 tbsp honey
- 4 cloves garlic, minced
- 2 tsp smoked paprika
- 1 tbsp brown sugar
- 1 tsp onion powder
- 1 tsp garlic powder
- 1/2 tsp cayenne pepper
- 1 tbsp kosher salt
- 1 tsp freshly ground black pepper
Instructions
- Prepare the marinade: In a bowl, whisk together lemon juice, olive oil, honey, and minced garlic.
- Marinate the chicken: Place the chicken in a large resealable bag or shallow dish and pour marinade over it. Make sure to coat inside and out. Refrigerate for 4-12 hours to infuse flavors deeply.
- Mix the dry rub: Combine smoked paprika,brown sugar,onion powder,garlic powder,cayenne,salt,and black pepper in a small bowl.
- Remove the chicken: Take the chicken out of the marinade, pat dry thoroughly with paper towels to ensure crispy skin.
- Apply dry rub: Generously rub the seasoning blend all over the chicken, including cavity and under the skin if possible.
- Prepare the grill: Set your grill for indirect heat, maintaining 350°F-375°F. Open a can of beer and pour out (or drink) about half.Place the chicken cavity over the can, standing upright on the grill’s cooler side.
- Grill the chicken: Cover and cook for 1 to 1 hour 15 minutes. Use a meat thermometer to check for an internal temperature of 165°F in the thigh.
- Crisp the skin: For the last 5-10 minutes,carefully move the chicken briefly over direct heat,rotating to crisp evenly but watch for flare-ups.
- Rest and serve: Remove chicken from grill and let rest 10 minutes before carving to lock in juices.
Tips for Success
- Choose fresh, room-temperature beer: This creates a gentle steaming effect inside the chicken.
- Do not skimp on drying the skin: For maximum crispiness, moisture is the enemy.
- Use a reliable meat thermometer: To avoid dry meat, never guess doneness.
- Make ahead: Marinate overnight for convenience and deeper flavor.
- Adjust the rub: Add ground coriander or cumin for an earthy twist, or swap honey for maple syrup for richer sweetness.
Serving Suggestions
Serve this succulent beer can chicken with vibrant sides like grilled corn on the cob, a fresh herb and tomato salad, or creamy garlic mashed potatoes.garnish with freshly chopped parsley and lemon wedges to brighten the presentation. A light drizzle of your favorite hot sauce or a smoky barbecue sauce on the side elevates each bite.

| Nutrient | Per Serving |
|---|---|
| Calories | 420 kcal |
| Protein | 45 g |
| Carbohydrates | 6 g |
| Fat | 20 g |
For more expert grilling techniques, check out our Perfect Grilled Vegetables Guide. For detailed facts about beer styles and their flavor profiles, visit the BeerAdvocate official website.
Q&A
Ultimate Guide to Juicy Beer Can Chicken on the Grill: Q&A
Q1: What exactly is beer can chicken, and why is it so popular on the grill?
A1: Beer can chicken is a grilling technique where a whole chicken is cooked upright with an open beer can inserted into its cavity. The beer inside steams the chicken from the inside out, keeping the meat incredibly moist while the grill crisps up the skin to golden perfection.It’s popular because it’s a simple method that delivers juicy, flavorful chicken with minimal fuss and maximum wow factor.
Q2: Can I use any type of beer for beer can chicken?
A2: Absolutely! The best beer choice is one you enjoy drinking because its flavors subtly influence the chicken. Light lagers and pilsners provide a mild, refreshing steam, while richer ales or IPAs can add more robust, hoppy notes.The key is to use a beer with balanced flavors that complement the chicken without overpowering it.
Q3: how do I prepare the chicken for beer can grilling?
A3: Start by rinsing and patting the chicken dry. Remove any giblets and trim excess fat. Season generously with your favorite dry rub or a simple mix of salt, pepper, garlic powder, and paprika. Then open a cold can of beer, pour out (or drink!) about half the contents, and insert the can into the chicken cavity. Carefully place the upright chicken on the grill and let the magic happen.
Q4: What’s the ideal grill setup for beer can chicken?
A4: use a two-zone heat setup on a gas or charcoal grill. One side should be hot for searing, around 400°F (204°C), while the other is cooler, about 300°F (149°C), for indirect cooking. start the chicken over indirect heat,standing upright on the beer can,so it cooks evenly while steaming from inside. Close the lid and avoid lifting it too often, preserving the heat and smoke for optimal flavor.
Q5: How long does it take to cook beer can chicken on the grill?
A5: Cooking time usually ranges from 60 to 90 minutes depending on the size of your bird and grill temperature.The internal temperature should reach 165°F (74°C) in the thickest part of the thigh without touching bone. Using a reliable meat thermometer is essential to ensure perfectly cooked, juicy chicken.
Q6: Can I use other liquids instead of beer for this method?
A6: While traditional beer can chicken calls for beer, you can experiment with other flavorful liquids like sparkling water infused with herbs, chicken broth, or even apple cider. These alternatives also create steam inside the chicken,keeping it moist,but the distinctive taste of beer is hard to beat if you want that authentic flavor.
Q7: Any tips for achieving extra crispy skin?
A7: For a crispy skin, start with a dry chicken by patting it thoroughly before seasoning. applying a light coat of oil or butter on the skin helps with browning. Also, resist the urge to constantly open the grill lid-keeping the heat steady allows the skin to crisp evenly. During the last 10-15 minutes, you can move the chicken closer to direct heat for a brief sear if it needs a little extra crunch.
Q8: how do I safely remove the chicken from the beer can?
A8: Use heat-resistant gloves or tongs with a steady grip. Carefully lift the chicken straight up to avoid spilling hot liquid or losing the beer can’s support. Place it on a cutting board and let it rest for 10 minutes before carving.Resting helps redistribute the juices and makes carving smoother.
Q9: What sides pair best with beer can chicken?
A9: The juicy, smoky flavors of beer can chicken shine alongside grilled vegetables like corn on the cob, asparagus, or bell peppers. Refreshing salads with crisp greens and citrus vinaigrettes provide a radiant contrast. Starchy sides like creamy mashed potatoes or grilled sweet potatoes round out the meal beautifully.
Q10: Any creative twists to try with beer can chicken?
A10: For an extra flavor punch, stuff the beer can with aromatics such as garlic cloves, fresh herbs (rosemary, thyme), or citrus slices before inserting it into the chicken cavity. you can also experiment with different spice rubs-think smoky chipotle, tangy lemon pepper, or fragrant Moroccan blends. Each variation transforms the classic beer can chicken into a signature smoky masterpiece.
To Wrap It Up
Mastering the art of juicy beer can chicken on the grill is no longer just a backyard barbecue dream-it’s your new go-to for impressing friends and family with bold flavor and tender, fall-off-the-bone goodness. Armed with this ultimate guide, you’re ready to elevate your grilling game, turning a simple whole chicken and a can of beer into a mouthwatering centerpiece. So fire up the coals, crack open your favorite brew, and let the magic of beer can chicken transform your next cookout into an unforgettable feast. Happy grilling!