
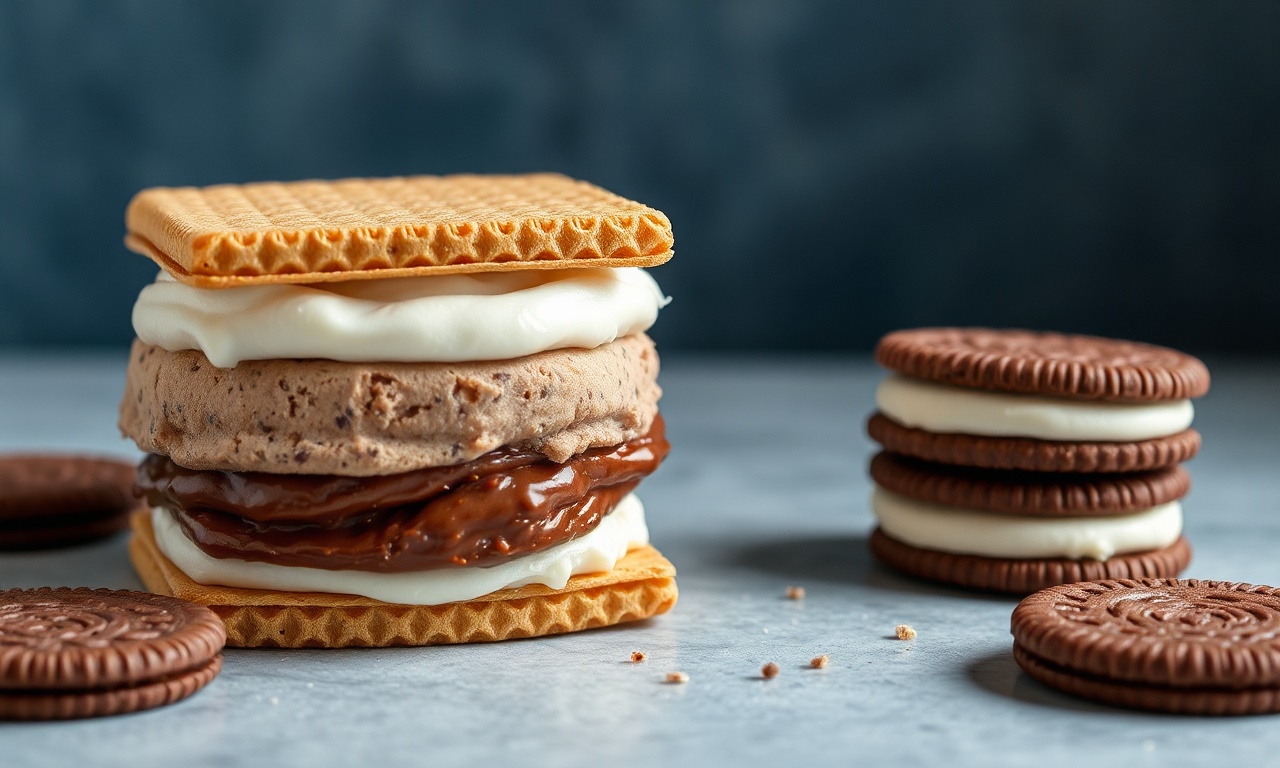
There’s something irresistibly nostalgic about biting into a classic chocolate wafer ice cream sandwich—a perfect marriage of creamy sweetness and crisp, cocoa-kissed cookies that has delighted generations. In “Timeless Treats: Crafting Classic Chocolate Wafer Ice Cream Sandwiches,” we journey through the art of creating this iconic dessert, exploring the simple yet precise steps that transform humble ingredients into a beloved summertime staple. Whether you’re a seasoned ice cream enthusiast or a curious kitchen adventurer, this guide will inspire you to craft your own hand-held pockets of frozen bliss, celebrating a treat that’s as enduring as it is delicious.
- Prep and Cook Time for Classic Chocolate Wafer Ice Cream Sandwiches
- Yield
- Difficulty Level
- Ingredients for Classic Chocolate Wafer Ice Cream Sandwiches
- Instructions
- Tips for Success with Classic Chocolate Wafer Ice Cream Sandwiches
- Creative Variations to Elevate Your Classic Ice Cream Sandwich Experience
- Serving Suggestions
- Q&A about Classic Chocolate Wafer Ice Cream Sandwiches
- The Conclusion
Classic chocolate wafer ice cream sandwiches are a joyful treat that blend nostalgia with timeless indulgence. The key to creating the perfect crispy yet tender wafer is a careful selection process that balances texture and flavor. Paired with a luscious, creamy ice cream filling, this dessert elevates simple ingredients into an irresistible delight that will enchant every palate. The history of ice cream itself is a fascinating culinary journey, with early forms dating back to ancient China and evolving through various cultures and innovations to become the frozen treat we know and love today. For a deeper dive into its origins, you can explore the history of ice cream on Wikipedia.
Prep and Cook Time for Classic Chocolate Wafer Ice Cream Sandwiches
Prep: 30 minutes | Cook: 12 minutes | Freeze: 4 hours minimum
Yield
Makes approximately 12 classic sandwiches (24 wafers + filling)
Difficulty Level
Medium – ideal for those comfortable with baking and freezing techniques
Ingredients for Classic Chocolate Wafer Ice Cream Sandwiches
- 1 cup all-purpose flour, sifted
- ¾ cup unsweetened cocoa powder, high-quality
- 1 tsp baking powder
- ½ tsp sea salt
- 3 large egg whites, at room temperature
- ¾ cup granulated sugar
- 6 tbsp unsalted butter, melted and slightly cooled
- 1 tsp pure vanilla extract
- 1 ½ cups heavy cream, chilled
- ⅔ cup confectioners’ sugar, sifted
- 1 tsp vanilla bean paste (or pure vanilla extract)
Instructions
- Preheat your oven to 350°F (175°C). Line two baking sheets with parchment paper or silicone mats to ensure easy removal and even baking.
- Whisk together the flour, cocoa powder, baking powder, and salt in a medium bowl. Set aside.
- In a clean, dry mixing bowl, beat the egg whites until soft peaks form using a hand or stand mixer on medium speed.
- Gradually add the granulated sugar, continuing to beat until glossy stiff peaks form. This meringue base is crucial for wafer crispness and lightness.
- Gently fold the cocoa-flour mixture into the meringue in three additions, taking care to preserve the aeration using a rubber spatula.
- Drizzle the melted butter and vanilla extract over the batter and fold just until combined and smooth—avoid overmixing.
- Using a piping bag or spoon, drop tablespoon-sized mounds of batter onto prepared sheets, spacing about 2 inches apart to allow for spreading. Flatten slightly with a spatula for uniform shape.
- Bake for 10-12 minutes, watching closely, until wafers become firm around edges but remain slightly soft in the center.
- Cool the wafers wholly on wire racks. They will crisp further upon cooling, achieving that signature snap.
- To prepare the ice cream filling, whip the chilled heavy cream on medium speed until it begins to thicken.
- Add the confectioners’ sugar and vanilla bean paste, then increase the mixer speed to high, whipping until soft peaks form—smooth, creamy, and luscious.
- Assemble the sandwiches by spreading or piping a generous dollop (about 2 tablespoons) of the whipped cream filling onto one wafer, then gently pressing another wafer on top to create a sandwich.
- Wrap each sandwich individually in plastic wrap or parchment paper to protect their texture, then place in an airtight container and freeze for at least 4 hours, preferably overnight.
- Before serving, allow sandwiches to soften slightly at room temperature for 5 minutes to reveal their creamy texture contrasted with crisp wafers.
Tips for Success with Classic Chocolate Wafer Ice Cream Sandwiches
- Choose quality cocoa powder: Use Dutch-processed cocoa for a rich, mellow flavor and darker color, enhancing wafer depth.
- Room temperature eggs: They help achieve the perfect meringue consistency that ensures wafer lightness and crispness.
- Whip cream just right: Avoid overwhipping to butter. You want a fluffy, stable whipped cream that holds shape yet melts pleasantly on the tongue.
- Freeze sandwiches thoroughly: Wrapping each sandwich prevents freezer burn and absorbs any external odors, preserving your dessert’s clean, classic flavor.
- Make-ahead ease: Bake and freeze wafers separately, then assemble sandwiches on demand, freezing assembled sandwiches again for fast treats.
Creative Variations to Elevate Your Classic Ice Cream Sandwich Experience
When it comes to Classic Chocolate, Infuse Your Filling: Blend freshly crushed mint leaves or espresso powder into the whipped cream to add fresh or bold caffeine notes. Alternatively, fold in finely chopped nuts like toasted almonds or pistachios for an exciting crunch contrast.
In the context of Classic Chocolate, Dip and Decorate: After assembly, briefly dip sandwich edges in melted dark or white chocolate and roll in colorful sprinkles, crushed freeze-dried fruits, or shredded toasted coconut for a festive finish.
Around Classic Chocolate, Flavor Swaps: Swap the whipped cream filling for homemade vanilla bean ice cream or chocolate gelato to bring new depth. For a dairy-free twist, try coconut cream whipped with a touch of maple syrup and vanilla extract.
Serving Suggestions
Regarding Classic Chocolate, Present these timeless treats on a rustic wooden platter or vintage-style cake stand to evoke nostalgic charm. Garnish the plate with fresh berries, edible flowers, or a dusting of cocoa and powdered sugar. Pair with a glass of cold milk, espresso, or a fruity sparkling mocktail for a balanced indulgence that amazes.
| Nutrient | per Sandwich |
|---|---|
| Calories | 220 |
| Protein | 3g |
| Carbohydrates | 28g |
| Fat | 10g |
When it comes to Classic Chocolate, Discover more delightful dessert recipes and expert tips on our Classic Dessert Recipes page. For additional insights on the science behind perfect chocolate baking, visit cook’s Illustrated.
Q&A about Classic Chocolate Wafer Ice Cream Sandwiches
Q&A: The Best Classic Chocolate Wafer Ice Cream Sandwiches
In the context of Classic Chocolate, Q1: What makes chocolate wafer ice cream sandwiches a timeless treat?
A1: Chocolate wafer ice cream sandwiches have an enduring charm because they perfectly blend contrasting textures – the crisp, delicate snap of the wafer and the creamy, cool softness of the ice cream. This classic combo evokes nostalgia while remaining endlessly satisfying, making it a favorite across generations.
Q2: What key ingredients define a classic chocolate wafer ice cream sandwich?
A2: The essential components are simple yet beloved: rich cocoa powder or melted chocolate for the wafer’s dark hue and bittersweet flavor, quality flour for the wafer’s tender crispness, and pure vanilla or your preferred ice cream flavor for that smooth, creamy heart. Minimal ingredients mean the flavors shine through clearly.
Around Classic Chocolate, Q3: How do you achieve the perfect chocolate wafer texture?
A3: Achieving that light, crisp, and slightly chewy wafer requires precise baking time and temperature. The batter should be thin, spread evenly, and baked until just set and dry—too long, and the wafer becomes brittle; too short, and it’s soft. Letting wafers cool completely also helps lock in that ideal snap.
Regarding Classic Chocolate, Q4: What are some insider tips for assembling ice cream sandwiches without melting mishaps?
A4: Work swiftly and keep your scooped ice cream very cold or slightly firm—too soft, and it melts into a gooey mess. Place a thin, even layer of ice cream on one wafer, then gently press the second wafer on top. Wrap sandwiches individually and freeze instantly to set the shape and chill the treat perfectly.
When it comes to Classic Chocolate, Q5: Can I experiment with ice cream flavors beyond vanilla in these sandwiches?
A5: Absolutely! While classic vanilla lets the chocolate wafer shine, feel free to explore. Mint chocolate chip, salted caramel, strawberry, or even espresso ice cream can add exciting new dimensions to your sandwich. Just remember to balance the flavor intensity so one doesn’t overpower the other.
Q6: How can I store chocolate wafer ice cream sandwiches to maintain freshness?
A6: Once assembled, wrap each sandwich tightly in parchment or wax paper, then place them in an airtight container or freezer bag. Keeping air out prevents freezer burn and preserves the wafer’s crispness. Stored this way, they can last up to two weeks while still tasting fresh and delicious.
Q7: What’s a creative way to elevate the presentation of these classic treats?
A7: Roll the edges of the sandwich in mini chocolate chips, crushed nuts, or sprinkles for a playful touch. You can also drizzle melted chocolate over the top wafer or dust with powdered sugar. For parties, serve them on vintage plates or stacked on a rustic wooden board to emphasize the nostalgic vibe.
Q8: Are there any common pitfalls to avoid when making these sandwiches at home?
A8: Overbaked wafers are a frequent stumble—they become too dry and crumbly. On the flip side, underbaked wafers lack structure. Additionally, spreading ice cream when it’s too soft leads to messiness. Patience with baking times and working in a cool environment help keep your process smooth and your sandwiches picture-perfect.
Q9: How do the cocoa and sugar ratios affect the wafer’s flavor and texture?
A9: Cocoa powder brings deep chocolate richness but can dry out the wafer if overused. Sugar balances this by adding sweetness and tenderness. Striking the right harmony creates a wafer that’s flavorful without being bitter and perfectly crisp without being crumbly.
Q10: Why is this dessert ideal for summer gatherings?
A10: Chocolate wafer ice cream sandwiches are handheld, portable, and refreshing—perfect for warm-weather delight. They cool you down without fuss, offer an approachable indulgence for all ages, and their nostalgic appeal sparks conversations, making them a star at picnics, barbecues, and casual get-togethers.
The Conclusion
As the final bite of your homemade chocolate wafer ice cream sandwich melts away, you’re reminded that some flavors truly stand the test of time. Crafting these classic treats isn’t just about combining ingredients; it’s about embracing a tradition built on simple pleasures and nostalgic moments. Whether enjoyed on a sunny afternoon or as a sweet finale to an evening, these timeless delights invite you to savor more than just dessert – they offer a taste of childhood memories and the joy of creating something lovingly from scratch. So next time you crave that perfect balance of crisp wafers and creamy ice cream, you’ll know exactly how to bring a little piece of classic happiness right into your kitchen.
See also: Classic Chocolate