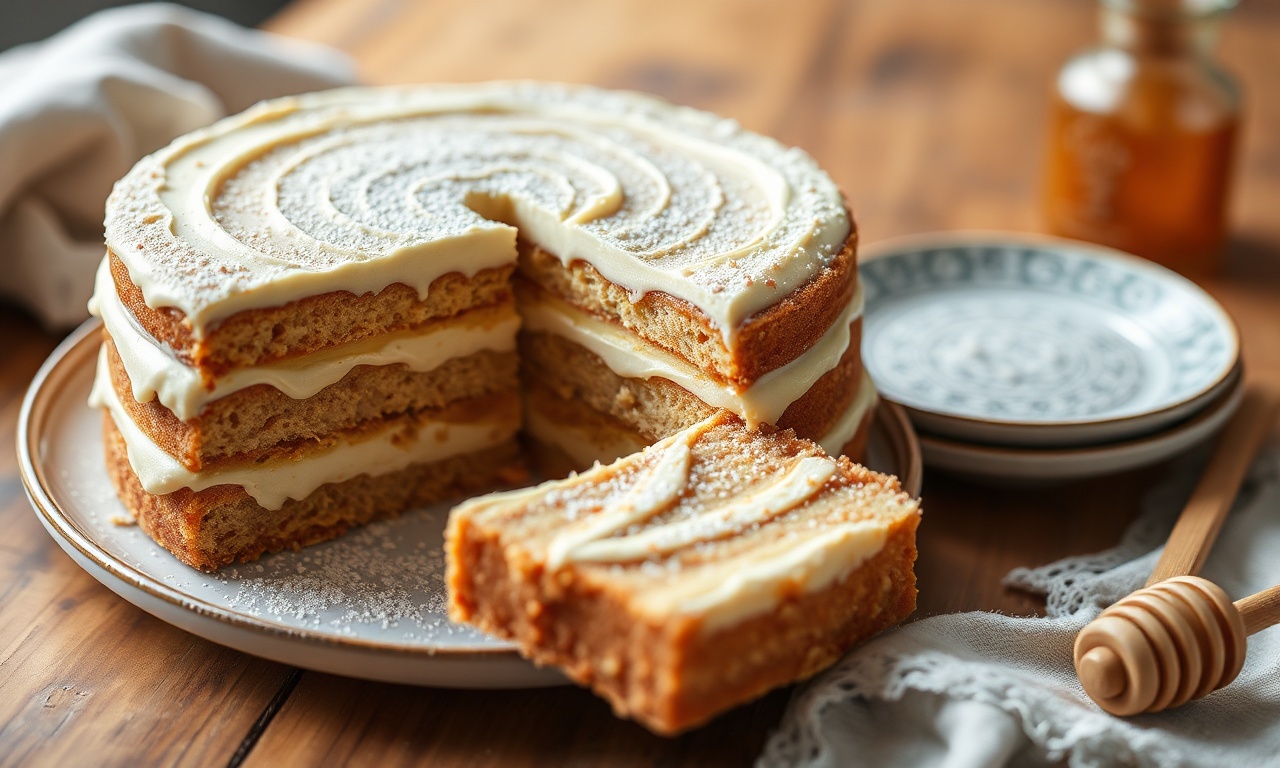
Medovik Magic is the classic Russian honey cake built from thin layers and a tangy, creamy filling. The name fits the result: as the cake rests, layers soften and the honey flavor turns rich and mellow.
- Prep Overview for Medovik Magic
- Ingredients You Need (Classic Medovik)
- Step-by-Step Instructions for Medovik Magic
- 1) Cook the Honey Mixture
- 2) Add Eggs and Activate Baking Soda
- 3) Fold in Flour Until a Soft Dough Forms
- 4) Roll Thin Layers and Keep Sizes Even
- 5) Bake Until Light Golden
- 6) Make the Sour Cream-Honey-Style Filling
- 7) Assemble and Press Lightly
- 8) Chill to Meld Flavor (This Is Where Magic Happens)
- Tips for Success (Avoid Common Medovik Mistakes)
- Serving and Storage
- Nutrition Snapshot
- FAQ
- Thin layers matter: roll dough evenly for balanced bake time.
- Honey + soda timing: careful mixing gives the signature lightness.
- Resting is non-negotiable: chill long enough for tender layers.
- Sour cream cream works: its acidity balances honey sweetness.
Many bakers love Medovik because it rewards patience. You bake multiple sheets, then stack them with filling. After chilling, every slice shows crisp-gold layers softened into a spoonable texture.
To keep this recipe reliable, follow the method and control the key variables: dough thickness, oven heat, and cream consistency. If you do that, your Medovik Magic will taste like the classic version served for celebrations across Eastern Europe. For background on honey’s culinary role, see honey.
Prep Overview for Medovik Magic
Plan the schedule before you start. You will bake layers in short bursts, then chill the assembled cake for hours so the filling can soak in.
Most cooks need fewer active minutes than they expect. The work comes in rolling and stacking, not in constant monitoring. If you want a shortcut mindset, treat it like pastry mise en place: measure, prep tools, and move calmly.
- Preparation: 40 minutes
- Cooking: 15 minutes (for all layers)
- Chilling: 6 hours to overnight
- Yield: 8 to 10 slices
Ingredients You Need (Classic Medovik)
This Medovik Magic uses pantry basics plus honey and sour cream. Keep ingredients at the right temperatures to avoid texture problems.
Honey contributes flavor and moisture, and sour cream provides tang and creaminess. For a quick science view of sour dairy cultures, check sour cream.
Cake Layers
- 3 large eggs, room temperature
- 1 cup granulated sugar
- 4 tbsp unsalted butter
- 3 tbsp honey (wildflower or buckwheat for deeper taste)
- 1 tsp baking soda
- 2 cups all-purpose flour, sifted
Cream Filling
- 2 cups full-fat sour cream, chilled
- 1 cup heavy cream, cold
- 3/4 cup powdered sugar, sifted
- 1 tsp pure vanilla extract
Step-by-Step Instructions for Medovik Magic
Work in order and keep heat controlled. The honey-butter-sugar step thickens slightly and gives the batter its classic color.
When baking thin sheets, speed matters. Each layer browns quickly, so preheat fully and keep an eye on edges.
1) Cook the Honey Mixture
Combine honey, butter, and granulated sugar in a heatproof bowl over a simmering water bath. Stir until smooth and fully melted, then remove from heat.
This syrup step helps distribute sweetness and supports even baking. For general guidance on water-bath heating, see bain-marie.
2) Add Eggs and Activate Baking Soda
Whisk eggs into the warm honey mixture slowly to avoid curdling. Then add baking soda and whisk until the mixture looks lighter.
The soda reacts with acidity and heat, which helps the layers develop a tender structure. If you want a chemistry refresher, review baking soda.
3) Fold in Flour Until a Soft Dough Forms
Sift flour and fold it into the mixture in small batches. Stop when the dough becomes pliable and smooth; overmixing can make layers tough.
At this point, the dough should feel elastic but not sticky like batter. If it feels too wet, add flour one tablespoon at a time.
4) Roll Thin Layers and Keep Sizes Even
Divide dough into 7–8 pieces. Roll each piece into a thin circle, about 8–9 inches wide, aiming for consistent thickness across the surface.
Uniform thickness helps each layer bake at the same rate. For more on dough structure, you can review wheat and how gluten forms through kneading and hydration.
5) Bake Until Light Golden
Bake layers on parchment at 350°F (175°C) for about 2–3 minutes. Pull them as soon as they turn lightly golden at the edges.
Cool fully before stacking. Warm layers can tear when you move them, and the texture can shift during assembly.
6) Make the Sour Cream-Honey-Style Filling
Whip heavy cream to soft peaks in a chilled bowl. In a separate bowl, mix sour cream, powdered sugar, and vanilla until smooth.
Fold whipped cream into the sour cream base until you get a thick, silky filling. For fermentation-related background on cultured dairy products, see fermented milk.
7) Assemble and Press Lightly
Spread a generous layer of cream between cake sheets. Press gently so the layers adhere without cracking the thin cake.
Save crumbs from trimmed edges for garnish. The crumbs also help you cover small gaps and create a neat, classic finish.
8) Chill to Meld Flavor (This Is Where Magic Happens)
Wrap the assembled cake and refrigerate for at least 6 hours, ideally overnight. As it chills, the cream hydrates the cake layers and softens them evenly.
Don’t rush this step. If you cut early, layers taste dry and the stack may feel unstable.
Tips for Success (Avoid Common Medovik Mistakes)
Small changes can affect the final slice. Focus on thickness, temperature, and chilling time, then adjust only one variable at a time.
Use a reliable kitchen scale if you want repeatable rounds. Weighing each dough portion often beats “eyeballing” thickness, especially for first-timers.
- Honey quality: use a flavorful honey you enjoy tasting.
- Egg temperature: room-temp eggs mix smoother with less curdling risk.
- Light hand rolling: flour the surface lightly to avoid sticking.
- Chill longer for best texture: 12–18 hours gives the softest layers.
Serving and Storage
Serve Medovik Magic chilled or slightly softened at cool room temperature. For clean slices, wipe your knife between cuts and use a gentle sawing motion.
Store the cake covered in the refrigerator. It keeps well for 3–4 days because the filling continues hydrating the layers over time.
Nutrition Snapshot
Nutrition varies based on honey type, sugar amounts, and how much cream you spread. The values below give a useful estimate for planning.
Use this as a reference point, not a strict medical number. If you need exact macros, calculate with your specific brands and portion sizes.
| Nutritional Facts (per serving) | Amount |
|---|---|
| Calories | 320 kcal |
| Protein | 5 g |
| Carbohydrates | 38 g |
| Fat | 15 g |
FAQ
What makes Medovik Magic different from other honey cakes?
Medovik uses multiple thin baked layers stacked with filling. That layer count, plus long chilling, creates the signature tender texture and balanced honey-cream flavor.
Many honey cakes use one thick layer. Medovik Magic focuses on thin sheets so moisture spreads evenly through the stack.
Can I use less chilling time?
You can cut sooner, but the cake may taste drier and feel less cohesive. Six hours helps, and overnight chilling gives the best classic softness.
During rest, cream hydrates cake layers and flavors blend. If you want the most “melt-in-mouth” result, plan ahead.
Why does baking soda matter in the layer dough?
Baking soda helps lighten the dough when mixed into the honey mixture. It supports a tender crumb instead of dense, heavy layers.
For best results, mix carefully and don’t rush the baking step after dough forms.
What honey works best for classic flavor?
Use a honey you enjoy eating. Wildflower and buckwheat options often give deeper aroma and color.
Honey flavor varies by source, so your choice affects the final taste of Medovik Magic.
How do I prevent layers from breaking during assembly?
Let layers cool fully before stacking. Warm layers tear easily, especially because they are thin by design.
Also press gently with the cream. Heavy pressure can crack delicate sheets and create uneven edges.
See also: Medovik Magic