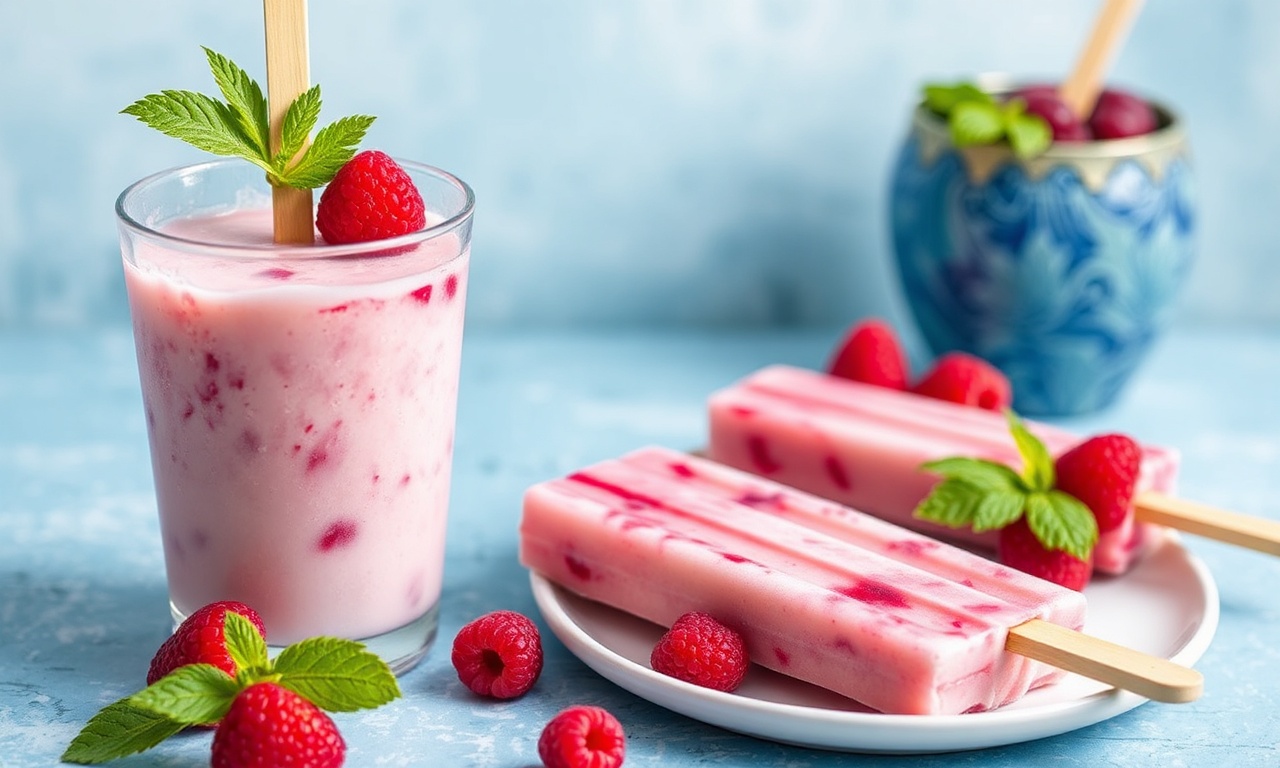
Raspberry and coconut milk popsicles hit two targets at once: they taste fresh and fruity and freeze into a creamy, scoop-friendly texture. The method stays simple—blend, pour, and freeze—so you get a dessert that feels store-bought good, but you control sweetness and texture.
- Why Raspberry + Coconut Milk Works for No-Churn Pops
- What “No-Churn” Really Means (and What Controls Texture)
- Ingredients for 8 Popsicles (About 3–4 oz Each)
- Tools and Setup That Prevent Mess and Sticking
- 7-Minute Raspberry Coconut Popsicles: Step-by-Step
- Step 1: Blend the Base
- Step 2: Strain for Seedless Smoothness (Optional)
- Step 3: Taste and Adjust Sweetness
- Step 4: Pour, Freeze, and Set the Timing
- Step 5: Unmold Cleanly
- How to Get “No-Churn” Creaminess Every Time
- Use Full-Fat Coconut Milk (Not Light)
- Blend Until It Looks Fully Glossy
- Freeze Long Enough for Stable Ice Structure
- Sweetness Control: Make It Tart, Balanced, or Dessert-Sweet
- Texture Options: Seedless, Marbled, or Thick and Spoonable
- Make-Ahead, Storage, and Serving Tips
- Nutrition Snapshot (Estimated)
- Expert-Led Troubleshooting
- FAQ: Raspberry Coconut Popsicles
- Faster than baking: Blend in about 7 minutes, then freeze.
- Creamy without dairy: Full-fat coconut milk emulsifies for a smooth mouthfeel.
- Bright raspberry flavor: Lemon juice and vanilla keep the taste vivid after freezing.
- Texture control: Strain for seedless silk, or blend for a more natural berry bite.
Why Raspberry + Coconut Milk Works for No-Churn Pops
This combo performs because fat and fruit chemistry balance each other. Coconut milk adds fat, which helps slow the formation of harsh ice crystals, so your pops stay tender instead of icy. Meanwhile, raspberries bring both tartness and natural sugars, which keeps flavor lively even when the pops get cold.
Freezing changes how we perceive sweetness and aroma. Cold temperatures mute some flavor notes, so a small amount of lemon juice and a touch of vanilla matter. If you’ve ever tasted fruit and found it “flatter” after freezing, that’s why this recipe uses brighteners on purpose.
For background on why food flavors shift with temperature, see flavor. For fruit acidity concepts, acidity explains why tart ingredients can make frozen fruit taste “brighter.”
What “No-Churn” Really Means (and What Controls Texture)
No-churn popsicles still freeze into structure. The difference is that you don’t whip air or cook a custard base. Instead, your texture comes from how you blend (emulsion), what you use (fat and solids), and how long you freeze (ice crystal growth).
To keep texture creamy, two things matter most: use full-fat coconut milk and blend until the mixture looks uniformly smooth. Some coconut brands separate in the can, so you must stir or shake before measuring. If you skip that step, you’ll get fatty streaks and uneven freezing.
Ice crystal behavior ties directly to freezing and phase changes. If you want the science behind why time and temperature affect the final texture, read freezing.
Ingredients for 8 Popsicles (About 3–4 oz Each)
You’ll build a small, reliable base that tastes great on day one and still holds up after a week in the freezer. Fresh or frozen raspberries both work, but frozen berries often blend more evenly straight from the bag.
This recipe aims for a bright, creamy balance: fruit-forward with a gentle coconut finish. You’ll sweeten after blending by tasting the mixture, because raspberry sweetness varies by brand and ripeness.
Base Ingredients
- 2 cups raspberries (fresh or frozen)
- 1 can (13.5–14 oz) full-fat coconut milk
- 2–4 tbsp honey or maple syrup (start at 2 tbsp, then adjust)
- 1–2 tbsp fresh lemon juice
- 1 tsp vanilla extract
- Pinch of fine sea salt
Optional Add-Ins (Choose One Direction)
- Seedless texture: strain the raspberry mixture through a fine-mesh sieve
- Thicker “sherbet” body: add 1 tbsp chia seeds (blend briefly so they disperse)
- More tropical aroma: add 1–2 tbsp shredded coconut and blend lightly
If you add chia, you’ll feel a slightly thicker set. That comes from chia’s natural gelling ability. For a quick reference on chia composition and behavior, see chia seed.
Tools and Setup That Prevent Mess and Sticking
Good pops start with good setup. Use popsicle molds that hold at least 3–4 ounces each, and keep a freezer space cleared so the molds freeze flat.
Plan for release. If your molds often stick, run warm water on the outside before pulling. Avoid forcing pops out cold—this causes surface cracks and watery edges.
Must-Have Tools
- High-speed blender
- Fine-mesh sieve (optional)
- Rubber spatula
- Popsicle molds and sticks
Helpful Prep Step: Stabilize Your Coconut Milk
Open the can and stir until fully uniform. Coconut milk can separate into creamy fat and watery liquid. If you measure before mixing, your final pops can freeze unevenly.
This is the most common “why is my batch icy?” mistake. Coconut fat and water need to emulsify in the blender, and the blend needs consistent starting ingredients.
7-Minute Raspberry Coconut Popsicles: Step-by-Step
This process stays fast because you skip cooking. You’ll blend until smooth, strain if you want silkier texture, sweeten by taste, then freeze.
Work with the goal of a uniform puree. When the mixture looks glossy and fully blended, the fat and fruit distribute evenly, which improves freeze stability.
Step 1: Blend the Base
Add raspberries, coconut milk, lemon juice, vanilla, honey (or maple syrup), and salt to a blender. Blend on high until the mixture looks smooth and creamy, usually 40–60 seconds.
If you like a more “natural berry” texture, you can blend a bit less. Still, aim for fewer visible raspberry chunks so the pops freeze evenly across each mold.
For terminology related to emulsions, which explain why coconut fat helps texture, review emulsion.
Step 2: Strain for Seedless Smoothness (Optional)
Pour the puree through a fine-mesh sieve into a bowl. Press gently with a spatula to extract the liquid and leave behind seeds.
Straining reduces tiny seed bits that can feel gritty in very cold pops. If you love the authentic raspberry mouthfeel, skip this step—your pops will still taste great.
Step 3: Taste and Adjust Sweetness
Raspberry sweetness varies. Taste the mixture at room temperature and adjust honey or maple syrup in small steps, like 1 tablespoon at a time.
Frozen flavor tastes slightly less sweet, so if you prefer a dessert-like pop, you need a bit more sweetness than you’d use for a smoothie.
Step 4: Pour, Freeze, and Set the Timing
Fill molds, leaving a small gap at the top for expansion. Insert sticks, then freeze immediately.
Freeze for at least 6 hours. For clean unmolding and the creamiest bite, freeze overnight.
Step 5: Unmold Cleanly
Run warm water over the outside of each mold for 20–30 seconds. Then pull gently without twisting.
If a pop doesn’t release, warm it a few seconds more. Forcing it cold often causes cracks that let melted edges freeze back into a rough surface.
How to Get “No-Churn” Creaminess Every Time
When your pops come out icy, the problem usually traces to fat quality, blend thoroughness, or freezing time. This recipe avoids most issues by using full-fat coconut milk and blending for complete emulsification.
Think of it as a system. Each step supports texture, and skipping even one step can shift your final result toward a harder, icier bite.
Use Full-Fat Coconut Milk (Not Light)
Light coconut milk has less fat and fewer solids. Less fat means less creaminess and a higher chance of icy texture.
Choose a can labeled full-fat or regular. Then stir well before blending.
Blend Until It Looks Fully Glossy
A cloudy mixture usually means the coconut fat hasn’t fully emulsified with the raspberry puree. Blend longer if you still see streaks or lumps.
For best results, scrape the blender walls halfway through blending using a spatula, then blend again for 10 seconds.
Freeze Long Enough for Stable Ice Structure
Pops that freeze for only a couple of hours can feel soft and slushy, then tighten unevenly later. Give them time so the mixture forms consistent ice crystals.
Set a freezer schedule: pour today, eat tomorrow. That timing gives you reliable results.
Once your freezer is stable, texture improves quickly. If you frequently get inconsistent results across batches, check that your freezer runs cold enough and that the door stays closed during freezing.
For more general cold-storage ideas and why fluctuations matter, you can review refrigeration.
Sweetness Control: Make It Tart, Balanced, or Dessert-Sweet
The easiest way to control sweetness is to sweeten after blending. At that point, you can taste real fruit balance instead of guessing from package directions.
Start low, then adjust. Raspberry tartness and sweetness vary widely based on variety and season, so a fixed number may taste too sharp or too mild.
Quick Sweetness Guide
- 2 tbsp honey/maple: bright and tangy
- 3 tbsp: balanced dessert sweetness
- 4 tbsp: sweeter pops that taste closer to ice cream
Lemon Juice Helps More Than You Think
Lemon juice boosts perceived brightness. It also smooths the fruit flavor so the pops don’t taste “flat” once frozen.
If your raspberries are already very tart, add the full 2 tablespoons. If they taste candy-sweet, start with 1 tablespoon.
For fruit acidity background, see citric acid, which is a key reason lemon juice tastes “clean” in cold desserts.
Texture Options: Seedless, Marbled, or Thick and Spoonable
You can customize more than taste. You can also choose mouthfeel—smooth and seedless, marbled with visible raspberry ribbons, or thicker with chia.
Pick one style per batch so the texture stays predictable.
Seedless Raspberry Pops
Strain after blending. This gives a silkier bite and removes the gritty feeling that some people dislike in frozen berry desserts.
Seedless pops still taste like raspberry—you just get less chew from tiny seeds.
Marbled Raspberry-Coconut Swirls
For a marbled look, blend raspberries separately into a thinner puree, then gently swirl into coconut milk before pouring. Use a light hand so the swirl doesn’t fully disappear.
Marbling usually looks best when you freeze quickly and avoid over-mixing at the final stage.
Thick Pops with Chia
Add chia to the blender with the other ingredients. Then blend just enough to distribute evenly—over-blending can change how chia gels.
After full freezing, chia pops feel slightly thicker and more “sherbet-like.”
Make-Ahead, Storage, and Serving Tips
These pops freeze well, and they’re ideal for meal prep. You’ll get the best texture when you store them in a way that prevents freezer burn and odor transfer.
Always keep molds sealed or transferred to an airtight container once frozen.
How Long They Last
Store in the freezer for up to two weeks for best flavor and texture. After that, quality can drop as ice crystals grow and freezer odors seep in.
If you plan longer storage, double-wrap or use airtight containers to reduce air exposure.
Prevent Freezer Burn
Freezer burn shows up as dry, grayish patches and can make pops taste slightly stale. It happens when air contacts the surface.
To reduce it, pack pops in a single layer first, then transfer to airtight bags or containers.
Nutrition Snapshot (Estimated)
Nutrition varies based on coconut milk brand and how much honey or maple syrup you use. Still, this gives you a useful expectation per pop.
Assuming 8 pops and 3 tbsp honey/maple total, one 3.5 oz popsicle usually falls around 100–140 calories.
If you want exact numbers, weigh your ingredients and use package labels for coconut milk and sweetener. For reference on how packaged nutrition facts are built, you can review nutrition label.
Expert-Led Troubleshooting
Most issues have simple fixes. Here are the most common symptoms and what to adjust next time.
Use these checks like a mini quality control checklist.
If your pops are still bland, check your coconut milk brand. Some brands taste more neutral, while others have a stronger coconut aroma. Your sweetener and vanilla should fit that profile.
Why Your Pops Are Icy
Icy texture usually means low fat, incomplete blending, or short freezing time. Confirm that you used full-fat coconut milk and blended until completely smooth.
Then freeze at least 6 hours. Overnight gives the most reliable results.
Why They Don’t Unmold Cleanly
Cold pops stick because the surface bonds to the mold. Warm water loosens the surface layer quickly.
If they keep sticking, try adding a small amount of neutral fat to the mold (very lightly) or use silicone molds.
Why They Separate
Separation often comes from not stirring coconut milk before blending. Other times, it comes from under-blending.
Stir the can well, then blend longer. If your blender is weaker, scrape and blend in two short rounds.
FAQ: Raspberry Coconut Popsicles
Can I use frozen raspberries?
Yes. Frozen raspberries blend easily and work year-round. For best texture, let them sit at room temperature for 5–10 minutes so the blender can puree smoothly.
Do I have to strain the mixture?
No. Straining gives a seedless, silkier finish. If you like a more authentic berry texture, skip straining and blend a bit more thoroughly.
Are these popsicles dairy-free?
Yes. They use coconut milk instead of dairy cream or milk. Always check labels on sweeteners and vanilla if you follow strict dietary rules.
How can I make them less sweet?
Start by reducing honey or maple syrup by 1 tbsp. Blend, taste, and then freeze a single test pop. Frozen fruit tastes less sweet, so you may need a small adjustment.
What’s the best way to get creamy texture?
Use full-fat coconut milk, blend until fully smooth, and freeze long enough (at least 6 hours). For maximum creaminess, freeze overnight and store airtight to protect texture.
See also: Raspberry coconut