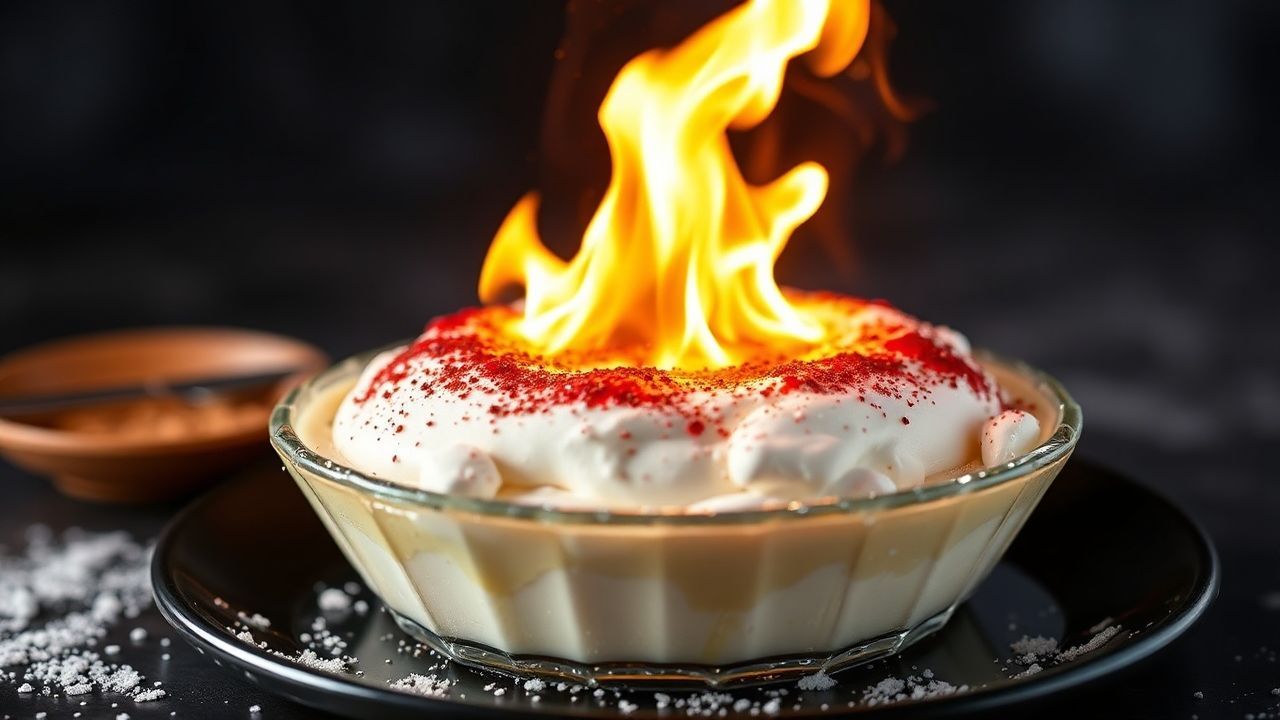
Imagine a dessert that plays with fire and cold at the same time. Baked Alaska pairs a frozen ice-cream core with a toasted meringue shell, so every slice delivers a crisp, warm outside and a cool, creamy center.
- What Is Baked Alaska (And Why It Works)
- History of Baked Alaska and Its Name
- Prep and Cook Time
- Yield and Difficulty
- Ingredients for Baked Alaska
- Instructions: Step-by-Step Baked Alaska Recipe
- Tips for Success (Avoid Common Baked Alaska Mistakes)
- Serving Suggestions: Make the Moment Count
- Q&A: Baked Alaska Recipe Basics
- What exactly is Baked Alaska?
- Why does the ice cream stay cold?
- What are the conventional components of Baked Alaska?
- Can I flavor Baked Alaska in different ways?
- Is Baked Alaska difficult to make at home?
- How do I serve it for maximum impact?
- To Wrap It Up
At a Glance
- Build fast: freeze the dome fully before meringuing.
- Insulate with thickness: a sturdy meringue reduces heat transfer.
- Toast briefly: torch or bake until golden, then serve right away.
- Mind moisture: dry whites and grease-free tools help meringue set.
Baked Alaska feels theatrical because the meringue browns in seconds while the ice cream stays cold. Chefs rely on the meringue’s low conductivity and quick surface cooking to pull off that signature contrast. If you want a dessert that wows without guesswork, this guide breaks down the technique in a practical way.
From the classic dome look to modern flavor swaps, this Baked Alaska recipe stays true to the core idea: hot exterior, chilled interior. You’ll learn prep timing, a clean meringue method, safe torching, and serving moves that keep the layers intact.
What Is Baked Alaska (And Why It Works)
Baked Alaska is built by layering cake (or cookie) under ice cream, then covering the frozen dome with whipped egg-white meringue. The meringue gets torched or baked briefly to create a golden crust.
The reason it holds up comes down to structure and heat time. Egg-white foam creates a thick, air-filled shell, and the cooking step exposes only the outside long enough to brown the surface. For more background on egg foams, see meringue.
This dessert also uses two key culinary concepts: insulation and rapid surface heating. A dense ice-cream dome has far more thermal mass than the meringue shell’s brief cook time. For a deeper look at temperature effects, review thermal conductivity.
History of Baked Alaska and Its Name
Baked Alaska gained major attention in the 19th century as a showy dessert. Many sources connect it to American dining culture and the era’s interest in dramatic “hot and cold” contrasts.
It’s also closely tied to the name “Alaska,” which became widely known after U.S. purchase in 1867. For a reliable overview of that historical context, visit Alaska Purchase.
Even when stories vary by publication, the technique stays consistent across versions: freeze first, cover, then toast or bake quickly. The enduring appeal comes from the instant visual payoff when the exterior goes golden.
Prep and Cook Time
Good timing makes the whole method easier. Plan your freezing step first, because the meringue step should happen only when the dome feels solid.
- Readiness: 45 minutes
- freezing Time: at least 4 hours (overnight works best)
- Cooking (Torched or Oven Blast): 3–5 minutes total
When you control the order—freeze, cover, then toast—you reduce melting risk. Serve immediately after browning to keep the interior at peak chill.
Yield and Difficulty
This recipe makes 6 to 8 servings, depending on how thick you slice the dome. It looks best when each cut reveals a clean layer line.
Difficulty: Advanced. You don’t need special equipment, but you do need precision with meringue texture and timing. If you’ve made stable meringue before, you’ll pick this up faster.
Ingredients for Baked Alaska
Choose high-quality ice cream, because it sets the flavor. Vanilla works for testing, and you can switch to chocolate, berry, or caramel once you’re confident.
For the cake base, use a sponge or pound cake that stays firm in the freezer. A soft, watery cake can release moisture and weaken the shell-to-core structure.
Core Ingredients
- Ice cream base: 1 quart high-quality vanilla ice cream, slightly softened
- Cake layer: 6 oz sponge cake or pound cake, cut to a 9-inch round
- Meringue: 4 large egg whites, at room temperature
- Sugar: 1 cup granulated sugar
- Cream of tartar: 1/4 teaspoon (helps stabilize the foam)
- Vanilla extract: 1 teaspoon
- Optional flavor enhancers: zest of 1 lemon OR 1 teaspoon almond extract
- Grease: neutral-flavored oil or butter, for greasing
Instructions: Step-by-Step Baked Alaska Recipe
Work in stages, and keep your tools clean. The meringue step fails most often due to grease, yolk, or timing issues.
Use a bowl you can line and un-mold easily. A 9-inch dome helps create those high meringue peaks that look dramatic on the plate.
- Prepare the base: Line a 9-inch bowl with plastic wrap, leaving an overhang. Press half of the softened vanilla ice cream into the bowl and smooth the surface. Freeze for 1 hour.
- Add the cake layer: Place the sponge cake round over the ice cream. Press gently so it adheres, then cover with remaining ice cream and smooth. Freeze until firm, at least 3 hours or overnight.
- Make the meringue: Use a clean, dry bowl. Beat egg whites until foamy, then add cream of tartar. Continue whisking until you reach soft peaks. If you want structure details, see egg white.
- Incorporate sugar: Add sugar gradually, about 1 tablespoon at a time, whisking continuously. Stop when you have stiff, glossy peaks that hold their shape. Mix in vanilla and optional zest or almond.
- Assemble: Unmold the frozen dome onto a parchment-lined baking sheet. Work quickly. Spread a thick layer of meringue over the entire dome, sealing edges at the base.
- Torch or bake: Torch until the surface turns golden, moving in slow circles (about 2–3 minutes). Alternatively, preheat the oven to 500°F (260°C), then bake for 3–5 minutes until golden.
- Serve promptly: Serve immediately. Warm toasted meringue needs a hot moment, but the ice cream needs a cold one.
If you want extra browning control, torching gives you more precision than an oven. Either method works when you keep the cooking short and the dome fully frozen.
Tips for Success (Avoid Common Baked Alaska Mistakes)
These details determine whether your meringue looks crisp and clean or turns patchy and weepy. Focus on dryness and insulation.
Expert Insight:
Also, keep ingredients and tools at the right stage. Room-temperature whites whip faster, while a fully frozen dome limits melting while you toast.
Pro-Caution:
For a meringue that holds its form, avoid yolk in the whites. Even a small amount of fat can reduce foam stability. For more on egg components and why they matter, read egg.
- Perfect the meringue: Ensure no yolk contaminates whites. Make sure bowl and whisk stay grease-free.
- Keep everything cold: Freeze the ice cream dome thoroughly. A semi-soft center melts during browning.
- Use thick meringue: A sturdy shell insulates the ice cream and browns evenly.
- Make ahead: Build and freeze the ice cream dome up to 2 days ahead. Add meringue and toast the day you serve.
- Get creative with flavors: Swap vanilla for passion fruit, chocolate, or salted caramel.
- Prevent sogginess: If your cake base seems moist, toast it very lightly before assembling.
Serving Suggestions: Make the Moment Count
Presentation matters because Baked Alaska is a “serve-something-now” dessert. Use a decorative platter, and keep a sharp knife ready for clean slices.
Garnish should stay light, so it doesn’t add extra moisture. Fresh mint, a dusting of powdered sugar, or a few berries look great and keep flavors bright.
When you bring the dessert to the table, the meringue should stay crisp on the outside while the ice cream stays firm inside. For general guidance on cooking temperatures and browning behavior, you can reference Maillard reaction.
Slice and serve immediately so guests get the warm-to-cold contrast at its best. That first bite carries the wow factor, and speed helps you protect it.
Nutritional Information
| Calories | Protein | Carbohydrates | Fat |
|---|---|---|---|
| 420 kcal | 6 g | 48 g | 22 g |
These values are estimates and will change based on ice cream brand and cake thickness. If you want tighter accuracy, calculate with your exact ingredient labels.
For related frozen dessert ideas, you can explore classic ice cream styling techniques and toppings in your own kitchen. Focus on structure first, then add garnishes that won’t melt quickly.
Q&A: Baked Alaska Recipe Basics
Use these quick answers to remove last-minute uncertainty. They cover the most common questions home cooks ask before the toast.
What exactly is Baked Alaska?
Baked Alaska is a layered dessert with cake under ice cream, then wrapped in a fluffy egg-white meringue. You toast or bake the meringue briefly to create a golden crust while keeping the ice cream frozen.
Why does the ice cream stay cold?
The meringue forms an insulating layer, and the cooking step stays short. Heat mainly browns the outside, while the frozen core has enough thermal mass to stay chilled.
What are the conventional components of Baked Alaska?
Traditionally, it uses a cake base (sponge or brownie), an ice cream dome, and a meringue made from egg whites and sugar. After assembly, you toast or bake until the shell turns golden.
Can I flavor Baked Alaska in different ways?
Yes. Switch the ice cream flavor to match the celebration, and consider flavoring the cake or adding a small amount of citrus zest to the meringue. Keep changes small until you confirm the meringue still whips well.
Is Baked Alaska difficult to make at home?
It looks advanced, but you can master it with the right order: freeze fully, use grease-free whites, and toast only until golden. If you respect timing, you can achieve a clean exterior and a cold interior.
How do I serve it for maximum impact?
Serve immediately after torching or baking. Slice cleanly, and keep garnishes minimal so you preserve the meringue’s crisp surface for that first wow bite.
To Wrap It Up
Baked Alaska delivers the rare thrill of eating fire and ice in one dessert. With a fully frozen core, a thick meringue shell, and a short toast, you get a crisp exterior and a chilled center that holds its contrast.
When you follow the sequence—freeze, assemble, whip, seal, toast, then serve—you control the outcome. Next time you want a centerpiece that feels special, bake or torch this Baked Alaska recipe and watch the golden peaks disappear one slice at a time.
See also: Baked Alaska