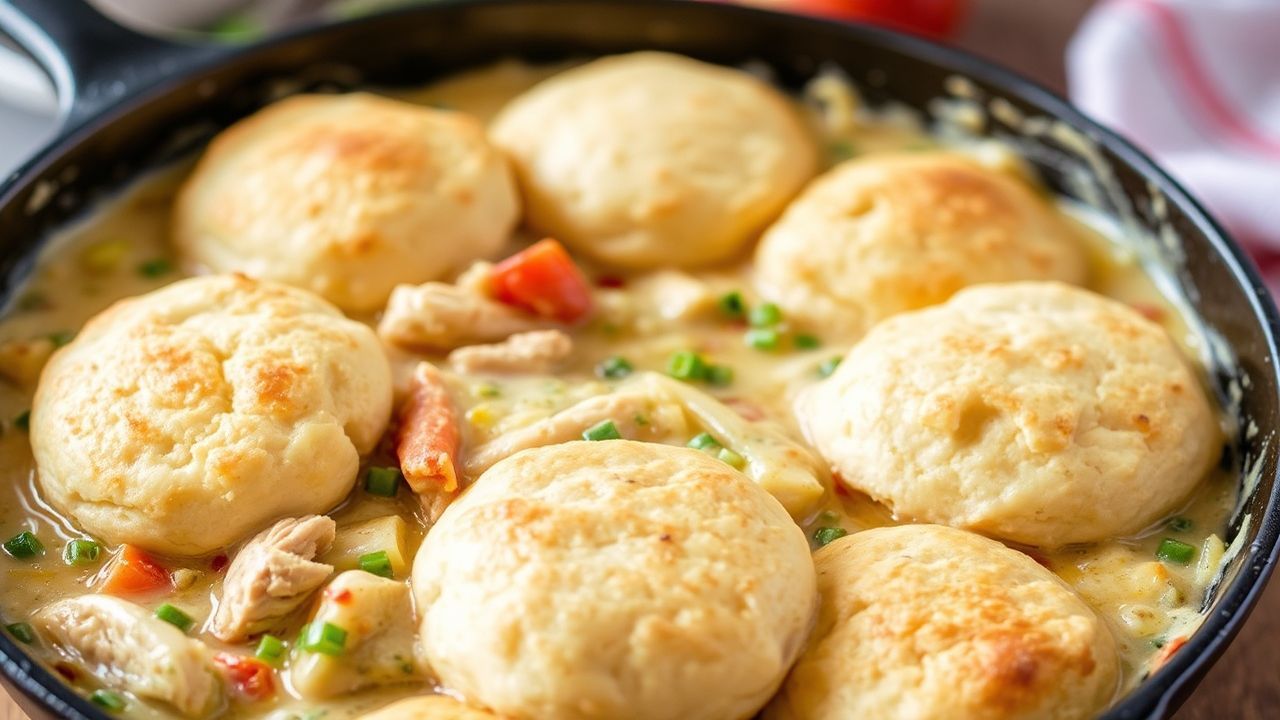
Big comfort flavor usually means slow cooking. This 20-minute skillet chicken pot pie flips that rule: you simmer a creamy chicken filling on the stove, then bake fluffy biscuits directly on top in the same pan. The result tastes like a classic pot pie—just faster, easier, and weeknight-friendly.
- Why This Skillet Pot Pie Feels “Real” (Even With Biscuits)
- The 20-Minute Workflow That Makes Everything Finish Together
- Phase 1: Cook chicken + quick vegetables
- Phase 2: Thicken with a roux (creamy, not gummy)
- Phase 3: Biscuit topping on top of hot filling
- Ingredients That Drive Success (Not Just Flavor)
- 20-Minute Skillet Chicken Pot Pie With Fluffy Biscuits (One-Pan Recipe)
- Timing Cues: How to Keep Filling Creamy and Biscuits Fluffy
- Vegetable Swaps That Don’t Break the 20-Minute Timing
- Pro Tips for Restaurant-Style Texture
- Make-Ahead Plan for Busy Weeknights
- Serving Ideas That Make It Feel Like a Full Meal
- FAQ
- One-pan method: skillet on the stove, then straight to the oven.
- Fast, creamy sauce using a roux for reliable thickening.
- Fluffy biscuit rise from cold butter and baking powder.
- Flexible filling—use quick-cooking veggies to match the bake time.
Why This Skillet Pot Pie Feels “Real” (Even With Biscuits)
A good chicken pot pie has two jobs: it must hold a creamy filling, and it must produce a tender, well-risen topping. This recipe does both by separating timing into two phases—thicken on the stovetop, then bake just long enough for biscuits to cook through.
Traditional pot pies rely on pastry dough that needs time to set. Here, biscuits act like a steam-driven “crust” because they sit on hot filling. The filling provides moisture while the biscuits bake, so the top rises and stays tender instead of turning dry.
Understanding the chemistry helps you nail consistency. Baking powder releases gas as it heats, which lifts the biscuit structure. If your butter warms too much before baking, you lose some steam pockets and your biscuits end up flatter.
If you want a deeper look at the science behind leaveners, read about baking powder. It explains why correct temperature and fresh leavening matter for rise.
The 20-Minute Workflow That Makes Everything Finish Together
To hit a true 20-minute dinner, you need a workflow that prevents the usual bottlenecks: raw chicken, undercooked sauce, or biscuits that bake too long. This method solves that by cooking the filling first and then giving biscuits a short, hot bake window.
Think of it like a relay. While the roux thickens the sauce, you mix biscuit dough. Then you top, bake, and rest. That short rest lets the sauce thicken slightly so every scoop stays creamy.
Phase 1: Cook chicken + quick vegetables
Start with diced chicken and cook it until it turns opaque. This step matters because the filling only simmers briefly, so the chicken must already be close to fully cooked.
Next, sauté onion and garlic, then add quick-cooking vegetables. Carrots work well when diced small. Frozen peas cook fast and release minimal extra liquid when you add them near the end.
For poultry handling and safe cooking habits, reference food-safety basics from poultry. Safe temperatures protect both flavor and trust.
Phase 2: Thicken with a roux (creamy, not gummy)
When you sprinkle flour into hot butter and onions, you build a roux. Cook it briefly so the raw flour taste disappears, then whisk in broth and milk to create a smooth base.
Whisking prevents lumps because the liquid spreads before flour clumps fully. After that, you simmer gently until the sauce coats a spoon. If you boil hard, the sauce reduces too quickly and can feel pasty after baking.
Roux technique connects directly to roux, including why fat + flour ratios and controlled heating matter for texture.
Phase 3: Biscuit topping on top of hot filling
Drop spoonfuls of biscuit dough over the simmering filling. Leave gaps so steam can move and biscuits can rise instead of steaming in place.
Then bake at high heat (around 425°F / 220°C). High heat sets biscuit structure quickly and helps create a golden surface without drying the interior.
Ingredients That Drive Success (Not Just Flavor)
You can swap vegetables, but you shouldn’t casually swap structure builders. This recipe’s texture depends on cold butter, baking powder, and a thickened dairy sauce. Keep those anchor ingredients steady for the best results.
Also pay attention to the skillet. A heavy skillet holds heat well when it moves from stovetop to oven. That stability protects both the roux and the biscuit top.
Chicken filling essentials
- Chicken: diced breast or thigh. Dice small for even cooking in under 10 minutes.
- Broth + milk: broth adds savory depth; milk keeps the pot pie creamy.
- Flour: thickens reliably with a quick roux.
- Vegetables: choose quick-cooking pieces so they finish in the same short window.
For a practical overview of chicken cuts and their behavior in cooking, see chicken. It helps you understand why thighs hold moisture well compared with breast.
Fluffy biscuit topping essentials
- Cold butter: creates flaky pockets and tender layers.
- Baking powder: drives rise through heat-activated gas release.
- Minimal mixing: prevents gluten from becoming too tough.
For more on biscuit-style texture and leavening, keep reading about biscuits and why “mixing less” matters.
20-Minute Skillet Chicken Pot Pie With Fluffy Biscuits (One-Pan Recipe)
Use this as your baseline, then customize confidently. The timing works because every component cooks fast: diced chicken, quick vegetables, and a hot bake that turns biscuit dough puffy.
Servings, prep time, and tools
Serves: 4 generous portions
Total time: ~20 minutes
Tools: 10–12 inch oven-safe skillet with a lid (or a tight foil cover)
Ingredients
Chicken filling
- 2 tbsp unsalted butter
- 1 lb boneless, skinless chicken, diced (about 1/2-inch)
- 1 small onion, finely chopped
- 2 cloves garlic, minced
- 1 cup carrots, diced small
- 1 cup frozen peas
- 1 cup low-sodium chicken broth
- 1 cup whole milk (or half-and-half)
- 3 tbsp all-purpose flour
- 1 tsp fresh thyme leaves (or 1/2 tsp dried thyme)
- Salt and black pepper
Fluffy biscuits
- 1 1/2 cups all-purpose flour, sifted
- 1 tbsp baking powder
- 1/2 tsp salt
- 6 tbsp cold unsalted butter, cubed
- 3/4 cup whole milk (add 1–3 tsp if needed)
Step-by-step instructions
1) Sear the chicken. Heat butter in a large skillet over medium heat. Add diced chicken and cook until opaque and lightly golden, about 5 minutes. Transfer to a plate.
2) Sauté aromatics and carrots. Add onion and garlic to the same skillet. Cook 2–3 minutes. Stir in carrots and cook about 3 minutes until slightly tender.
3) Build the roux. Sprinkle flour over the vegetables. Stir and cook 1 minute to remove raw flour taste. Slowly whisk in broth and milk until smooth.
4) Simmer to thicken. Bring to a gentle simmer. Cook 2–4 minutes until the sauce thickens enough to coat a spoon.
5) Add peas, chicken, and thyme. Stir in peas (from frozen), cooked chicken, and thyme. Season with salt and pepper. Turn off the heat.
6) Mix biscuit dough. In a bowl, whisk flour, baking powder, and salt. Cut in cold butter until you see coarse crumbs. Stir in milk just until a shaggy dough forms; add 1–3 tsp milk only if needed.
7) Top and bake. Preheat oven to 425°F / 220°C. Drop spoonfuls of dough over filling with space between each mound. Bake 12–15 minutes until biscuits puff and turn golden.
8) Rest and serve. Let the skillet rest 5 minutes. Serve hot. The filling thickens slightly as it cools.
Timing Cues: How to Keep Filling Creamy and Biscuits Fluffy
Your goal is simple: thick enough filling to scoop, tender biscuits that set without drying out. That means you must stop when the sauce coats, not when it becomes overly thick.
Watch the filling right before baking. If it looks like a thick soup, it will become perfect once the biscuits release steam and the sauce finishes setting during the rest.
Visual checks that prevent common mistakes
- Sauce texture: coats a spoon; leaves a clear path when you swipe a finger through.
- Biscuit dough: holds shape in spoonfuls but still looks slightly rough.
- Oven timing: bake until golden and puffed, not just set.
If you’re also learning about flour behavior and thickening, see flour for background on starch thickening and why controlled heating matters.
Even with great technique, oven differences exist. Biscuit tops can brown faster in some ovens, especially if your skillet is dark. Start checking at 10 minutes and adjust up to 15.
Vegetable Swaps That Don’t Break the 20-Minute Timing
This recipe works because you choose vegetables that cook fast. You can swap carrots and peas, but keep pieces small and favor vegetables that soften quickly under gentle simmering.
When you add higher-water vegetables, you must account for moisture. If the filling thins, you can thicken it briefly on the stovetop before topping with biscuits.
Best quick substitutions
- Mushrooms: slice thin; sauté until they give up moisture.
- Green beans: chop small; cook 3–5 minutes until crisp-tender.
- Corn: add near the end so it heats without overcooking.
- Bell pepper: dice small for faster softening.
What to avoid for speed
- Potatoes unless diced small and partially cooked. Starchy cubes may stay underdone.
- Large chunks of any vegetable. They need more time than the oven allows.
- Very watery produce without extra simmering. The filling can turn thin.
For a broader look at how moisture affects cooking, reference vegetable general behavior. Moisture release is the difference between creamy and watery.
Pro Tips for Restaurant-Style Texture
Small details make big improvements in a short recipe. You don’t need extra steps, but you do need a few smart choices.
Think in terms of heat management, dough handling, and skillet stability. Those three categories control almost every outcome you care about.
Biscuit handling tips
- Mix dough only until the flour disappears. Overmixing builds gluten and toughens biscuits.
- Keep butter cold. Cold butter creates layers that melt in the oven for lift.
- If dough feels dry, add milk one teaspoon at a time.
Filling handling tips
- Simmer gently. Hard boiling reduces too fast.
- Season at the end so salt doesn’t slow thickening.
- Add peas near the end to prevent mush.
Let the skillet rest after baking. That step thickens the filling slightly and prevents messy scoops. Resting also helps the biscuits finish setting so they don’t collapse when cut.
Make-Ahead Plan for Busy Weeknights
You can prep this dinner without losing the “freshly baked” vibe. The best make-ahead move is preparing the filling and keeping biscuit dough separate.
That way, the filling stays creamy without absorbing too much biscuit moisture before baking.
What you can prep in advance
- Filling: cook up to 12 hours ahead. Cool, cover, and refrigerate.
- Biscuits: mix dough the day you bake for maximum lift.
How to reheat and bake
Reheat filling gently on the stovetop until bubbling lightly. Then top with fresh biscuit dough and bake as directed. If the filling thickened too much, whisk in 1–2 tablespoons broth to loosen.
That small adjustment keeps the pot pie scoopy and creamy. It also protects biscuit tenderness because biscuits bake best when they sit on moist, hot filling.
Serving Ideas That Make It Feel Like a Full Meal
Skillet pot pie already includes chicken and a starchy topping, so sides should add contrast. Crunch, brightness, and fresh herbs work best.
A simple salad or steamed greens gives you balance against the creamy sauce and buttery biscuits.
Easy side pairings
- Green salad with a tangy vinaigrette.
- Roasted vegetables for a deeper, caramelized flavor.
- Steamed green beans for a clean, fast option.
- Extra thyme or parsley on top for aroma.
If you want extra brightness, add a tiny squeeze of lemon to finish. Use it lightly so it lifts thyme and chicken without turning the sauce sharp.
FAQ
Can I use chicken thighs instead of breasts?
Yes. Thighs stay juicy and stay forgiving if your skillet runs slightly hotter. Dice them the same size as breasts so everything cooks evenly in the short time window.
Why do my biscuits come out dense?
Most dense biscuit issues come from warm butter or overmixing. Keep butter cold when cutting into flour, and stop mixing as soon as the dough forms. Then bake right away.
My filling is watery after baking—what went wrong?
You likely didn’t cook the roux long enough or your simmer boiled too hard and reduced unevenly. Aim for a sauce that coats a spoon before adding peas and chicken, then rest 5 minutes after baking.
Can I make this gluten-free?
You can, but you must use gluten-free flour for the roux and a tested gluten-free biscuit method. Gluten-free dough can brown faster, so check at 10 minutes and adjust baking time.
What’s the best skillet size for even baking?
A 10–12 inch oven-safe skillet works well. If you use a wider pan, biscuits bake faster because filling thickness spreads out. If you use a deeper pan, add 1–3 minutes to ensure biscuits cook through.
See also: 20-minute skillet