there’s something irresistibly nostalgic about the humble ice cream sandwich-a perfect marriage of creamy sweetness and crisp,chocolaty crunch that has delighted generations. Among the many variations, the classic chocolate wafer ice cream sandwich stands out as a timeless treat, embodying simplicity and indulgence in every bite. In this article, we’ll explore the origins, enduring appeal, and the art of crafting these iconic frozen delights, celebrating how a few humble ingredients combine to create a dessert that never goes out of style. Whether you’re a lifelong fan or a curious newcomer,join us on a delicious journey into the world of classic chocolate wafer ice cream sandwiches.
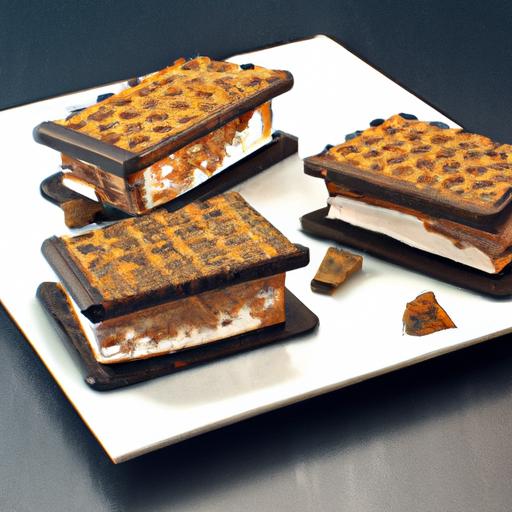
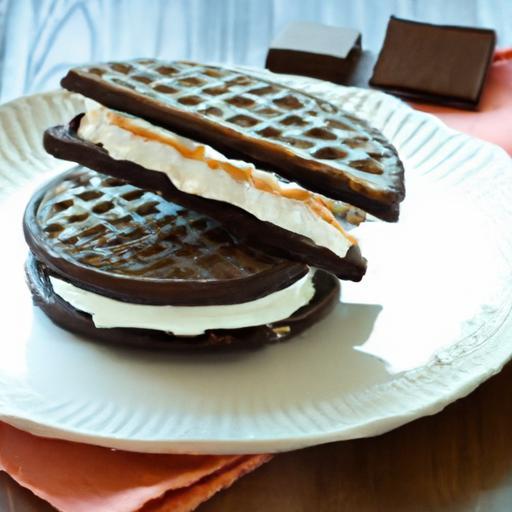
Classic Chocolate Wafer Ice Cream Sandwiches capture the heart with their flawless harmony of crunchy, bittersweet wafers hugging luxuriously creamy ice cream. Rooted in nostalgic summertime memories,this dessert is simplicity perfected-a timeless treat that’s as satisfying to create as it is indeed to eat. From weekend afternoons with family to elegant dinner parties, these sandwiches offer an irresistible charm, marrying texture and flavor in every bite.
Prep and Cook Time
- Preparation: 20 minutes
- Assembly: 15 minutes
- Freezing: minimum 1 hour
Yield
Makes 8 ice cream sandwiches
Difficulty Level
easy – Perfect for beginners and advanced home chefs alike
Ingredients
- 1 ½ cups all-purpose flour,sifted
- 1/3 cup unsweetened cocoa powder,high quality
- 1 tsp baking powder
- ¼ tsp salt
- ½ cup unsalted butter,softened
- ½ cup granulated sugar
- 1 large egg
- 1 ½ tsp pure vanilla extract
- 2 ½ cups premium vanilla ice cream,slightly softened
Instructions
- Preheat your oven to 350°F (175°C). Line two baking sheets with parchment paper to prevent sticking and ensure perfectly crisp wafers.
- In a medium bowl, whisk together the sifted flour, cocoa powder, baking powder, and salt. This dry mix will deliver that signature chocolate bite.
- In a large bowl, cream the softened butter and sugar using an electric mixer until light and fluffy, about 3 minutes. This aeration is key for tender yet crisp wafers.
- Beat in the egg and vanilla extract until just combined. Avoid overmixing to maintain the dough’s ideal texture.
- Gradually fold in the dry ingredients until a smooth dough forms. If it feels too sticky, lightly dust your hands and workspace with flour.
- divide the dough in half, then roll out each portion between two sheets of parchment paper to about 1/8 inch thickness. Uniform thickness ensures even baking.
- Cut the dough into uniform rectangles approximately 3×4 inches-the classic sandwich size. Transfer to baking sheets, spacing a couple of inches apart.
- Bake for 10-12 minutes or until wafers are firm to the touch but not overbaked. They will crisp more as they cool, so watch closely to avoid dryness.
- Cool wafers completely on wire racks. Once cooled, pair wafers evenly for sandwiches.
- Scoop the softened vanilla ice cream generously onto one wafer and gently press the matching wafer on top, creating a neat sandwich. use a spatula to smooth edges, if desired.
- Wrap each sandwich tightly in plastic wrap and freeze for at least 1 hour before serving to allow flavors to meld and ice cream to firm perfectly.
Chef’s Notes: Achieving the Perfect Classic Chocolate Wafer Ice Cream Sandwich
- flavor Boost: Stir in a pinch of espresso powder with the cocoa for a deeper chocolate intensity without overwhelming the palate.
- Ice Cream Variations: Swap vanilla for creamy salted caramel or mint chocolate chip for a playful twist-just make sure ice cream is soft enough for easy assembly.
- Wafer Storage: Store leftover wafers in an airtight container at room temperature for up to 1 week. For longer, freeze tightly wrapped for up to 1 month.
- Make-Ahead Tip: Assemble sandwiches and freeze overnight for a perfectly chilled, ready-to-serve treat when entertaining.
- Preventing Meltdown: Serve sandwiches straight from the freezer and allow 3-5 minutes at room temperature for the ideal bite-not too hard, not melty.
Serving Suggestions to Elevate Your Classic Chocolate Wafer ice Cream Sandwich Experience
for a visually stunning presentation, plate ice cream sandwiches on simple white or matte black dishes to contrast the deep chocolate hue. Garnish with a sprinkle of finely grated dark chocolate or a dusting of cocoa powder for subtle elegance. Adding fresh raspberries or sliced strawberries brings a burst of color and a tangy counterpoint. For special occasions, drizzle warm caramel or a ribbon of rich chocolate sauce alongside your plated sandwiches.
To keep the experience fun and interactive,set up an ice cream sandwich bar with a variety of ice cream flavors and toppings such as chopped nuts,mini chocolate chips,or colorful sprinkles-letting guests create their own perfect combination.
| Nutrient | Per Sandwich |
|---|---|
| Calories | 280 |
| Protein | 4 g |
| Carbohydrates | 32 g |
| Fat | 14 g |

For more inspired desserts using traditional baking techniques, visit our Dessert Classics collection. discover how simple ingredients blend into unforgettable luxury. For more on the science behind perfect baking, the King Arthur baking Company offers excellent resources.
Q&A
Q&A: Timeless Treats – Classic Chocolate Wafer Ice Cream Sandwiches
Q1: What makes chocolate wafer ice cream sandwiches a timeless treat?
A1: Chocolate wafer ice cream sandwiches have a delightful simplicity that never goes out of style. Their crisp, fudgy wafers paired with creamy, cool ice cream create a perfect balance of textures and flavors that appeal to all ages. This nostalgic combo evokes childhood memories while remaining irresistibly delicious today.Q2: How were chocolate wafer ice cream sandwiches originally created?
A2: The earliest ice cream sandwiches date back to the early 1900s, when vendors began serving ice cream between cookies or wafers as an easy, handheld delight. Chocolate wafers became a popular choice for their sturdy yet tender texture and rich flavor, making them the ideal vessel for holding creamy ice cream.
Q3: What types of ice cream work best in these sandwiches?
A3: While vanilla remains the classic choice, almost any ice cream flavor can elevate your sandwich. From mint chip to salted caramel, the key is to pick a smooth, scoopable ice cream that complements the chocolate wafers without overpowering them. A well-balanced pairing enhances that timeless harmony between crisp and creamy.
Q4: Can I make homemade chocolate wafer ice cream sandwiches?
A4: Absolutely! Crafting them at home lets you customize everything-from the thickness of the wafers to your preferred ice cream flavors. Bake thin, crispy chocolate wafers or pick up quality store-bought ones. Then,sandwich your favorite scoops and freeze until firm for a fresh,personalized twist on a classic.
Q5: How should I store chocolate wafer ice cream sandwiches to maintain their texture?
A5: To keep your sandwiches crisp and perfect,wrap each one tightly in parchment or wax paper,then place them in an airtight container. Store them in the freezer and enjoy within a week or two. This careful packaging prevents the wafers from absorbing moisture and turning soggy.
Q6: are there creative ways to customize these classic sandwiches?
A6: Definitely! You can roll the edges in mini chocolate chips, crushed nuts, or sprinkles for an extra pop of texture and fun. For a seasonal spin, try adding a dash of cinnamon or espresso powder to the wafers.The possibilities are endless while preserving that essential, timeless charm.
Q7: What’s the best way to enjoy a chocolate wafer ice cream sandwich?
A7: The perfect bite balances crisp wafer edge and creamy center. Let your sandwich sit out a minute after removing it from the freezer-not too long!-to soften the ice cream just enough to melt in your mouth while the wafers stay delightfully crunchy.
Q8: Why do chocolate wafers pair so well with ice cream?
A8: Chocolate wafers offer a slightly bitter cocoa depth that contrasts beautifully with the sweetness and creaminess of ice cream. their fragile crunch creates a textural contrast that makes every bite engaging, enhancing the overall sensory experience.
Q9: Can these sandwiches be made dairy-free or vegan?
A9: yes! Using dairy-free or plant-based ice creams works wonderfully, especially with vegan chocolate wafer recipes made from plant oils and cocoa. These alternatives ensure everyone can indulge in this classic treat without missing out on texture or flavor.
Q10: what occasions are perfect for serving chocolate wafer ice cream sandwiches?
A10: These sandwiches shine at summer picnics, birthday parties, casual backyard barbecues, or anytime you crave a cool, nostalgic delight. their portable nature and familiar taste make them a crowd-pleaser for both kids and adults alike.
The Way Forward
As the last bite of a classic chocolate wafer ice cream sandwich melts away, we’re reminded why this timeless treat has endured through generations. Its simple yet perfect marriage of crispy, chocolaty wafers and creamy, sweet ice cream creates a comforting harmony that transcends trends and seasons alike. Whether enjoyed on a sunny afternoon or as a nostalgic dessert after dinner, these sandwiches continue to capture hearts with every chilly, satisfying crunch. So next time you crave a sweet escape, reach for a classic chocolate wafer ice cream sandwich-and savor a little piece of edible history that never goes out of style.