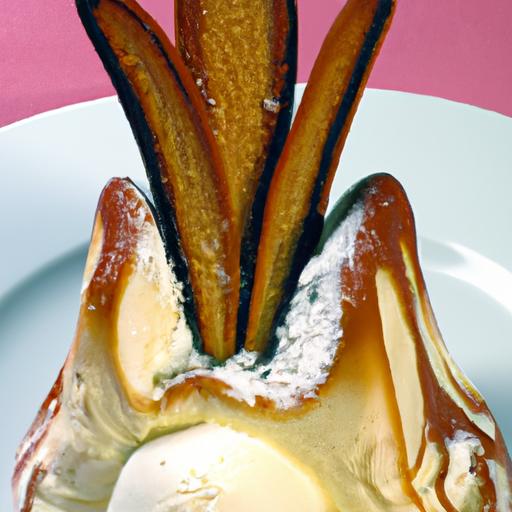
Imagine a dessert that dances on teh edge of fire and ice-a culinary marvel where flaming meringue cloaks an icy core, creating a dazzling contrast of temperatures and textures. Baked Alaska is not just a treat; it’s a theatrical experience on a plate, captivating both the eyes and the palate. From its mysterious origins to its dramatic presentation, this fiery dessert with a chilling twist has fascinated food lovers for centuries. In this article, we’ll explore the history, technique, and irresistible appeal of Baked Alaska, uncovering why it remains a show-stopping finale at tables around the world.
Baked Alaska is a captivating dessert that masterfully balances hot and cold, combining the chill of ice cream encased in a delicate, flaming meringue shell. Its origins trace back to the 19th century, a testament to culinary ingenuity where chefs synthesized unique textures and temperatures to create a theatrical finale worthy of any special occasion. Imagine the dramatic reveal as a torch ignites the golden meringue, creating caramelized peaks that contrast with the smooth ice cream beneath-a visual and sensory masterpiece.
Prep and Cook Time
- Readiness: 45 minutes
- freezing Time: At least 4 hours (preferably overnight)
- Cooking (Torched or Oven Blast): 3-5 minutes
Yield
Serves 6 to 8 guests,ideal for an impressive centerpiece dessert.
Difficulty Level
Advanced – Requires precision in timing and temperature control, but rewarding for experienced bakers and culinary creatives.
Ingredients
- Ice Cream Base: 1 quart high-quality vanilla ice cream, slightly softened
- Spongy cake Layer: 6 oz sponge cake or pound cake, cut into a 9-inch round
- Meringue: 4 large egg whites, at room temperature
- Sugar: 1 cup granulated sugar
- Cream of Tartar: 1/4 teaspoon (stabilizes the meringue)
- Vanilla Extract: 1 teaspoon
- Optional Flavour Enhancers: Zest of 1 lemon or 1 teaspoon almond extract
- Neutral-flavored oil or butter, for greasing
Instructions
- Prepare the base: Line a 9-inch bowl with plastic wrap leaving an overhang. Press half of the softened vanilla ice cream into the bowl, smoothing evenly. Freeze for 1 hour.
- Add cake layer: Place the sponge cake round over the ice cream, pressing gently. Cover cake with remaining ice cream and smooth. Freeze until firm, at least 3 hours or overnight.
- Make the meringue: Using a clean, dry bowl and whisk, beat egg whites until foamy. Add cream of tartar and continue whisking until soft peaks form.
- Incorporate sugar: Gradually add sugar,one tablespoon at a time,whipping continuously until stiff,glossy peaks form. Mix in vanilla extract and optional zest or almond extract.
- Assemble the dessert: Turn the frozen ice cream and cake dome onto a baking sheet lined with parchment paper. Quickly but carefully cover the entire dome with thick meringue, sealing all edges to prevent melting.
- Torch or bake: For the signature flame, use a culinary torch to evenly brown the meringue, moving the flame in slow circles to avoid burning (about 2-3 minutes). alternatively, preheat the oven to 500°F (260°C), place dome in the oven for 3-5 minutes until golden brown.
- Serve promptly: The contrast of the warm, toasted meringue with the icy interior is at its peak freshly torched or baked.
Tips for Success
- Perfect the meringue: Make sure no egg yolk contaminates whites, and bowl and whisk are fully grease-free for maximum volume.
- Keep everything cold: Freeze ice cream dome thoroughly; a semi-soft center leads to melting during the browning process.
- Use thick meringue: A thick layer insulates the cold inside and browns beautifully without heating the ice cream too much.
- Flame safety: Always torch in a well-ventilated space, keeping a fire extinguisher nearby when using open flames.
- Make ahead: Ice cream dome can be prepared and frozen up to 2 days before toasting, but meringue should be applied and torched just before serving.
- Get creative with flavors: Swap vanilla ice cream for passion fruit, chocolate, or salted caramel for a delightful twist.
- Prevent sogginess: If your cake feels too moist, lightly toast it before assembling to provide structure against melting ice cream.
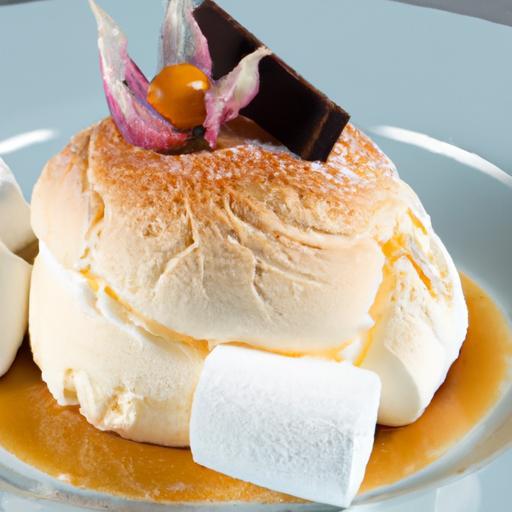
Serving Suggestions
Present your Baked Alaska on a decorative platter or wooden board. Garnish with fresh mint leaves, a scattering of edible flowers, or a dusting of powdered sugar for a snowy effect. A drizzle of raspberry coulis or a few fresh berries add vibrant color and tartness.Serve immediately to guests with elegant dessert forks and watch as the striking meringue peaks melt slowly against the creamy, chilled interior.

Nutritional Information per Serving
| Calories | Protein | Carbohydrates | Fat |
|---|---|---|---|
| 420 kcal | 6 g | 48 g | 22 g |
For further exploration of exquisite frozen desserts, explore our Classic Ice Cream Sundae Recipe. To deepen your understanding of meringue chemistry and flame techniques, the Culinary Institute of america offers excellent resources on advanced dessert execution.
Q&A
Q&A: Baked Alaska – A Fiery Dessert with a Chilling Twist
Q1: What exactly is a Baked alaska?
A1: Baked Alaska is a dazzling dessert that combines hot and cold elements in one spectacular dish. It features a cake base topped with ice cream, all enveloped in a fluffy meringue shell that is briefly baked or torched to create a golden, toasted exterior while keeping the ice cream inside perfectly frozen.
Q2: How does Baked Alaska achieve its dramatic temperature contrast?
A2: The magic lies in the insulating properties of the meringue. when baked or torched,the meringue forms a warm,crisp crust,but because it’s such a great insulator,the ice cream underneath remains chilled. This creates a fascinating sensory experience – warm, crispy, and cool all at once.
Q3: what are the conventional components of a baked Alaska?
A3: Traditionally, it starts with a layer of sponge cake or brownie as the base. Then a dome of ice cream is placed on top, followed by a generous layer of meringue made from beaten egg whites and sugar.The dessert is then baked briefly or flambéed until the meringue turns a golden brown.
Q4: Can Baked Alaska be flavoured in diffrent ways?
A4: Absolutely! The basic blueprint invites endless creativity. You can use any flavor of ice cream-vanilla, chocolate, mango, or even unusual blends like lavender or matcha. The cake base can be plain or infused with spices, citrus zest, or nuts. The meringue itself is typically sweet and neutral, allowing the other flavors to shine.
Q5: Is it difficult to make Baked Alaska at home?
A5: While it may look intimidating, with a bit of patience, Baked Alaska is definitely achievable in a home kitchen. The key is to freeze the assembled dessert solid before applying the meringue and baking quickly at a high temperature or using a kitchen torch for that perfect finish.Attention to timing and temperatures ensures that your ice cream stays frozen while your meringue crisps up perfectly.
Q6: What is the historical origin of Baked Alaska?
A6: Baked Alaska is believed to have originated in the 19th century, with roots tracing back to French and American culinary traditions. It gained fame at Delmonico’s Restaurant in New York City, where it was named to honor the recent acquisition of Alaska by the United States, highlighting the contrast between ice and fire – a fitting tribute in both ingredients and symbolism.
Q7: How can one serve Baked Alaska for maximum impact?
A7: Serve Baked Alaska immediately after baking or torching to showcase the striking contrast of textures and temperatures. Present it on an elegant platter,and slice with a sharp knife to reveal the layers inside. The sudden presentation of hot golden meringue giving way to cold, creamy ice cream will enchant your guests every time.
Q8: Are there any exciting modern twists on Baked Alaska?
A8: Definitely! Contemporary chefs experiment with vibrant ice cream flavors, alternative cake bases like brownie or even gluten-free options, and creative presentation styles such as individual mini Baked Alaskas or flambéed versions with infused spirits (avoiding any disallowed ingredients, of course). It’s a playground for innovation while honoring a classic.
Q9: What makes Baked Alaska a perfect dessert for celebrations?
A9: Baked Alaska brings theatrical flair to any occasion. Its fiery finish, the awe-inspiring temperature interplay, and the luscious combination of textures make it a memorable finale. Whether it’s a birthday, holiday feast, or special dinner party, Baked Alaska delivers a sensory surprise that elevates the entire experience.
Q10: Can Baked Alaska be prepared ahead of time?
A10: Yes! One of Baked Alaska’s advantages is that you can assemble it in advance, freeze it thoroughly, and then finish it with meringue and a quick bake or torching just before serving. This makes it a practical yet elegant choice for entertaining without last-minute stress.
Baked Alaska remains a timeless dessert that dazzles both eyes and taste buds – a perfect dance of fire and ice in every bite.
To Wrap It Up
As the flames flicker and the meringue crisps to a golden crown, Baked Alaska stands as a testament to culinary artistry-where fire and ice intertwine in a delicate dance. This dessert, with its contrasting textures and temperatures, invites us to savor not just flavors but the very spectacle of cooking itself. Whether you’re a seasoned chef or an adventurous home baker, embracing the fiery embrace of Baked Alaska offers a flavorful reminder: sometimes, the most memorable treats are born from the boldest contrasts. So next time you crave a dessert that dazzles both the eye and the palate, let Baked Alaska be your fiery finale with a chilling twist.