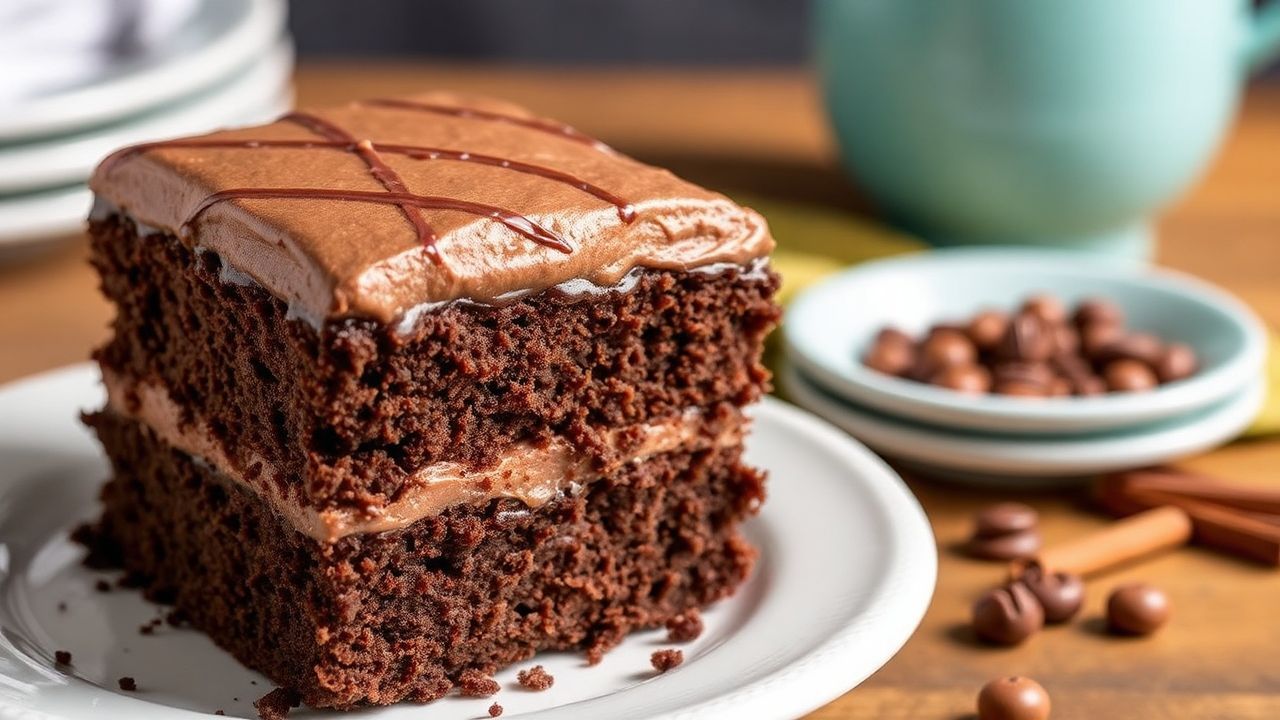
Devil’s food cake with rich fudge frosting earns its reputation for a reason. It delivers deep cocoa flavor, a tender, springy crumb, and a frosting that finishes with a glossy bakery sheen. The cake stays sliceable because the structure comes from sound baking technique, not shortcuts.
- What Makes Devil’s Food Cake Taste So Bold
- The Moisture Blueprint: Ingredients That Actually Control Texture
- Cocoa powder: bloom it, don’t just dump it
- Buttermilk + baking soda: tenderizing chemistry
- Oil for softness, eggs for structure
- Fudge Frosting That Spreads Smoothly (and Sets)
- Butter creaming: the foundation for a silky finish
- Cocoa powder in frosting: keep it lump-free
- Heavy cream and emulsification
- Assembly That Looks Like a Bakery (Every Time)
- Recipe: 2-Layer Devil’s Food Cake with Rich Fudge Frosting
- Troubleshooting: Fix Texture Problems Before They Start
- Serving and Storage for Peak Chocolate Bliss
- FAQ
At a Glance
- Moist, tender crumb depends on cocoa hydration, acidity, and gentle mixing.
- Glossy fudge frosting comes from stable butter creaming and correct cocoa + sugar ratios.
- Clean slices need a crumb coat plus a short chill before the final layer.
- Flavor boost improves with hot coffee or espresso powder, without a coffee-tasting result.
You’ll notice the difference in how the cocoa tastes. Devil’s food recipes lean darker and more chocolate-forward than many standard chocolate cakes. They also keep the crumb moist by balancing acidity, fats, and mixing speed.
If you want the science behind cocoa flavor compounds, review cocoa. That background helps you understand why blooming cocoa and using warm liquid improves texture and taste.
What Makes Devil’s Food Cake Taste So Bold
Devil’s food cake sits in the darker lane of chocolate cakes. Most recipes aim for a deeper cocoa presence by using more cocoa, plus leavening chemistry that supports a soft interior. In plain terms, it tastes richer and more complex than a typical “chocolate cake.”
Flavor depth also comes from how cocoa solids interact with sugar and fat. Cocoa contains natural compounds that disperse more evenly when you hydrate and integrate cocoa well. That’s why hot coffee or hot liquid matters: it helps cocoa bloom and smooth out the batter.
For more on cocoa processing, see cocoa powder. When you handle it correctly, your devil’s food cake tastes like cohesive chocolate rather than dry cocoa powder.
The crumb target: tender, springy, never dry
The ideal devil’s food cake crumb feels moist but not gummy. It should bounce back lightly when pressed, and it should hold moisture as it cools. You get that texture by avoiding overmixing once flour goes in and by baking to “moist crumbs,” not wet batter.
Acidity plays a major role here. Buttermilk adds acid, and acid works with baking soda to create lift. That combination supports a soft interior and helps the cake taste pleasant on day two.
If you want the general chemistry of leavening, you can reference baking powder for background on how these agents produce gas. Devil’s food relies on that gas structure to keep the crumb airy and tender.
Why hot coffee boosts chocolate perception
Hot coffee works mainly as a flavor amplifier. It deepens perceived chocolate notes because coffee bitterness and aromatics pair well with cocoa. You do not need a coffee taste in the finished devil’s food cake.
Use fresh, hot brewed coffee and add it while mixing gently. Hot liquid helps cocoa dissolve and blend, which improves both flavor distribution and batter smoothness. For a broader view of coffee aromatics, see coffee.
The Moisture Blueprint: Ingredients That Actually Control Texture
Devil’s food cake turns “good” into “great” when moisture sources work together. You can’t rely on one ingredient alone. Instead, the recipe builds a balanced crumb using flour structure, fat for tenderness, and liquid for hydration.
Think of it as a system. Flour forms the baked matrix. Cocoa adds flavor and some absorbency. Eggs provide structure and emulsification, while buttermilk adds moisture and acidity. Oil keeps the crumb soft and slows staling.
Cocoa powder: bloom it, don’t just dump it
Cocoa powder needs heat and liquid to bloom. When it blooms, it hydrates and disperses more evenly, which improves chocolate flavor and reduces dry pockets. In a devil’s food cake, hot coffee helps bring cocoa to a more uniform state.
If a cake feels “chalky,” the usual causes include incomplete cocoa hydration or uneven batter mixing. Blooming cocoa fixes that. For cocoa chemistry background, revisit cocoa and focus on even dispersion.
Buttermilk + baking soda: tenderizing chemistry
Buttermilk isn’t just for tang. Its acidity reacts with baking soda to release carbon dioxide gas, which supports lift and a softer crumb. This reaction also helps create the classic devil’s food taste.
If you substitute buttermilk, keep the acid amount consistent. Too little acid weakens lift, and the crumb can feel tighter. Too much can shift flavor and change how the cake browns.
Oil for softness, eggs for structure
Oil keeps the crumb moist because it stays liquid at room temperature, which reduces staling speed. Eggs support the cake’s set through protein coagulation during baking. That balance creates a tender cake that doesn’t feel dry.
Also, mix with purpose. Whip eggs and sugar first to build a lighter base, then mix gently after adding flour to limit gluten formation. Too much gluten can make chocolate cake feel dense instead of tender.
Fudge Frosting That Spreads Smoothly (and Sets)
Rich fudge frosting should feel thick, glossy, and creamy. It should not turn grainy or runny. That texture depends on stable creaming, properly sifted dry ingredients, and a small amount of liquid that emulsifies with butter.
Traditional buttercream can go dry or airy if you overwhip or add sugar too fast. A devil’s food cake’s fudge frosting stays closer to a custard-like richness when your ratios remain balanced and you stop once the mixture turns smooth.
Butter creaming: the foundation for a silky finish
Start with softened butter, not melted butter. Beat it until it turns paler and more uniform. This step aerates slightly and creates a stable base for mixing sugar and cocoa.
Add confectioners’ sugar gradually. Sifting matters because cocoa and powdered sugar clump easily. Clumps cause gritty frosting that refuses to smooth out in the final devil’s food cake assembly.
Cocoa powder in frosting: keep it lump-free
Cocoa powder affects frosting texture more than many bakers expect. If cocoa isn’t well mixed, frosting can look fine at first and then turn patchy after chilling. Sift cocoa and mix until it hydrates and emulsifies.
If you want a deeper chocolate tone, use a small amount of espresso powder. It intensifies chocolate flavor without adding a noticeable coffee taste. For broader cocoa and chocolate context, see chocolate.
Heavy cream and emulsification
Heavy cream adds the liquid and fat that help emulsify frosting. Without enough cream, frosting can turn thick and crumbly. With too much, it can become loose and fail to hold between cake layers.
Mix until frosting looks glossy and spreadable. If it thickens too much while you frost, a brief rest and gentle remix usually fixes it better than adding random extra liquid.
That “break” issue often shows up when bakers rush creaming or work in a hot kitchen. Control temperature, and your devil’s food cake frosting stays stable through chilling and final smoothing.
Also avoid overwhipping once the mixture looks glossy. Overwhipping adds extra air, which can make frosting feel lighter than true fudge-style frosting.
Assembly That Looks Like a Bakery (Every Time)
Even when cake and frosting taste amazing, presentation depends on assembly. Devil’s food cake layers often dome slightly, and doming makes frosting edges look uneven. Level and chill to lock in clean lines.
You also need the right frosting temperature. If frosting warms too much, it slides. If frosting chills too hard, it tears and drags crumbs into the surface.
Step-by-step layering for crisp edges
Cool cake layers fully on a rack before you trim. Use a long serrated knife and slice off domed tops so layers stack flat. Then spread a measured amount of frosting in an even layer.
Apply a thin crumb coat first. This base layer traps loose crumbs so your final coat stays smooth. Chill briefly so the crumb coat sets before you add your top and side frosting.
Final smoothing and decor
For a clean bakery look, use an offset spatula and apply frosting in thin passes. Wipe the spatula often and work in small sections rather than trying to cover everything at once.
If you want swirls or curls, do it after the final coat is on but before frosting fully firms. For garnish, chocolate shavings add texture, while a light cocoa dusting works well on the top.
Serve slightly chilled for best slice stability. Chilled frosting holds shape, but the cake tastes more cohesive when it warms a little after refrigeration.
Recipe: 2-Layer Devil’s Food Cake with Rich Fudge Frosting
Below is a balanced recipe designed for tenderness and a spreadable, glossy fudge frosting. You’ll get two 9-inch layers and enough frosting for a generous, smooth finish on a devil’s food cake.
Use room-temperature dairy and eggs for smoother batter and better emulsion in the frosting. Also sift dry ingredients so the frosting stays lump-free and the cake bakes evenly.
Ingredients
For the Devil’s Food Cake
- 1 3/4 cups all-purpose flour, sifted
- 3/4 cup unsweetened cocoa powder, sifted
- 2 cups granulated sugar
- 1 1/2 tsp baking soda
- 3/4 tsp baking powder
- 1 tsp salt
- 2 large eggs, room temperature
- 1 cup buttermilk
- 1/2 cup vegetable oil
- 1 cup hot brewed coffee (fresh)
- 2 tsp vanilla extract
For the Rich Fudge Frosting
- 1 cup unsalted butter, softened
- 1 1/2 cups confectioners’ sugar, sifted
- 3/4 cup unsweetened cocoa powder, sifted
- 1/4 cup heavy cream
- 1 tsp espresso powder (optional)
- 1 tsp vanilla extract
- Pinch of salt
Instructions
1) Bake the cake
Preheat the oven to 350°F (175°C). Grease two 9-inch round pans and line the bottoms with parchment.
Whisk flour, cocoa, baking soda, baking powder, and salt in a bowl. In another bowl, beat eggs and sugar until lighter, about 3 minutes.
Mix buttermilk, oil, and vanilla into the egg mixture. Add dry ingredients in three additions, alternating with hot coffee. Mix gently and stop once the batter looks smooth.
Divide batter evenly and smooth tops. Bake 28–32 minutes, until a toothpick shows “moist crumbs,” not wet batter. Cool in pans 15 minutes, then transfer to racks to cool fully.
2) Make the frosting
Beat softened butter until smooth and creamy. Add confectioners’ sugar and cocoa powder gradually, alternating with heavy cream. Add espresso powder (if using), vanilla, and salt.
Beat on medium-high until glossy and spreadable, about 3–4 minutes. If it feels too thick, mix gently longer rather than adding extra liquid immediately.
3) Assemble
Trim domes so layers stack evenly. Place the first layer on a plate, spread frosting evenly, then add the second layer.
Apply a thin crumb coat. Chill 20–30 minutes. Then spread the remaining frosting on top and sides using thin passes. Chill briefly to set before slicing.
Troubleshooting: Fix Texture Problems Before They Start
Even a strong recipe can fail if one step goes off track. For a devil’s food cake, the best moves come from diagnosing texture and then changing your next action. Use the cues below and adjust fast.
Most frosting problems come from temperature or mixing speed. Most cake problems come from timing, overmixing, or overbaking.
Cake feels dry
Dry devil’s food cake usually means it baked too long or you mixed too aggressively after adding flour. The cake should pull when the toothpick reads moist crumbs.
Use an oven thermometer if you suspect hot spots. Also check two minutes earlier than the suggested time because ovens vary.
Cake feels dense
Dense devil’s food cake often comes from overmixing or leavening balance issues. Mix gently once flour goes in, and measure baking soda and baking powder accurately.
Overmixed batter develops more gluten. Gluten changes crumb feel from tender to chewy, and the cake loses that springy texture.
Frosting turned grainy
Grainy frosting usually happens when sugar and cocoa weren’t fully incorporated, or when butter stays too cold. Sift dry ingredients and beat until smooth and glossy.
If frosting looks grainy after chilling, let it sit at room temperature for 10 minutes and remix briefly. Cocoa particles need time to hydrate in the fat.
Frosting looks separated
Separation happens when butter melts or when the emulsion breaks. Cool the bowl, then re-beat until the frosting comes back together.
To prevent separation, keep butter softened, not warm. Also avoid adding cream that’s hot enough to change butter consistency.
Serving and Storage for Peak Chocolate Bliss
For the best experience, serve your devil’s food cake slightly chilled. Frosting firms in the fridge, which makes slicing neat. However, very cold cake can mute aroma and flavor.
Let slices sit at room temperature for 15–20 minutes before serving. That short window helps the crumb soften and lets chocolate aroma open up.
Storage
Store the assembled cake in the refrigerator, covered, for up to 3 days. The frosting stays stable, and the cake keeps its moisture and tenderness.
For longer storage, freeze cooled cake layers wrapped tightly. Thaw overnight in the refrigerator, then bring to near room temperature before frosting and final assembly.
If you want more background on fat’s function in baked textures, see fat.
FAQ
What makes devil’s food cake different from other chocolate cakes?
Devil’s food cake focuses on a darker, more cocoa-forward flavor and a tender crumb. It often combines cocoa with acidic ingredients like buttermilk and uses baking soda to support lift and softness, not just sweetness.
That acidity plus strong cocoa flavor gives the cake a deeper taste and a softer interior. The result feels richer without turning heavy.
How do I keep the frosting from becoming runny?
Use correct ratios and keep butter at a consistent soft temperature. If frosting feels loose, chill briefly and remix gently.
Avoid adding lots of extra powdered sugar right away. Too much dry ingredient at once can make frosting dry or gritty rather than thick and glossy.
Why does my cake sink in the center?
A center sink usually means underbaking or a batter that didn’t set fully. Bake until you see moist crumbs on a toothpick and cool layers on racks so steam escapes evenly.
Also check that baking soda and baking powder amounts stay accurate. Leavening imbalance can weaken the cake structure.
Can I make this cake ahead of time?
Yes. Bake layers up to about one month ahead and freeze them wrapped. Thaw overnight in the refrigerator, then level and frost for the best texture.
Plan to assemble close to serving so frosting holds its final glossy finish on the devil’s food cake.
Is there a buttermilk substitute that works well?
Use whole milk plus 1 tablespoon lemon juice or vinegar per cup of milk. Rest 5–10 minutes to thicken slightly, then use it in the recipe.
This substitute restores acidity so the cake gets lift and the same tender crumb you expect in devil’s food cake.
See also: devil’s food