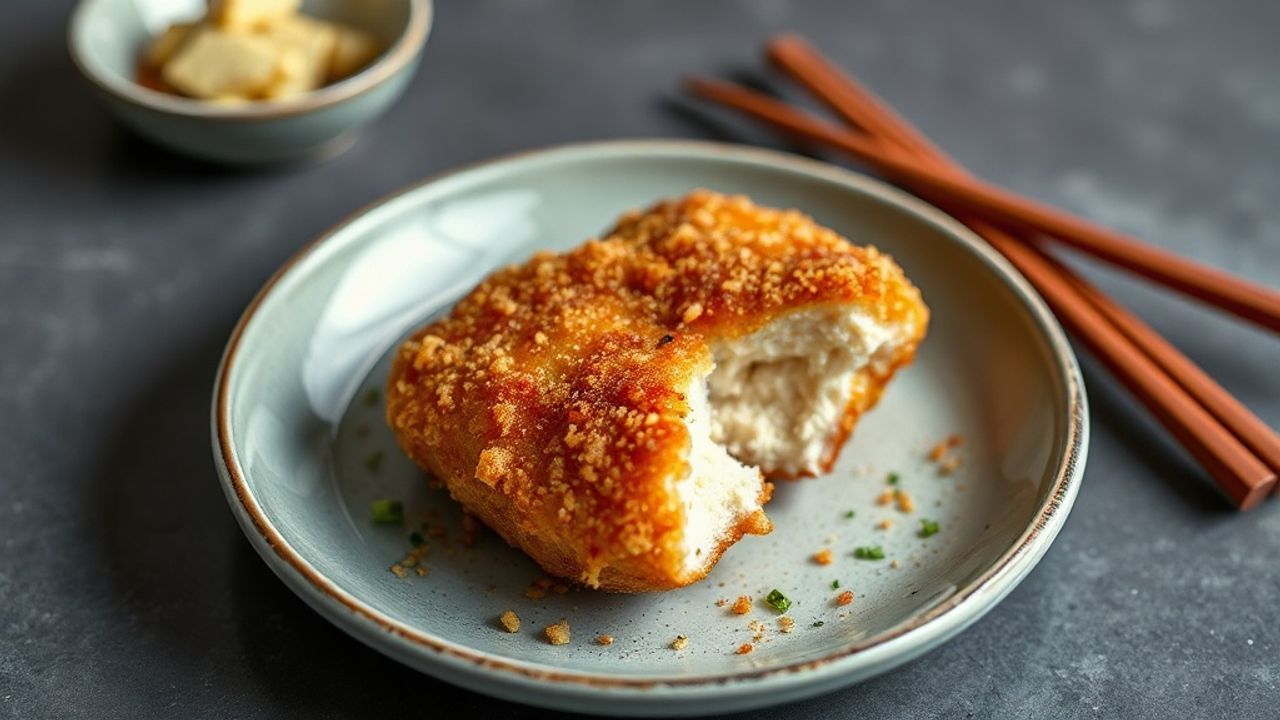
Chicken Katsu delivers a satisfying contrast: a golden, crunchy exterior and tender, juicy meat inside. Achieving that crisp reliably requires precise breading, correct oil temperature, and timing. This guide focuses on practical, chef-grade techniques so you can reproduce restaurant-quality Chicken Katsu at home.
- Key takeaway: panko + correct oil temp = long-lasting crunch.
- Make-ahead hack: bread and chill to set coating before frying.
- Drain strategy: rest on a wire rack, not paper towels, to avoid steam softening.
Prep and Cook Time
Readiness: 20 minutes | Cooking: 15 minutes | Total Time: 35 minutes.
These timings assume thin, pounded chicken breasts. If you use thicker cuts, allow extra cook time and check internal temperature.
Yield
Serves 4 generous portions when sliced into strips. Adjust ingredient quantities proportionally for larger batches.
For batch frying, keep oil temperature steady by frying in small batches to prevent the oil from dropping below target.
Difficulty Level
Medium — suitable for home cooks comfortable with shallow or deep frying. The technique rewards attention to detail.
Familiarity with basic knife work and a reliable thermometer improves consistency and safety when making Chicken Katsu.
Ingredients for Chicken Katsu
Use quality components for the best texture. The panko breadcrumb is the single most important texture element.
Substitute proteins as desired, but keep the breading ratio consistent for identical crisp results.
- 4 boneless, skinless chicken breasts, pounded to ½ inch thickness
- 1 cup all-purpose flour, sifted
- 2 large eggs, beaten
- 1 ½ cups panko breadcrumbs (Japanese-style breadcrumbs for maximum crunch) — see panko for origin and texture notes
- 1 tsp kosher salt
- ½ tsp freshly ground black pepper
- ½ tsp garlic powder (optional)
- Vegetable or canola oil for frying (enough to submerge halfway)
- Fresh lemon wedges, for serving
- Katsu sauce, store-bought or homemade
How to Fry Chicken Katsu
Correct frying technique produces a golden crust without excess oil uptake. Use a heavy-bottomed skillet or a deep-fryer and maintain steady heat.
For professional results, keep the oil between 340–350°F (170–175°C). Use a candy or probe thermometer to monitor temperature precisely.
- Prepare the chicken: Pat each breast dry and season both sides with salt, pepper, and garlic powder. Dry meat reduces surface moisture and improves adhesion.
- Set up breading station: Place flour, beaten eggs, and panko in three separate shallow dishes. Keep the panko loose and flaky for better coverage.
- Bread the chicken: Dredge in flour, dip in egg, then press firmly into panko so crumbs adhere well. Shake off excess flour before dipping to avoid clumping.
- Chill to set: Transfer breaded cutlets to a wire rack and chill 15 minutes. This helps the coating bind and reduces crumb loss during frying.
- Heat the oil: Bring oil to the correct temperature. If you drop too low, the coating soaks oil; too high, it burns before the center reaches 165°F (74°C).
- Fry in batches: Lay cutlets into oil without crowding. Fry ~3–4 minutes per side until deep golden and the internal temp reads 165°F (74°C).
- Drain and rest: Transfer to a wire rack over a sheet pan to drain. Resting keeps the crust crisp and prevents steam from forming underneath.
Tips for Keeping Chicken Katsu Crunchy
Small steps preserve texture from pan to plate. The right finish and storage method make a big difference.
Avoid stacking cutlets and hold them on a warm rack if you must delay service for a short time.
- Fresh panko: Use fresh, dry panko for maximum crunch; stale crumbs collapse and absorb oil.
- Oven hold: Keep cooked cutlets on a rack in a 200°F (90°C) oven to stay warm without trapping moisture.
- Reheat smart: Use an air fryer or convection oven to revive crispiness instead of a microwave.
- Spray oil: Lightly mist the breaded surface with neutral oil before frying or baking to promote even browning.
Chef’s Notes & Variations
Adjust textures and flavors by swapping proteins or folding spices into flour. Pork tonkatsu is traditional, but chicken offers a lighter profile and faster cook time.
Experiment with coatings and aromatics while preserving the basic dredge-egg-panko sequence that defines Chicken Katsu.
- Protein swaps: Pork loin or pork tenderloin produce classic tonkatsu textures. Chicken thighs yield juicier results but require slightly longer cooking.
- Flavor boosts: Add smoked paprika or a pinch of shichimi togarashi to the flour for a flavor lift without changing technique.
- Nuts & seeds: Mix panko with crushed toasted sesame or almonds for a nutty crunch.
- Oil choice: Use neutral, high smoke-point oils. See more about cooking oils on cooking oil.
Serving Suggestions
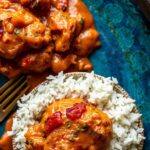
Slice cooked Chicken Katsu into even strips to display the cross-section: crisp crust over moist interior. Plate over steamed rice and shredded cabbage for balance.
Top with katsu sauce, lemon wedges, or a fried egg for a katsu-don style bowl. Pair with miso soup or pickled vegetables to round the meal.
For context on how this dish fits into broader cuisine, consult the Japanese cuisine page for traditional accompaniments.
Nutritional Data (Per Serving)
Estimated values assume frying in vegetable oil and using standard panko. Values vary with oil absorption and portion size.
Use a kitchen scale and nutrition tool to calculate for your specific ingredients if you require precise macronutrient tracking.
| Nutrient | Amount |
|---|---|
| Calories | 430 kcal |
| Protein | 38 g |
| Total Carbohydrates | 25 g |
| Total Fat | 18 g |
Technique Deepening: Why Panko and Temperature Matter
Panko’s larger, flakier particles create pockets of air that crisp quickly and resist oil saturation. That structural difference gives Chicken Katsu its signature crackle.
Controlled frying temperature drives moisture out of the coating quickly while cooking the meat through. For an overview of frying science, see deep frying.
FAQ
What is Chicken Katsu and how does it differ from tonkatsu?
Chicken Katsu is a breaded, fried chicken cutlet using the same method as tonkatsu, which uses pork. Both share the dredge-egg-panko sequence and a crunchy profile. Tonkatsu often pairs with shredded cabbage and a thick, sweet-savory sauce.
Can I use regular breadcrumbs instead of panko?
Regular breadcrumbs work but they compact and produce a denser crust. Panko yields a lighter, flakier crust that stays crispy longer, which is why it’s the preferred choice for Chicken Katsu.
How do I prevent the coating from falling off while frying?
Ensure you pat the chicken dry, shake off excess flour before egg, press panko firmly, and chill on a rack before frying. These steps set the coating and reduce crumb loss during the cook.
What oil temperature should I aim for?
Maintain 340–350°F (170–175°C) for even browning and minimal oil absorption. Use a probe thermometer or a reliable fryer with temperature control to keep heat steady.
How can I keep Chicken Katsu crunchy if I need to hold it before serving?
Place cooked cutlets on a wire rack in a 200°F (90°C) oven. Avoid wrapping or covering, and do not rest them on paper towels because trapped steam softens the crust.
For background on similar dishes and variations, reference tonkatsu and breadcrumbs pages for ingredient histories and regional uses.
Apply these proven methods—precise frying temperature, fresh panko, and correct resting technique—and you will consistently produce crunchy, delicious Chicken Katsu that holds up through plating and serving.
See also: Chicken Katsu