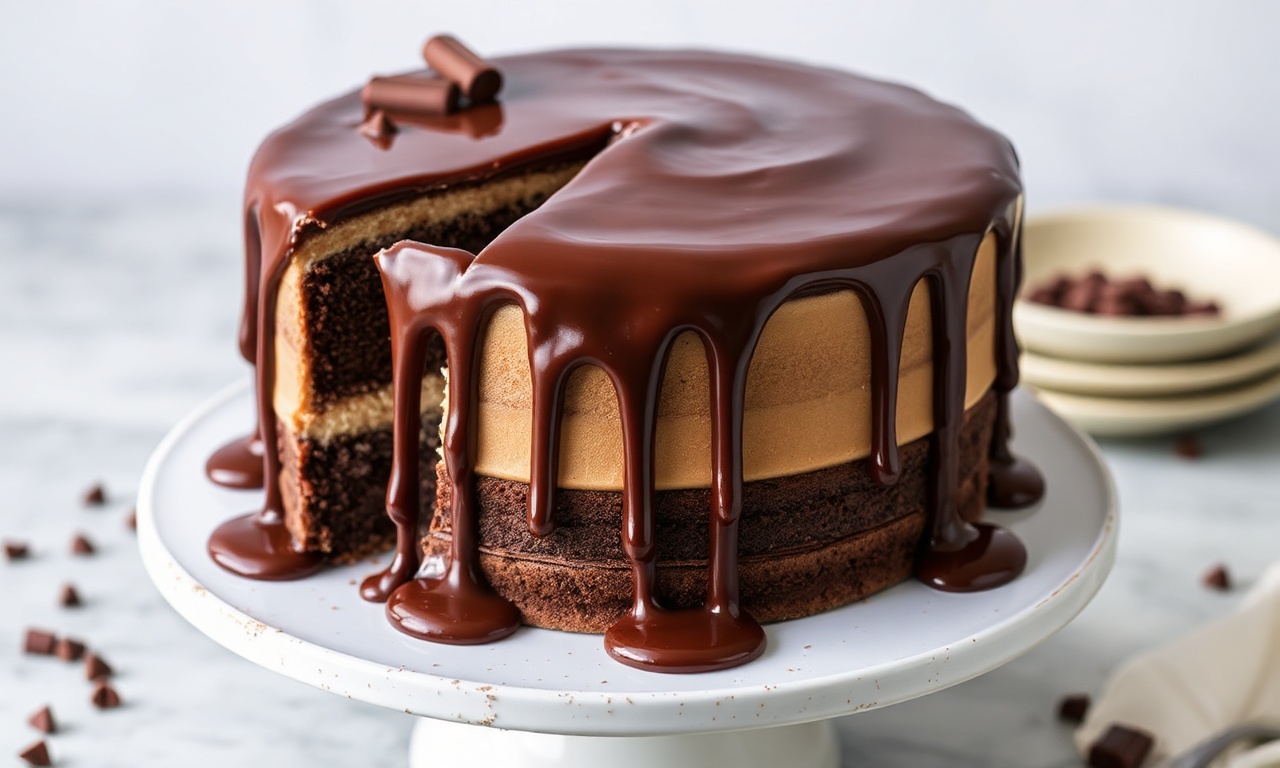
There’s something irresistibly enchanting about a cake that oozes luscious, glossy chocolate and cascades down the sides like liquid velvet. This Decadent Drip Cake Delight pairs a sturdy cake base with a silky chocolate ganache that sets into a smooth drip.
- Why a Decadent Drip Cake Delight Works
- The Art of Crafting the Perfect Drip Cake Base
- Ingredients for Decadent Drip Cake Delight with Silky Chocolate Ganache
- Step-by-Step Instructions for Your Decadent Drip Cake Delight
- 1) Prepare and Bake the Cake Layers
- 2) Cool the Cake Properly
- 3) Make the Silky Chocolate Ganache
- 4) Achieve the Right Drip Consistency
- 5) Build the Drip Cake
- Tips for Success with Silky Chocolate Ganache
- Serving Suggestions for a Decadent Drip Cake Delight
- Nutrition Snapshot
- FAQ
At a Glance
- Ganache texture controls drip speed, thickness, and shine.
- Chilled cake prevents sliding and messy edges.
- Even layers help you pour and spread without collapsing.
- Resting times improve flavor and make cutting cleaner.
Whether you bake for a birthday, a dinner party, or a “treat yourself” moment, this dessert turns ordinary ingredients into a dramatic centerpiece. You’ll follow clear steps for a tender crumb, a glossy ganache finish, and controlled drips that look polished on camera and on the table.
At its core, a drip cake balances two goals: support and flow. The cake base must hold weight, while the ganache must pour smoothly at the right temperature. Once you dial in that balance, the result feels effortless.
Why a Decadent Drip Cake Delight Works
A drip cake goes viral for good reason: it creates a bold visual contrast between the clean cake top and the flowing chocolate sides. The shine matters because it signals correct ganache temperature and fat crystallization, which helps drips set neatly.
Chocolate ganache also brings deep flavor with a simple formula—cream plus chocolate. When you heat cream just to simmer and stir until glossy, you get an emulsion that turns silky as it cools. If you want a foundation that behaves, start with quality chocolate and accurate mixing technique.
For background, ganache relates to the same principles behind emulsions and stable mixtures. See emulsion for the science behind why cream and chocolate blend into a smooth texture instead of separating.
For another key idea—why chocolate sets with shine—review chocolate and how cocoa solids and cocoa butter behave during cooling. This helps you understand why small temperature changes affect drips.
The Art of Crafting the Perfect Drip Cake Base
Your base must stay moist but firm enough to support ganache. A too-soft cake absorbs ganache and can slump, while a too-dry cake cracks and looks rough under glossy chocolate.
Choose a cake style that traps moisture and bakes evenly. Vanilla sponge, chocolate sponge, or butter-based layers work well because they hold shape after chilling. Then you level and assemble with intention so the ganache pours across a flat, stable surface.
What the Cake Base Must Do
First, it must provide structure so the drip stays on the sides instead of sinking into the crumb. Second, it needs a clean top plane so your center pour spreads evenly without creating high spots.
Third, chilling helps you control placement. When the cake feels firm to the touch, the ganache sets faster on contact and drips remain neat rather than sliding.
Prep and Cook Time
Prep Time: 40 minutes. Cook Time: 35 minutes.
Ganache Planning: 15 minutes plus chilling. Total Time: about 1.5 to 2 hours, including decorating and set time.
Yield and Difficulty
This recipe yields 12–16 generous slices. The method suits home bakers who want a confident upgrade in cake decorating.
Difficulty Level: Medium. You’ll do standard mixing and baking, then focus on temperature and consistency for the signature drip effect.
Ingredients for Decadent Drip Cake Delight with Silky Chocolate Ganache
Gather ingredients before you start. This keeps your workflow smooth and reduces the risk of overmixing or uneven cooling.
For best results, measure accurately and use room-temperature dairy products. Consistency makes ganache and cake batter easier to control, which directly improves the final drip look.
For the Cake Base
- All-purpose flour, sifted: 2 ½ cups
- Baking powder: 2 ½ tsp
- Salt: ½ tsp
- Unsalted butter, softened: 1 cup
- Granulated sugar: 1 ¾ cups
- Eggs, room temperature: 4 large
- Vanilla extract: 1 tbsp
- Whole milk, warmed: 1 cup
For the Silky Chocolate Ganache
- Dark chocolate (60–70%): 10 oz, finely chopped
- Heavy cream: 1 cup, warmed
- Unsalted butter (optional but recommended): 2 tbsp, room temperature
- Vanilla extract (optional): 1 tsp
Dark chocolate provides structure for ganache drips because cocoa solids help the mixture set with a stable mouthfeel. If you want to learn how cocoa content changes flavor and behavior, read cocoa.
For chocolate types and melting behavior, refer to couverture chocolate. Even if you don’t use couverture, this background helps you understand why higher-quality chocolate tastes smoother.
Step-by-Step Instructions for Your Decadent Drip Cake Delight
Follow each step in order. Timing matters because ganache thickens as it cools, and cake layers must cool before you add any glossy topping.
Work cleanly: wipe drips on the board quickly, and chill between steps when needed. You’ll get a tidy result faster when you build in rest time.
1) Prepare and Bake the Cake Layers
Preheat: 350°F (175°C). Grease and line two 8-inch cake pans with parchment paper.
Mix dry: whisk flour, baking powder, and salt in a bowl.
Cream butter and sugar: beat softened butter and sugar until light and fluffy, about 3–4 minutes.
Add eggs and vanilla: add eggs one at a time, then mix in vanilla. This step improves air in the batter for a tender crumb.
Alternate dry and wet: mix in flour and warm milk in parts, beginning and ending with flour. Stop mixing as soon as the batter looks smooth.
Bake: divide batter evenly. Bake 30–35 minutes until a toothpick comes out clean. Overbaking dries the crumb and hurts drip aesthetics.
2) Cool the Cake Properly
Let cakes cool in pans for 10 minutes, then move them to wire racks. Cool fully before you assemble and frost.
When the cake stays warm, ganache may soften and slide. Cooling protects both structure and final drip control.
3) Make the Silky Chocolate Ganache
Chop dark chocolate finely and place it in a heatproof bowl. Pour warm cream over the chocolate and wait 2 minutes so the chocolate can melt.
Stir gently until glossy. Add butter for extra silkiness and mix again. For a brief science refresher, see ganache.
4) Achieve the Right Drip Consistency
Let ganache cool to room temperature, or chill briefly until it thickens to a pourable state. The ideal texture flows slowly off a spoon and still holds drips as it sets.
5) Build the Drip Cake
Set the fully cooled cake on a chilled turntable or sturdy cake board. If you have crumb coat frosting, chill it first for cleaner edges.
Using a spoon or piping squeeze bottle, apply ganache along the edges. Work slowly so drips fall naturally rather than pooling.
Pour ganache over the center next. Spread gently with an offset spatula so the top becomes smooth and level.
Chill the cake briefly until the ganache sets. Then decorate while drips stay crisp.
Tips for Success with Silky Chocolate Ganache
Consistency gives you repeatable results, especially with drip cakes. Small changes in ingredient temperature can shift how fast ganache flows.
Use the tips below to fix common issues before they happen. This keeps your final look elegant and your slices more stable.
- Room temperature ingredients: smooth batter mixes faster and bakes evenly.
- Chocolate quality matters: choose 60–70% cocoa for depth and shine.
- Control the ganache viscosity: chill if too thin; stir and warm slightly if too thick.
- Chilling helps: it sets drips and supports decorations.
- Make-ahead: bake layers and make ganache a day early for easier assembly.
If you want to understand how fats and solids behave in chocolate, review cocoa butter. That knowledge helps explain why shine and texture can change when temperatures swing.
For another relevant concept—why emulsions stabilize—read surfactant. While ganache isn’t built the same way as detergents, the underlying idea of stabilizing mixtures helps you trust the mixing logic.
Serving Suggestions for a Decadent Drip Cake Delight
Serve this cake with simple, high-contrast garnishes. Fresh berries add acidity and color that balance rich chocolate.
For an elegant finish, use cocoa dusting, toasted nuts, or thin chocolate curls. Each adds texture without overpowering the silky ganache.
If you like golden accents, edible gold leaf works well on dark chocolate because it creates a high-end shine. Keep portioning light so it doesn’t feel heavy.
Pair the cake with coffee or a dark tea. The bitterness makes the chocolate taste richer instead of sweeter, which improves overall balance on the palate.
Nutrition Snapshot
Nutrition varies by slice size and ingredient brands, so use this table as an estimate. This helps you plan for gatherings where people track calories or macro balance.
For more precise numbers, calculate using your exact chocolate and cream amounts. That gives the most accurate reading per serving.
| Nutritional Info (per slice) | Amount |
|---|---|
| Calories | 420 kcal |
| Protein | 5 g |
| Carbohydrates | 45 g |
| Fat | 23 g |
FAQ
Quick answers help you troubleshoot fast and bake with confidence. Use these responses the next time your ganache looks too thick, too thin, or uneven.
If you follow the temperature and chilling logic, your drip cake should stay stable and glossy with minimal fuss.
What makes a drip cake so visually appealing?
A drip cake stands out because ganache flows over the edges and then sets into neat streaks. The contrast between a smooth top and glossy side drips creates instant “wow” on any display table.
How do I get the perfect consistency for silky chocolate ganache?
Heat cream until it simmers gently, then pour over chopped chocolate and rest briefly. Stir until glossy, then cool until it drips slowly from a spoon.
What chocolate works best for ganache?
Use high-quality dark chocolate with about 60–70% cocoa for a balanced sweetness and strong texture. Lower cocoa blends often taste softer and can produce a less stable drip.
Which cake base is best for holding ganache drips?
Moist, sturdy cakes like chocolate sponge or a vanilla butter cake work best. They hold weight and slice cleanly after chilling.
Can I make this cake ahead of time?
Yes. Bake layers and make ganache in advance, then assemble and create the drip on serving day for the freshest shine. Chill between steps to keep drips controlled.
See also: Decadent drip